Leftover Makeover for Refried Beans: Huevos Rancheros
I adore huevos rancheros.
And until breakfast yesterday, I’d never bothered to make them at home.
I’m not sure why except for whatever reason I never had leftover refried beans in the refrigerator at the same time as eggs and freshly made salsa at a time that coincided with a desire to eat huevos rancheros.
Or, perhaps, until yesterday, I had simply been too lazy to bother making them myself since I can go downtown and get a really nice version of the dish made for me at the cosy little locavore haven, Casa Nueva.
I’ll cop to being lazy, so maybe that should just be the answer.
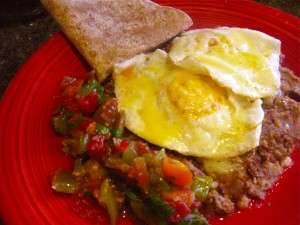
But yesterday, I wanted huevos and couldn’t just haul off and wander downtown because I was waiting for the dishwasher repair guy, so I looked in the fridge and lo and behold! There were refrieds, made the night before from Rancho Gordo’s Eye of the Goat beans, there was Calico Salsa made freshly the night before from heirloom tomatoes we grew in our very own garden, there were fresh local eggs, there was smoked goat cheddar from Integration Acres, and some whole wheat tortillas left over from burritos from the week before.
So, it only made sense to get in front of the stove and make myself a plate of huevos.
For the initiated, huevos rancheros is a dish from the cowboy days, born along the border of Mexico and the American Southwest, and today you can find it in restaurants, truck stops, diners and dives all through that area, all with slight regional variations, especially when it comes to what kind of salsa is featured with the dish. But the basic idea for “eggs, ranch-style” is always the same–one or two corn tortillas are layered with some warm refried beans and cheese, then the plate is put under the broiler to heat it all up nicely and melt the cheese. Two over-easy fried eggs are laid gently atop this bed of leguminous love, a bit of salsa is poured over, cheese is sprinkled again and then under the broiler the plate is put to melt the cheese and warm the salsa.
Then, out it comes to the diner who presumably tucks in gleefully, drinking copious amounts of black coffee which tastes mighty fine alongside the plate of eggs, beans and salsa.
Turns out, if you have the ingredients already prepped up and on hand, making huevos rancheros is a simple matter of warming some stuff up, frying a couple of eggs and melting some cheese, which really, truly, anyone can do in the morning, even if one hasn’t had coffee.
I’d say the trickiest part is frying the eggs. I’m not sure I can really teach someone how to cook over-easy fried eggs online, but I can at least describe the process. But, truly, it just takes practice to get the hang of it. I got good at it working breakfast shift when I was in culinary school. Breakfast shift in a diner or another quick-serve establishment will really teach a person how to cook eggs.
But here’s basically how to go about frying some over-easy eggs–which would be eggs that are fried until the bottom of the egg white is set, then are gently flipped over to set the white on the top. The yolk is only partially set–it is mostly just thickened slightly to a rich, smooth golden liquid. (Over hard eggs are cooked until the yolks are completely set and firm, but not rubbery.)
First, pick a good pan. I use a non-stick pan, but a good, well-seasoned cast iron pan is just as good, if not better. Heat it over medium heat and put a little bit of whatever fat you want to use in it: olive oil is good, butter is better and bacon drippings are the best. THE best. But, if you are watching your weight or are a vegetarian, by all means, use either olive oil or butter. When the oil is dripping, crack your eggs carefully by opening the shell less than an inch from the pan. (Using the freshest eggs possible will not only result in the tastiest eggs but also the most compact egg whites–older egg whites run a lot and spread out over the pan more. Fresher eggs are less likely to result in broken yolks as well.)
Cook the eggs until the whites are set–opaque white–with maybe a little bit of browning on the edges, and just a clear sheen of uncooked white on top. Then, using a thin but sturdy spatula, slide it under an egg, and without lifting the egg clear out of the pan, just gently roll the egg over so that the yolk goes down on the hot surface of the pan, hopefully without breaking the yolk. (The first few times you do this, you’re likely to break the yolk. The egg will still taste good though, so don’t despair and just keep cooking eggs until you get them right.) The closer to the pan you keep the spatula and the egg, the less likely you are to actually break the yolk, and the more gently you roll the egg, the better.
If you are cooking one egg at a time and you have a quick wrist and a strong intestinal fortitude, not to mention the courage of your convictions, you can flip the egg in the air. BUT, from personal experience, I can tell you that it takes about a dozen and a half eggs destroyed to get this advanced technique right and it never works if you’re cooking two eggs or more in the same pan.
Anyway, once you turn the egg over, let it cook for about thirty seconds or so more, just until the white on the bottom is set, and voila! It’s done!
So, that’s how you fry over easy eggs.
The recipe below will teach you what to do with them once you have them. Give making huevos rancheros a try–your taste buds will thank you.
Huevos Rancheros
Ingredients:
(For one serving)
2 fresh corn tortillas
1 cup refried beans
2 tablespoons shredded extra sharp cheddar cheese
1 tablespoon Chile Colorado Sauce or salsa (optional)
2 cooked over easy eggs, fresh from the pan
2 more tablespoons shredded extra sharp cheddar cheese
Fresh salsa to taste
cilantro for garnish (optional)
Method:
Put your two corn tortillas on a serving plate. Spread the beans evenly over them and sprinkle with the cheese. Run under a broiler or microwave until heated through and the cheese is melted. Spread the Chile Colorado or salsa over the beans, then put the eggs on top of that, and sprinkle with the second bit of cheese.
Run under the broiler or microwave for a few seconds, just until the cheese melts and everything is bubbly and nice.
Serve with fresh salsa on the side and sprinkle with minced cilantro. (If you had no fresh corn tortillas, then skip them and spread the beans right on the plate, then serve with a nice freshly steamed whole wheat tortilla for scooping up cheesy-eggy-beany goodness.)
From Garden to Table: Vietnamese Style Grilled Beef and Pork in a Bowl
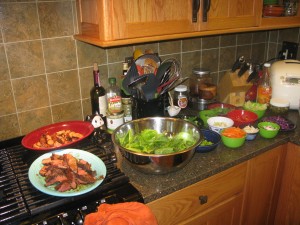
Yeah, I know that the title of the recipe involves beef and pork, but really those aren’t the stars of the show. The stars of the show are all of the local vegetables and herbs that go into the bowl on top of the steamed broken rice, long before the grilled beef and pork even come into the picture.
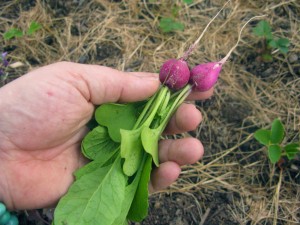
What vegetables, you ask? Well, some of our very own radishes, for one thing. Aren’t they the prettiest things? All shades of pink, rose, purple and carmine with icy white. Kat got to pull some of them her very own self–her favorites so far are the long narrow fuchsia and white ones called, “French Breakfast.” Mine are the large round violet ones: “Plum Purple.”
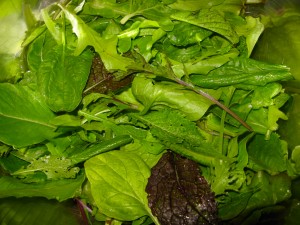
But those radishes only tell part of the story. Please note the plethora of mixed baby greens we sheared carefully from our salad bed in our community garden plot.
Purple mizuna, various baby lettuces and burgundy colored tatsoi are included in the big pile of salad greens Kat and I cut for dinner. Two days later, you could barely see where we had harvested–the plants grew that fast.
We also picked a great many herbs from the bed dedicated to them in the garden: spearmint, cilantro, basil, lemon basil and lovage.
And then, in addition to our own herbs and vegetables, we had fresh local tomatoes, (From Star at Shade River Farm–she starts them in the middle of winter in her solar greenhouse) cucumbers, turnips, red cabbage, carrots and scallions from the farmer’s market. Counting all of that and the steamed broken jasmine rice, this dish is way more vegetative than its name would imply.
But, it is based on the classic Vietnamese dish, Lemongrass Beef. Which, again, is a name that is somewhat misleading because the name doesn’t really tell you what all is going to be happening in your bowl, so maybe it’s traditional or something to just not talk about the rice, vegetables and herbs that outweigh the meat in the dish by many ounces.
When I say based on, I should clarify–it’s loosely based on Lemongrass Beef. The meat is grilled instead of stir-fried, and while the rub contains lemongrass, there is a finishing sauce I made to use while the meat is sizzling on the fire that contains very little that resembles the original recipe.
The sauce is made of a combination of fish sauce, soy sauce, lemon juice, honey, whiskey, vegetarian (or if you aren’t allergic to seafood like I am, regular) oyster sauce, and Thai sweet chili sauce.
A word about that last ingredient–it’s meant to go on grilled chicken and it’s lovely that way. But, I like it even better with pork, and it’s really good on top of a bowl of Lemongrass Beef. The sticky-sweet, lightly tangy and fiery scarlet sauce is so good that it is addictive–which is why we gave it the nickname, “Cracky-Crack Sauce” at our house.
The marinade/barbeque sauce really made the grilled meats taste fantastic. Don’t get me wrong–the rub I put on the beef and pork made them tender and taste fantastic–I mean, it’s fresh lemongrass, lemon juice, garlic, ginger and scallions–how can it make anything bad? But the sauce when added at the end, really gives it the extra added oomph that tips the meat over the top.
Finally, you need to make nuac cham–a spicy, fragrant Vietnamese sauce that is like one of the best salad dressings in the world. As the final touch, it enhances not just the grilled meats, but the rice, the vegetables and the herbs. It’s great stuff. AND, it’s easy to make and keeps nicely in the fridge for about a week, though I like it best the day it’s made or the day after. Also, before serving, I like to bring it to room temperature so that the fullness of flavor is expressed.
It sounds like lots of work–making two sauces, a marinade/rub, grilling meats, making broken rice or plain jasmine rice, and prepping the vegetables and herbs. But, really, the vegetables and herbs can be cleaned and cut a day before, the nuac cham can be made a day before, and the marinade and finishing sauce can all be made up to two days before. That leaves just the grilling, rice cooking and assembly for the day you serve the meal. That isn’t so bad, and the payoff is you get lots of fresh local vegetables and herbs, some rice and really tasty grilled meat in amounts that feed a whole crowd of your friends and family. The finished dish looks impressive and theirs something to please everyone.
Vietnamese Style Grilled Beef and Pork
Ingredients for the Marinade/Rub and Meat:
4 stalks of lemongrass, bottom third only, tough outer leaves removed and sliced thinly
3 cloves fresh garlic, peeled
1″ piece fresh ginger, peeled
1 fresh Thai chili
2 scallions, white and light green parts, sliced
juice of 1 lemon
1 teaspoon fish sauce
pork tenderloin, trimmed and cleaned of excess fat and silverskin
1 1/2 thick piece of top sirloin/ London Broil
Methods:
Grind all solid ingredients into a paste, then mix with lemon juice and fish sauce.
Rub onto meats, then lay the meats into a shallow pan and seal with plastic wrap. Allow to marinate for at least three hours, preferably more, up to overnight.
Ingredients for Grilling Sauce:
1 tablespoon high quality fish sauce
1 tablespoon dark soy sauce
1/2 tablespoon lemon juice
1 tablespoon honey
1/2 tablespoon bourbon or whiskey
1 tablespoon vegetarian or real oyster sauce
2 tablespoons Mae Ploy sweet chili sauce
Method:
Whisk together and allow to sit at room temperature for at least an hour before use–if you make it a day or so ahead, warm up to room temperature before using it.
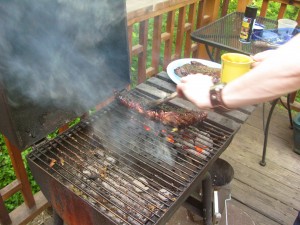
To grill the meats–prepare a charcoal grill for very hot indirect grilling, and cook the meats in the section not directly over the flame, turning at least twice until they are nearly done. At that time, move them closer to the actually burning coals, and brush several times on both sides with the sauce, allowing the outside of the meat char and crisp up a bit.
Ingredients for the Vegetables, Herbs and Rice:
3 cups broken jasmine rice
a big pile of mixed lettuces and other salad greens–at least 8 ounces, cleaned, dried and chilled
whatever fresh vegetables you want to use such as carrots, radishes, baby turnips, snow peas, cucumbers, and tomatoes, all cleaned, dried and chilled.
1 cup of cilantro leaves
1/2 cup of mint leaves
1 cup Thai basil leaves
1/4 cup lovage leaves
1 recipe nuac cham
sweet chili sauce
Method:
Cook the broken rice: In the rice cooker, put 3 cups of rice and water. (Always use equal parts rice and water for broken rice.) That is that. You put it in the rice cooker, shut the lid down on it, push the button and walk away.
If you are cooking on the stove top, the proportion of broken rice to water is exactly the same. Put the rinsed rice into a pot with three cups of water. Bring to a boil, give it a nice stir, clap a tight lid down on it, turn the heat down to the lowest setting possible setting and cook for twenty minutes. Let it sit for five minutes off heat, then fluff with a fork.
The lettuces and greens should be torn into bite sized pieces. Choose greens that are a good balance of color, texture and flavor. I like to add some baby bok choy or tatsoi and mizuna to the greens because they are very flavorful and have great textures.
The root vegetables should be peeled if needed, if not, they should be well scrubbed, and then cut into a thin julienne. Snow peas should be stringed and then cut into julienne to match the root vegetables. I like to peel the cucumbers and seed them, then cut into julienne. Tomatoes, if they are full sized, I just cut into thin wedges, while cherry tomatoes get simply sliced in half.
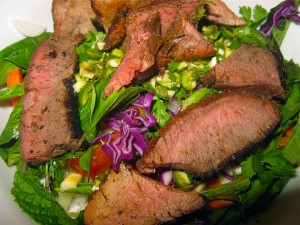
To serve, I slice the meats thinly on the diagonal and set them on platters on one end of the serving surface. I leave the rice in the rice cooker, with the lettuces in a large bowl near it on the other end. Then, the vegetables and herbs are in separate bowls arrayed in between the two ends, with the nuac cham and chili sauce after the meat.
Pass out bowls and let your guests fill them as they see fit. I find it’s tastiest to put the greens in first, then the steamy rice, then the vegetables and herbs covering the rice, with the meat on top, and the sauces drizzled joyfully over the top.
If you have leftovers, and that’s a big if, you can make a cold salad out of everything with a big dose of cold nuac cham as a dressing the next day. I ate it for breakfast and it was a delightful eye opener.
The First Harvest
It’s true. I should probably have let these little “Plum Purple” radishes grow a bit bigger before pulling them, but these marble-sized babies were so cute, I just had to bring them home from the garden plot.
Kat ate one of them last night at dinner–it was her first radish. She watned to try it because not only had she helped grow it, but it was purple. Purple vegetables are superior, of course.
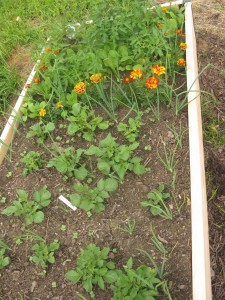
Speaking of purple vegetables, our “All Blue” potato plants are growing quickly–so quickly in fact that we’ll need to hill them up next week. You can see them in the foreground here, surrounded with baby red, yellow and white onions. In the background are our “Cherokee Purple,” “Green Zebra” and “Black from Tula” heirloom tomatoes, some of which have already started to blossom! The purple radishes are interplanted among the tomato plants and will be really ready to harvest in a week, maybe less. Interplanted among the potatoes are “French Breakfast” radishes.
I always plant fast-growing crops like radishes or lettuces among slower growing crops like tomatoes–they take up the space until the bigger crops take off and need the room. By then, the radishes are ready to harvest, and from the same bit of soil, two crops are grown at the same time.
I do the same thing with onions, though they aren’t fast growing. They actually grow quite slowly, but they are small and are easy to tuck in here and there among other crops. They also can repel various pests with their aromatic natures, much the way that the smell of marigolds repel some bugs above ground while the chemicals exuded from their roots repel nematodes.
Companion planting and intercropping are just two ways to maximize space and use the natural defense mechanisms that plants posses to protect themselves to also protect other plants.
As more vegetables and fruits ripen and are ready to harvest, I’ll write about them and keep everyone up to date.
Meatless Monday: Channa Bhatura
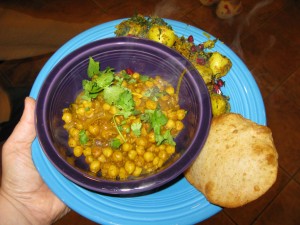
I know that I’ve already posted one recipe for bhatura, and a recipe for channa masala, but these are completely different versions which everyone in the family has decided we prefer.
The bhatura recipe is more authentic than the one I wrote about before–there is no yeast in it at all; instead it is leavened with a starter made from equal parts all purpose flour and yogurt. It is based on Yamuna Devi’s recipe from Lord Krishna’s Cuisine with the exception that I used Greek yogurt in the starter and substituted whole meal spelt flour for some of the all-purpose flour.
This version of bhatura is thinner-walled and flakier–more delicate than the yeast-raised version I posted previously. But the dough is no harder to work with, roll out or fry, so there is no reason not to try making it.
As for the channa–I think that there are about a thousand different ways to make channa masala. Probably more than a thousand–for every household or restaurant where it is eaten, it is cooked slightly differently. I based this version on the one they serve at Udipi Cafe in Columbus, Ohio, which is my favorite vegetarian restaurant ever, hands down.
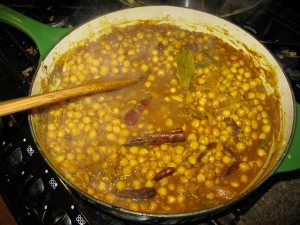
Their version has no tomatoes in it, or very few, and is yellow with turmeric instead of red with tomatoes and paprika. It is redolent of cinnamon and fenugreek, and liberally flavored with toasted whole cumin seeds and black mustard seeds. Oh, and it is fiery with chilies both dried and fresh–I should have mentioned that. Mmm… chilies.
You will also note that I served a dry version of aloo methi with this meal. Some of the versions of aloo methi are damper than others–aloo methi tamatar is by its nature wetter, being that one of the main ingredients is tomatoes. I sometimes add yogurt and spinach to it, which makes it saucier. But I have found that the textural differences between a dry curry and a wet one, served with bread and yogurt is most pleasing.
Every piece of bread was eaten–and most of the channa and aloo as well. I have enough of them for a light lunch left over, but nothing else. That’s how I know that dinner was appreciated highly–very little of it was left. I suggest doubling the channa and the bhatura recipes if you have more than five or six people eating, especially if you want anything left to munch on for lunch.
Flaky Bhatura
Ingredients:
1/2 cup whole milk or 2% Greek yogurt
1/2 cup unbleached all purpose flour
1 cup unbleached all purpose flour
3/4 cup whole meal spelt flour (or chapati flour or whole wheat flour or white whole wheat flour or kamut, take your pick)
1/2 teaspoon salt
1 teaspoon raw sugar or honey
1/2 teaspoon baking powder
3 tablespoons melted ghee or butter
about 1/4 cup warm water–use more or less as needed
canola or other vegetable oil for deep frying
Method:
First, the night before you want bhatura, make the starter–take your yogurt out of the refrigerator and let it come to room temperature. Then, preheat your oven to about 100 degrees F. by putting it on the lowest heat setting and turning it off just as it reaches that setting. Open the oven door, and place an oven thermometer on the rack, and when the temperature dips to 100 degrees F, close the door and keep it closed.
Stir the 1/2 cup of all purpose flour into the warmed yogurt, until a smooth paste is formed. Cover lightly with a warm, damp towel or plastic wrap and set inside the prepared oven. Leave the starter undisturbed for eight or ten hours or so.
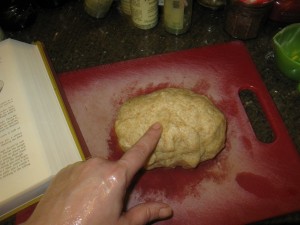
Make the dough–put all the dry ingredients into a large bowl and stir to mix it well. Add the starter and the melted ghee, and the honey if you used it instead of raw sugar. Rub your hands with oil or ghee (ghee is really good for your skin, btw–I used ghee when making the bread yesterday to oil my hands and today they are amazingly soft and silky. On the other hand, it is pretty expensive as hand cream……) and start mixing the dough with your hands. Add as much water as is needed to make a smooth, reasonably stiff, pliable dough.
Knead it for eight to ten minutes or until the dough is springy–a fingerprint pushed into it will start springing back almost immediately when you have kneaded it enough.
Gather dough into a ball, rub the outside with ghee or oil, and put into a small bowl, cover with plastic wrap and let it rest for at least 1/2 hour, or as long as 3 hours.
When you are ready to roll out the dough, cut the ball into two equal pieces and roll one into a thick log about 1 1/2 inches in diameter.
Cut this log into seven equal pieces, and roll each of those into smooth balls. Flatten each one with your hand into a disk about 2 inches in diameter.
Dust your surface very lightly with flour, place a disk into the flour, turn over and shake off the excess. Using a rolling pin, roll evenly into a thin 4 inch diameter circle, and set aside until all the other disks are rolled. Do the same with the other half of the dough–roll into a log, cut it into seven equal pieces, roll each into a smooth ball, flatten into disks and then roll out into 4 inch diameter circles. Lay them on a plate and cover with a very lightly dampened towel.
Heat your cooking oil in a wok, karahi or deep saucepan over medium high heat. Test the oil with a dry bamboo chopstick by simply placing it into the oil. If tiny bubbles immediately start traveling up the chopstick tip, the oil is ready.
When the oil is ready, carefully slip a single dough disk into the oil so that it goes in flat, not folded. It will sink to the bottom, and immediately the oil will bubble and foam. After a few seconds, the dough will start to rise at the top. Using a slotted spoon or a mesh skimmer, gently hold the dough under the surface of the oil so that it puffs up into a little bready balloon.
As soon as the bhatura puffs up, hook your spoon or skimmer under it and gently flip it over. Let it brown very gently on the other side–not too much–it will only take a few seconds–then take out the bhatura with your spoon/skimmer and let it drain on layers of paper towels.
Serve immediately, before the bhatura cool and deflate.
Now this means that you should have everything ready–channa, potatoes and garnishes–and -THEN- start frying the bhatura. You can either serve each bhatura as it comes out of the oil to each diner, or you can fry half of the dough–seven portions–serve that, and turn the heat off on your oil. Sit down and eat that, and then, when (note I do not say, “if,” but “when”) your family wants seconds, go back, turn the heat back on under the oil, test with a chopstick and then start cooking the second batch.
These breads cook very quickly–in a matter of seconds, really. I haven’t timed them, but I suspect that they each cook in under a minute. That is indeed, how fast they go.
They get eaten nearly as quickly.
Channa Masala II
Ingredients:
1 pound dried chickpeas
1 teaspoon ground turmeric
1 teaspoon smoked paprika
1/4 teaspoon ground cinnamon
2 bay leaves
2-3 tablespoons ghee
1 large onion, thinly sliced
1 teaspoon salt
5-6 dried thin hot chilies
1 large cinnamon stick
5 whole cloves
8 whole green cardamom pods
1 teaspoon black mustard seeds
2 fresh long, thin green chilies, thinly sliced on the diagonal
4 cloves garlic, peeled and minced very finely
1″ cube fresh ginger, peeled and minced very finely
1 1/2 teaspoons cumin seeds
1/4 teaspoon black peppercorns
1 teaspoon fenugreek seeds
2 cloves
1/2 teaspoon coriander seeds
1 teaspoon ground turmeric
1/2 teaspoon smoked paprika
water as needed
2 tablespoons pappulu podi
1 1/2 teaspoons tamarind concentrate
salt to taste
roughly chopped cilantro leaves for garnish
Method:
Sort through the chickpeas and remove any suspicious looking (shriveled, black or moldy) beans and any small stones or dirt clods. Rinse well with cold water, then put into a large bowl. Cover well with warm water–the water should stand about an inch over the top of the beans–and cover the bowl and let stand overnight.
Drain the remaining water from the beans and discard. Put beans into pressure cooker (or regular large pot) and add water to cover by two inches, one of the bay leaves, the teaspoon of turmeric powder and the powdered cinnamon. Bring to a boil, put the lid on, lock it and bring to full pressure. Turn down the heat, cook on full pressure for fifteen minutes. Then, take the cooker off the heat and allow it to depressurize on its own, gradually. Open the cooker and check the texture of the beans–they should be tender and absolutely done with no crunchy bits. If it is not done, bring to a boil, put on the lid, bring up to pressure, lower heat and cook for another five minutes, then remove from heat and allow the pressure to lower naturally off heat and check again–they should be done at this time.
If you do not have a pressure cooker, put the directed ingredients into a regular deep, large pot, and simmer until the beans are done–about an hour.
Drain the beans, reserving about a cup of the liquid.
Melt ghee in a heavy-bottomed deep frying or braising pan. Add onions, sprinkle with salt and the second bay leaf, and cook, stirring, until the onions turn light golden. Add the whole spices and dried chilies save for the mustard seed at this time, and continue cooking and stirring until the onions turn deep golden brown. Add the mustard seed and the fresh chilies, and cook stirring until the mustard seeds pop. Add the garlic and ginger and lower heat, still stirring, though not as constantly.
Grind the remaining whole spices together and add to the pan with the turmeric and the paprika, and cook, stirring until the onions are a deep reddish brown and everything is fragrant. Add the chickpeas and enough of the reserved cooking water to the pan to deglaze the pan. Scrape all the browned bits up from the bottom of the pan and turn the heat down so it can simmer. Allow to simmer uncovered for 1/2 hour to 45 minutes. Add water as needed to keep the curry moist.
Thicken the curry with the pappulu podi and add the tamarind concentrate. Simmer for five more minutes and add salt as needed to taste.
Remove from heat and sprinkle the cilantro over the channa. Serve immediately with bhatura.
Happy Generic Winter Holiday: Cherry Chocolate Chip Cookies
Last week, while I was taking a bath and Kat was assisting by throwing rubber duckies into the tub on top of me, I decided to attempt to distract her by telling her that we were going to start making cookies this week for the holidays.
And she said my favorite word in the English language. (No, not “chocolate.”)
She stopped, poised in mid-throw, ducky hovering over her head like a bloated blue hummingbird and said, “Why?”
I nearly wept with joy. It was the first time she had asked one of us “why?” about anything! And it was about cookies!
I grinned and said, “Well, making cookies is a tradition at Christmastime. I’ve been baking cookies every Christmas for thirty years, and I hope to be doing it for another thirty.”
“But why, Mommy?”
Why, indeed.
I perked right up, and happily watched as the wee blue ducky, long forgotten, was dropped on the bathmat where it would lurk, waiting to trip me up as I got out of the tub. Putting on my best “Mommy has a minor in history voice” I answered, “All over the world, at this time of year, when the nights get longer and longer and longer and darker and darker, people celebrate the return of the light, as the days slowly start to lengthen and the nights become shorter again. All over the world, people have holidays that celebrate the light, and on those holidays we give gifts, we feast and we make sweets like cookies, to rejoice in teh return of the sun, and the light of hope and love in our hearts.”
It sounded good, and Kat nodded sagely.
I finished and she piped up with, “But what do cookies have to do with light?”
Ah, she thought she got me with that one, but no! I had a ready answer, and it is even historically accurate.
“Well,” I said as I started draining the tub, for the ablutions were completed, the last five minutes of them blissfully duck-free, “long ago before there were refrigerators and grocery stores, people had to grow all of their food and store it for the winter. And sometimes, if the winter was really cold, or the harvest had been bad or if the snows lasted longer than usual, people would start running out of food near the end of winter. So, in the beginning of winter, when there was still plenty of food stored up, people would make and eat fattening foods like cookies and roast meats and cheeses so they could fatten themselves up to live through the winter. That way, if they ran short of food, they had a bit of fat on them to keep them strong until springtime. And the feasting just happened to coincide with the return of the sunlight, so the holiday tradition of making cookies was born.”
So there we are. That’s why we make cookies at Christmas.
Now, as to why I make cookies at Christmas, that is another story. I make them every year, because since I was fourteen years old, that was my holiday job. I did the baking. I made bread, cakes and especially cookies. I wasn’t really allowed to cook anything else in my mother’s kitchen, but since she didn’t much care for baking, and I did it so well, she turned the duty over to me, and I just kept on with it, happily becoming along the way somewhat of a cookie expert.
The first recipes I used were the family ones, handed down from great-grandmothers, a couple of them even coming all the way from Germany. And, of course, I used the Toll House Cookie recipe on the back of the pouch of Nestle’s semi-sweet chocolate chips. I insisted on using real butter in all of my baking–my Mom liked to use margarine, but I was having none of that. All of the recipes called for butter, and butter is what I used–who was I to argue with my long-dead great grandmothers? You don’t mess with the ancestors, man–they can come back to haunt you. I also insisted on real chocolate chips, and real vanilla extract too. Mom grumbled, but bought the ingredients I specified, and when she tasted the results, she stopped grumbling.
Over the years, I started experimenting, and worked out new recipes, some of which were based on the old family favorites, like my Aphrodite Cakes, which is based on my great-grandmother’s German sugar cookies. Others were based on ideas I had, like what would a cookie with Sichuan peppercorns in it taste like? Would lavender be good in shortbread? What about chilies in a brownie? Why can’t I put toffee chips and cinnamon bits and espresso powder and just use brown sugar in chocolate chip cookies? If Irish Cream is good with cream cheese in brownies, what happens if you add raspberry preserves and Chambord?
That is the cool thing about cookies. They are easy to play with. You can add ingredients, subtract them, change them, modify them by chilling or melting them, and you can almost always, if you have a bit of knowledge about baking, come up with something that will taste amazing. Cakes–they are much trickier, and I would not play as fast and loose with cake recipes as I do with cookies. Pies–well, I play with fillings all the time, but I stick pretty close to the general ideas when it comes to the crust. I will add ingredients and change proportions a little, but not like I do with cookies. Pie crust is too fragile to mess with very much, and cake–it is just finicky.
But cookies are forgiving. They are easy and they are fast and they are fun. So, I love playing around in the kitchen every year and coming up with new and tasty additions to the holiday sweets repertoire.
This year, I wanted to do something new with a chocolate chip cookie.
But I didn’t want to overload it like I did with the Coyote Chip Cookies. Granted, they are lovely, and I like them a great deal, but Zak is not fond of them, and I wanted to make a chocolate chip cookie that both he and I could enjoy together.
What flavors go with chocolate?
Coffee. Been there, done that.
Nuts? Eh–I have to be careful with that, Zak can be weird about nuts. He likes some of them and not others.
Something was niggling at the back of my brain, trying to get my attention and suddenly, I remembered–Zak had just said the other day at the grocery store when we were buying candy canes that he doesn’t know a thing about those because he doesn’t really like peppermint candy, but chocolate covered cherries–those he used to be able to eat by the box.
And what is his favorite (non-Jeni’s) ice cream? Cherry Garcia.
Ah ha! Cherry chocolate chip cookies!
Why had I not thought of it before? What exactly is wrong with me? Dried sour cherries added to the usual Toll House style cookie, with milk chocolate instead of semi-sweet, since Zak prefers the former, and some almonds to help boost the flavor of the cherries and add a bit of crisp texture to the chewy fruit and cookies–perfect!
Yeah, I was right. The tart cherries are chewy and tangy, and you can taste the cherry flavor very well in the golden cookie, and it pairs beautifully with the rich, sweet milk chocolate. Almonds pair perfectly with both chocolate and cherries, and they added some crunch and the whole thing is just soul-satisfying.
He ate three for breakfast this morning. Brittney, who came to take care of Kat while we were in Columbus for my therapy appointment and for Generic Winter Holiday shopping, had one and declared it “Amazing.”
There are a few caveats: one, use Mariani brand dried cherries if you can find them. They are plump, chewy and delightfully tart. You don’t want to use sweet cherries in this–you want to use sour red cherries. Mariani are the best I have come across for baking–they do not dry out and do not require plumping before baking. So, seek them out. Two–toast your almonds before you put them in the cookie dough–it brings out the flavor in them. And three–you can use half semi-sweet chocolate chips and half milk, but I think milk chocolate is better, because it is a better foil for the tart sour cherries than the lightly bitter semi-sweet would be.
It is my new favorite, and here it is–one of my gifts to you this holiday season. Go bake a batch and celebrate the return of the light with a little bit of dietary fat and sugar!
Cherry Chocolate Chip Cookies
Ingredients:
2 1/4 cups all purpose flour (or 1 1/4 cups all purpose flour and 1 cup white whole wheat flour)
1 teaspoon salt
1 teaspoon baking soda
1 cup cold butter
3/4 cup sugar
3/4 cup light brown sugar, packed
1 1/2 teaspoons vanilla extract
1/2 teaspoon almond extract (optional)
2 large eggs
12 ounce package milk chocolate chips
6 ounce packaged Mariani dried sour cherries
1 cup sliced almonds, toasted
Method:
Preheat oven to 375 degrees F.
Stir flour, salt and baking soda together in a bowl and set aside.
With a mixure, cream together the cold butter and sugars, until well blended and fluffy. add the extracts and eggs, and beat well until mixture is smooth. Add flour mixture in thirds, and mix until well blended. add chocolate chips, cherries and almonds, and stir until combined.
Drop by rounded tablespoonsful onto not greased baking sheets (I line mine with silicone liners) and bake for 9-11 minutes, or until golden brown, but still seeming to be lightly underdone in the center. Remove from oven and allow to cool two minutes on the baking sheet, then transfer to a rack. Allow to cool until the cookie is still warm to the touch, but is firm and not hot. Place into a container with a tight-fitting lid and seal them up and allow them to cool the rest of the way. (This guarantees a chewy texture to the cookie.)
Makes about three and a half dozen cookies.
Powered by WordPress. Graphics by Zak Kramer.
Design update by Daniel Trout.
Entries and comments feeds.


