Tuesday, August 30, 2005
The Whole Enchilada Part III: The Tortillas
 The soul of the enchiladas isn't the sauce, nor is it the filling.
It is the simple, humble tortilla.
Which is why I don't make enchiladas with store-bought tortillas anymore. To put it bluntly, they suck. They taste like soggy cardboard and have a mealy texture. There is nothing about them that evokes the flavor or aroma of corn.
And corn is the essence of tortillas.
So, I make them fresh. At the moment, I do it with pre-ground masa that can be bought in five pound bags in Latin American markets; I do have some dried corn and slaked lime to use to make them really from scratch, following the directions put forth by Diana Kennedy. (I appreciate her a great deal; she is a woman after my own heart--dedicated to the point of obsessive when it comes to matters culinary.) I am just lacking a corn grinder; my Sumeet -can- grind the corn, but in the amounts needed for masa dough, I suspect it would be tedious to use the Multi-Grind to do the job. So, I am scouting around for a corn grinder of some sort in order to take up full-scale tortilla making. (After the corn grinder, my next step is to find a farmer to grow the proper kind of corn for me, so I can have locally made tortillas. At that point--who knows--maybe I wil start a tortilla factory.)
 The first time I made tortillas from scratch, I was surprised at two things. One, at how simple the process really was, and two, how -good- the tortillas tasted. They smelled like freshly parched corn--if you have ever smelled that--or stoneground cornmeal fresh from the hopper. They were heavenly to eat, too---the corn flavor comes through the highly seasoned sauce, the cheese and meat and really gives a structure not only to the enchiladas themselves, but to the layered flavors.
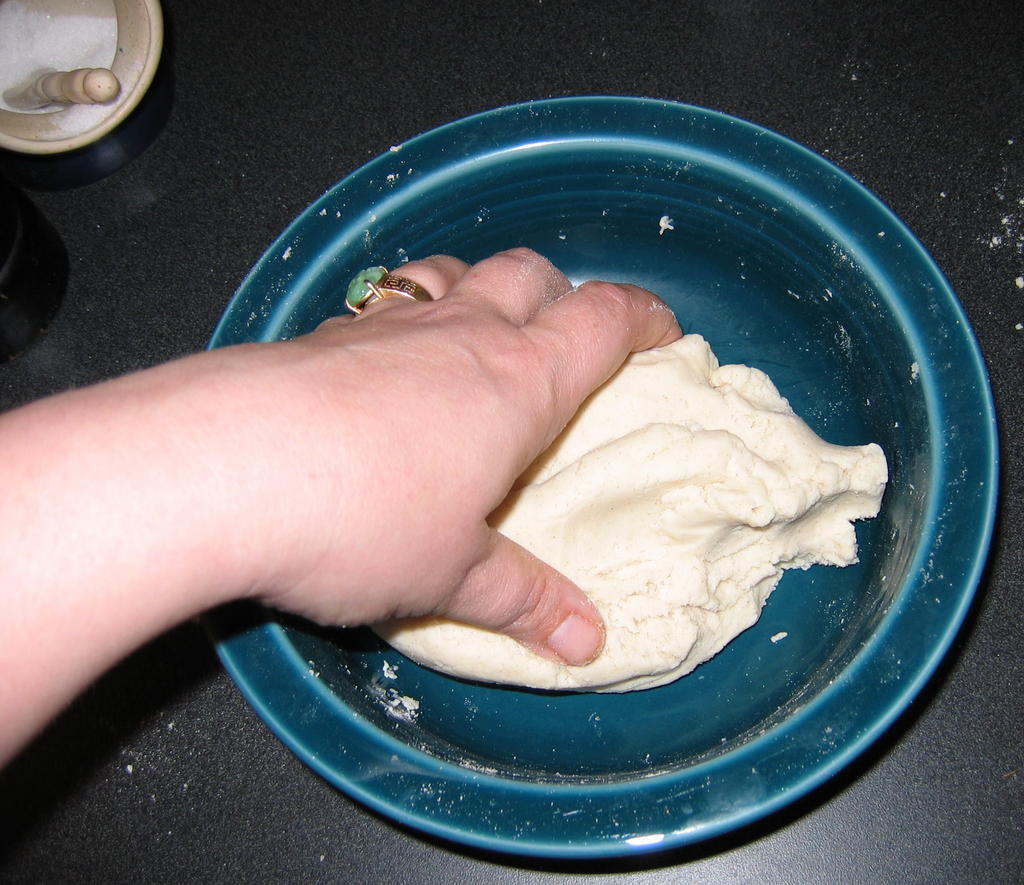
But making them--it was utterly foolproof. They are made with two ingredients: masa flour and water. You follow the directions on the package (I use Maseca brand) and add 1 1/8 cups of water to 2 cups of masa, and then knead it into a smooth dough by hand. You know it is ready when it takes on the texture and pliability of Play-Doh. Yes, Play-Doh. (That was my favorite toy as a kid--I was always "baking" things with it. Are we surprised? No, I suspect not.)
At that point, it is time to divide the dough into sixteen equal balls.
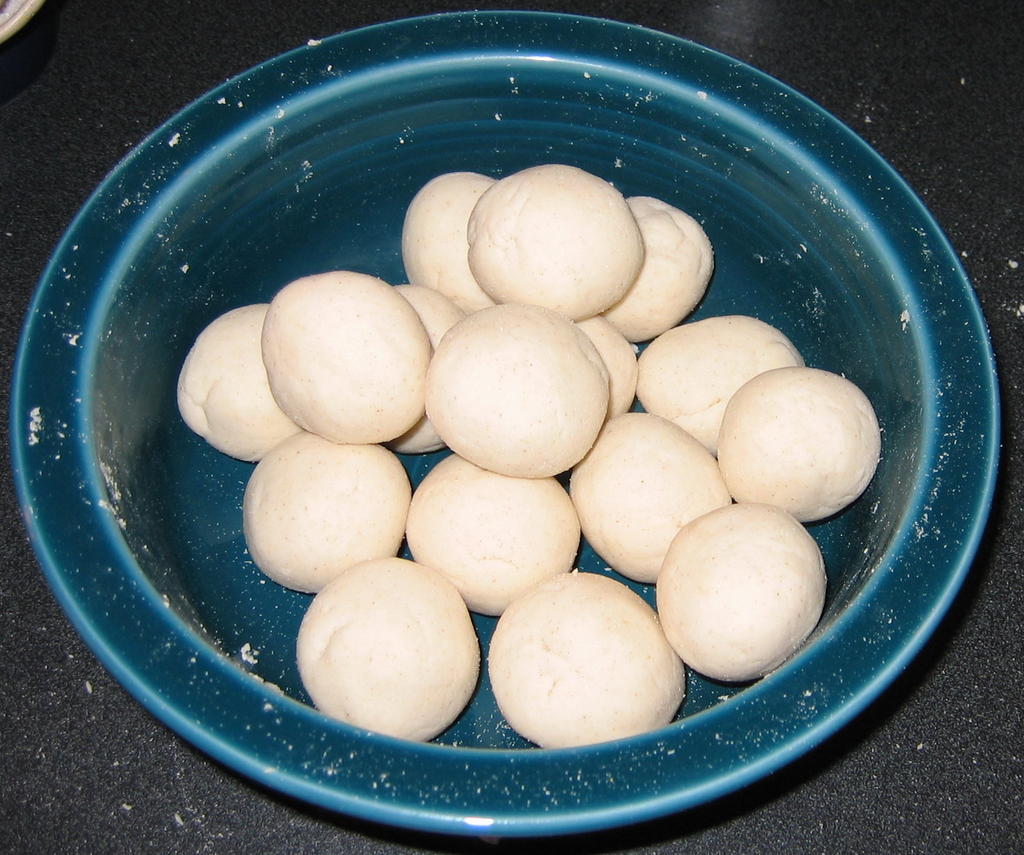 I do this by rolling into one ball and then cutting it into quarters. These I roll into balls and cut in half, which gives me eighths. Each eighth, I roll into a ball and cut in half, and voila! Sixteenths, which I roll into equal sized, smooth balls, pile back into the mixing bowl and cover with a damp towel while I start pressing and cooking the tortillas.
Now, we need to talk about tortilla presses.
I know that there are a lot of very practiced abuelas out in the world who eschew tortilla presses and pat the masa out by hand into beautiful, flat, thin cakes. Well, I am not one of them. I am a gringa who didn't grow up eating real, live corn tortillas and watching my mamma pat them out by hand, so I have no clue. Hell, I went to culinary school and can't toss pizza dough without endangering the ceiling, so patting tortillas by hand is not going to happen.
And if you are anything like me, and I bet that you are, you need a tortilla press.
You can get cheap aluminum ones anywhere it seems, and my first one was one of those.
I ended up hating the damned thing, and gave it away to the Salvation Army. Who knows what someone picked it up to use it for, but there we are.
 The kind of tortilla press you need is a cast iron one that is nice and heavy. They are made in Mexico and you have to use very little pressure to make nice thin tortillas. You can get them in various sizes, and they aren't very expensive, and from what I can tell, they will last until the world ends, so if you get one, expect to pass it down to your great-grandchildren. I bought mine here.
To use the tortilla press, you want to line both the top and the bottom with plastic. Some folks use plastic wrap, but I sacrificed a nice heavy Ziploc bag by cutting it apart and have used that for months now. You just wipe it clean with a damp cloth and put it away with the tortilla press. The plastic keeps the tortillas from sticking to the press and making a godawful mess.
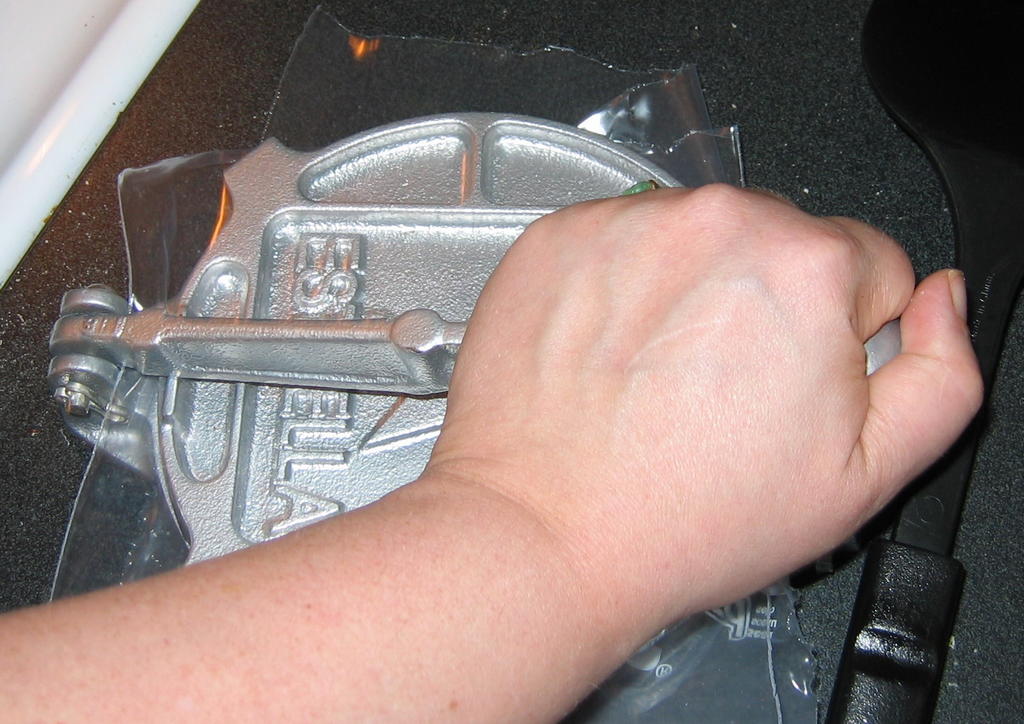 What you do is just put one piece of plastic on the bottom, put the ball of dough slightly off-center on the press, flatten it slightly with your palm, place the other piece of plastic over it, and then close the press. Bring the lever down with mild pressure, then lift up, and voila!
You have a tortilla.
Pick it up with the sheets of plastic, and peel off the top sheet, then the bottom sheet, and flip it into your preheated cast iron pan.
Ah, the pan.
You can use a traditional flat Mexican griddle called a comal, but you don't have to. I just use the well-seasoned lid to a deep cast iron skillet, turned upside down. (This particular piece is meant to be used as griddle anyway.)
Just remember not to grease your cooking surface in any way, and get it nice and hot before you lay a tortilla down on it.
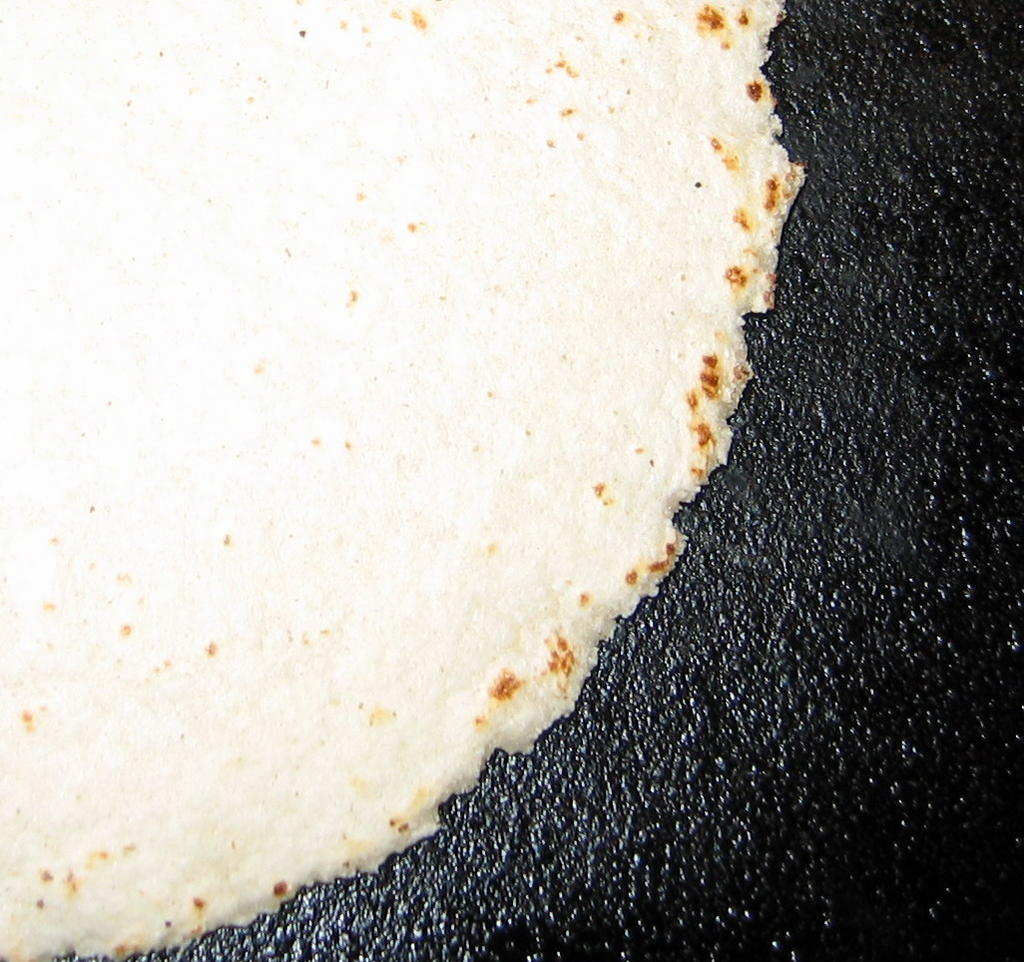 I use high heat and cook it for about forty-five seconds to a minute on the first side, then flip it once, and cook it about the same on the other side. When you flip it, there should be some browned freckles on the cooked side, as shown at left.
Unlike leavened pancakes, tortillas don't really give you any visible sign that they are getting cooked, except they smell like nice toasty corn. But there are no bubbles, no sizzling, nothing. They just bake silently and stealthily on the smooth cast iron, which means the first ones you make, you will flip them more than once, maybe more than twice, until you get a feel for how long they need to cook.
 I have found that if I am cooking alone, that if I take a tortilla out of the press, and lay it on the hot pan, I have enough time to lay the plastic down, put out another masa ball and play with the upper sheet of plastic and press it, before I need to flip the cooking tortilla. After I flip it, I open the press, peel the plastic away, then scoop up the first tortilla and lay down the second one into the its place on the hot iron.
If I am cooking by myself, I usually put the tortillas into one of those big heavy plastic tortilla keepers to keep them nice, warm and pliable.
However, if you are working with a second person, you can toss the cooked tortillas directly on a work surface, and they can fill and shape them, then lay them in a pan to await the drizzle of sauce and sprinkle of cheese.
I always put cheese -in- my enchiladas as well as on them, along with whatever shredded meat I have, some black or pinto beans, and lots of cilantro. Sometimes I add strips of fire roasted bell or poblano peppers as well, particularly if I am making vegetarian enchiladas.
 Then, I fold them up into half-moon or taco shapes, rather than roll them. Unless I am in a mood for stacked enchiladas--then I layer sauce on the bottom of the pan, then tortillas to cover it, then cheese, fillings and sauce and tortillas, sauce, fillings, cheese and tortillas, then sauce and cheese. It is kind of a Mexican casserole thing--sort of a New World lasagne.
Whether I fold or stack them, I always spray my baking pan with some canola oil spray and then spread a couple of tablespoons of sauce in the bottom to keep the enchiladas from drying out or sticking. Then, I layer them in whatever fashion until the pan is full, then ladle sauce over them in strips. I don't completely inundate them with sauce; I generally leave some edges of the tortillas out in the open to brown and get nice and crispy for a textural contrast. Then, I sprinkle cheese over and bake them--and when they come out of the oven, a bit of roughly chopped cilantro goes over it all.
 Master Recipe for Enchiladas
Ingredients:
32 freshly made corn tortillas
1 pound of shredded cheese, preferably a mixture of queso blanco and sharp cheddar
1 pound of shredded meat filling
2 cups or so of sauce (verde or Colorado)
1-2 cups of cooked black or pinto beans or strips of fire roasted sweet or poblano peppers, or grilled corn cut from the cob, or caramelized onions or sauteed bitter greens such as kale or collards (or all of the above)
1 cup roughly chopped fresh cilantro
1 cup sliced scallions (optional)
canola oil spray or canola oil
Method:
Preheat oven to 375 degrees.
Spray three 9"X9" glass baking pans with canola oil and spread the bottom with a couple of tablespoons of sauce.
Lay a tortilla flat on work surface, and sprinkle with a tablespoon or so of cheese, then the fillings of your choice. I like to make certain to include some fresh cilantro and/or some scallion slices in the filling.
Fold the tortilla into a half-moon shape over the filling, and lay half-upright in the baking dish. Continue with all other tortillas, fitting about ten or eleven or so enchiladas per pan. When they are all fitted in, pour a ladleful of sauce down each row of tortillas and top with more shredded cheese.
Bake for 20-30 minutes, or until cheese is melted and bubbly and the sauce is molten, and the exposed bits of tortilla are crispy. As soon as you remove them from the oven, sprinkle with more cilantro and/or scallions, to allow the garnish to wilt slightly.
Garnish with fresh salsa, guacamole and sour cream, if you wish.
Monday, August 29, 2005
More Food in the News
 Lunch Doesn't Have to Suck
More schools and universities seem to be jumping on the sustainable, local agriculture bandwagon. Yet another story hits the New York Times on the subject of public and private schools seeking locally grown alternatives to the products of corporate agriculture.
One reason cited for the growth of this trend is the attempt by administrators to get kids and young adults to eat more healthy food as a means to fight the growing obesity epidemic. Even though transitioning to locally grown foods often leads to higher food costs, especially in the short term, many administrators are sold on the idea of helping kids learn to like and eat more healthy foods.
"Children's obesity issues have highlighted the farm to school program," said Marion Kalb, director of the national farm to school program for the Community Food Security Coalition. "It appeals to taste as well as nutrition and how to get kids to change their eating habits." The nonprofit coalition works to build sustainable food systems that ensure access to affordable, nutritious food.
Another factor cited in the article for the growing number of school systems turning to local alternatives is the rapid increase in oil prices.
Considering that oil just reached a record seventy dollars a barrel today, and might go over one hundred dollars a barrel due to the devestation of Hurricane Katrina, my prediction that prices for non-locally produced fresh foods will jump may come true sooner than I had expected.
I will make another prediction: I think that more and more institutions like schools will turn toward locally produced food as the artificially low prices on non-local petroleum-based agricultural products begin their inevitable rise. I also think that we will see more farmer's markets open up, and more small farmers get into the game as demand rises for local products.
Why the Hell is Organic Food So Damned Expensive, Anyway?
So, now that I have your attention, I want you all to trot on over to Grist Magazine and read this article by Christy Harrison. You remember that irritating column by Julie Powell in the New York Times, where she claimed that those of us who eat organic food are a bunch of elitist food snobs and railed about how awful it was that the stuff was so expensive? Remember how shallow it was, in that it pointed out a problem in regards to organic food production, but didn't give any thought as to why that might be, and instead decided to fling accusations and call people names? (Artful mudslinging is a hallmark of fine yellow journalism.)
Well, this article answers some of the legitimate questions that were raised in her column, and explains, in a much more succinct fashion than I could manage myself, why organic produce is often more expensive in the grocery store than its conventionally produced corporate counterparts. (It does ignore the basic fact that if you buy at a farmer's market, that same organic food is often cheaper than the price they charge in a grocery store, but that is apparently a side issue.)
Here's a little peek at what is inside the article:
"Conventional crops are heavily subsidized by the federal government in the United States, making them artificially inexpensive. Couple those subsidies -- which have been in place since the New Deal -- with the cost of cleaning up pollution and treating health problems created by conventional farming, and we're paying a lot in taxes in order to pay a pittance at the grocery store.
"When we make the argument that low-income people can't afford organics, we're assuming that the prices of conventionals are the prices we should be paying," says a USDA economic researcher who asked to remain anonymous. "But those prices externalize a lot of costs, like pollution and higher energy inputs."
A study last year by Iowa State University economists showed that the annual external costs of U.S. agriculture -- accounting for impacts such as erosion, water pollution, and damage to wildlife -- fall between $5 billion and $16 billion. (For context, that's as much as twice the EPA's 2005 budget.) And Michael Duffy, a coauthor of the Iowa paper, says his team's estimate is conservative."
There is a lot more in that gem--it is worth a read--trust me.
How to Find a Mad Cow
Now, y'all just know it wouldn't be Food in the News at Tigers & Strawberries if I didn't make some mention of BSE. Yes, bovine spongiform encephalopathy is one of my favorite hobby horses, because it is a nightmare of humanity's own making; someone, somewhere, at some time thought it might be a good idea to feed an herbivorous life-form protein rendered from meat. More specifically, some dipshit took a dead cow, rendered it down into cattle feed and fed it to live cows, and thought that was just fine and dandy.
Right.
My grandpa never went to college, but he raised cows most of his life, and he could have told said dipshit exactly why that was a bad idea. "Cows were meant to eat grass! They are built to eat it. If they were meant to eat meat, they'd have teeth like dogs or cats!" I can hear him ranting now.
Well, anyway, the news this week is, there may be a new test on the way to detect BSE and its human counterpart, Creutzfeld-Jakob disease, in the bloodstream of cattle and humans before they show symptoms or drop dead with holes in their brains. Basically, it increases the number of prions already present in a given blood sample in order to make them detectible. This would eliminate the need for samples of brain tissue to confirm a case of BSE.
This new procedure has the potential to help prevent the spread of the human form of the disease through transfusions, and it might make it easier to diagnose and destroy sick cattle before there is a risk of them wandering into our food supply.
Well, it might help keep sick cows out of our food supply so long as the USDA actually went to the effort of testing a decent number of the cows in the US herds. And since the USDA doesn't seem overly eager to test very many cows in the first place, I am not so certain that it would work.
But it is a nice idea, and I applaud the fine researchers at the University of Texas Medical Branch at Galveston for coming up with the procedure.
It isn't their fault that the USDA is in the pocket of the cattle industry.
And with that sarcastic remark, thus concludes the second installment of Food in the News.
Y'all eat well, now, y'hear?
Sunday, August 28, 2005
The Whole Enchilada Part II: Filling and Fixin's
 I like shredded meat fillings in enchiladas, which I will often mix with beans or strips of fire roasted poblano chiles. For vegetarian fillings, I will use the beans and poblano strips, mixed perhaps with roasted sweet bell pepper strips, and sauteed bitter greens like kale or collards.
No matter what filling I use, there is always cheese. I like to use a mixture of sharp cheddar cheese and queso blanco. Queso blanco is a white Mexican cheese that melts beautifully into a creamy, buttery-flavored mass. A decent substitute is montery jack cheese, but I like the nutty-buttery flavor of queso blanco better.
The wonderful thing about making a shredded meat filling is that the cooking liquid can eventually be used as the foundation of the Colorado sauce; if I don't want to use it right away, I will cool it completely to room temperature, and then put it into a freezer container and freeze it to either reuse the next time I make shredded meat or for the basis of a sauce or a soup.
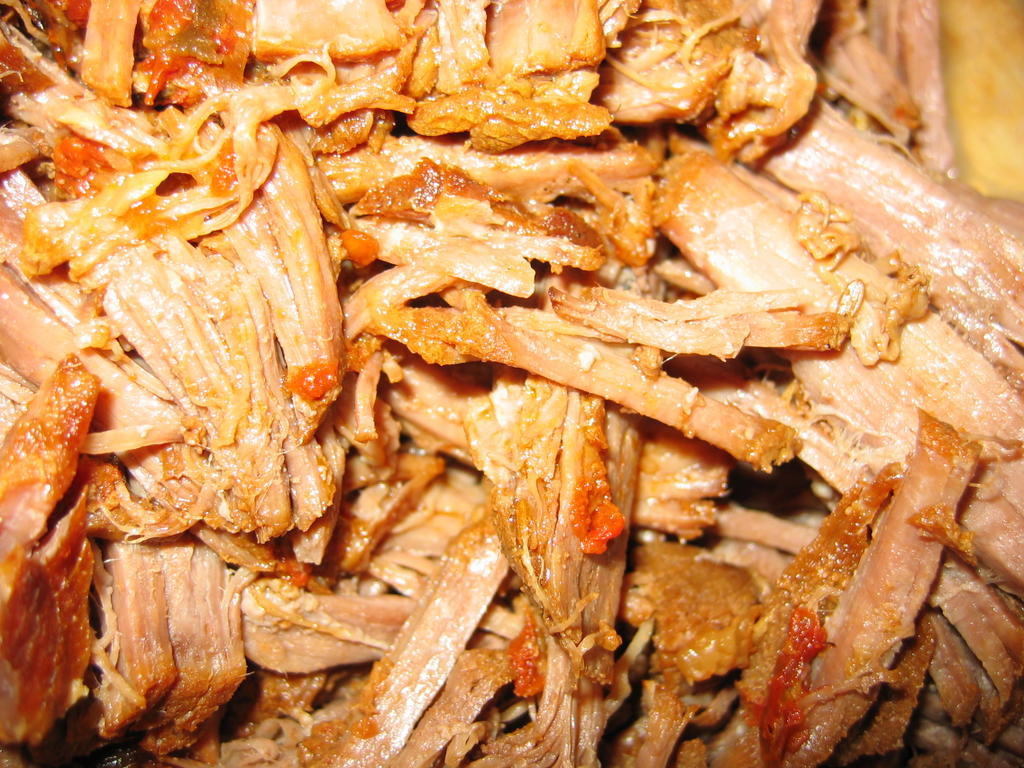
Any kind of meat can be shredded successfully: pork, beef, chicken, lamb and game all make very nice shredded meat fillings. The key is choosing the right cut of meat to braise and eventually shred.
For pork, I prefer the shoulder or the Boston butt. For beef, the chuck roast (either bone in or boned) has immense beefy flavor and a texture that shreds beautifully. To make shredded chicken, an older stewing chicken is a must. Lamb shanks make lovely shredded lamb; you can also use the shoulder roast or a leg roast, particularly if you can get one from an older animal. For shredded venison, the haunch is a great cut to braise.
Once you have the correct cut of meat, you need to decide how much time you have to spend on braising it. If you have all day, by all means stick it in a stewpot and simmer as long as you need to until the meat is tender and falling off the bones, and all of the fat and connective tissues have melted and dissolved into gelatin. Whatever you do--do not underestimate how much time you will need to bring the meat to the point where it is falling-apart tender; each cut of meat from each animal is individual and unique, and sometimes they just plain take longer to cook, and it is better to have a late dinner that is fantastic than a meal that is on time, with tough, dried out meat.
If you have any thought that you may not have time to braise your meat properly, I suggest you run right out and buy a pressure cooker. This instant. Go, go, go. It is quite simply, the best investment for a cook who lacks time to spend all day in the kitchen. A pressure cooker works simply--you seal up your food item in the cooker with an amount of boiling water. When the steam cannot escape, it creates pressure within the cooking chamber--usually up to 15 psi, which raises the temperature at which water boils, and has the effect of cooking foods faster.
Using a pressure cooker to braise meats is like having a fail-safe device to obtain fork-tender meat with a minimum of time and effort. There are just a few rules to be aware of: after you have cooked your meat the recommended amount of time, do not immediately release the pressure by pressing the "quick release" valve, especially if you are cooking beef. Instead, take the pressure cooker off the heat, and allow it to release the pressure slowly and naturally over a fifteen or twenty minute period. If you use the quick release method, the fast temperature and pressure inversion has the potential to take your very tender, succulent meat and turn it into a tough, chewy mess. For some reason, the tissues in beef will often firm back up when treated in this way.
 Making shredded meat fillings is so simple, I have never had a recipe for them, but for the blogosphere, I will write it down now. Instead of giving a specific recipe for a specific meat, I will write this as generally as possible, so that one can use it as a master recipe to be altered depending on what cut of meat one uses.
Shredded Meat Filling
Ingredients:
Piece of meat, about two and a half pounds, bone in or not
3 cloves garlic, sliced thinly
2-3 tablespoons olive oil or bacon grease
1 onion, sliced thinly
2 cloves garlic, minced
1 chipotle en adobo
1 teaspoon freshly ground cumin
1 tablespoon freshly ground coriander (The spices can be varied to taste--see suggestions below)
2 quarts broth or stock to match meat (For pork or lamb one can use commercial vegetable or chicken broth; for venison, one can use beef broth.)
1 bottle lager beer
1 bay leaf
1 pinch Mexican oregano, or regular oregano
1 pound fire roasted fresh tomatoes, seeded and peeled, then cut up (Or, use 1 can Muir Glen fire roasted diced tomatoes.)
1 ripe (not green) sweet pepper, fire roasted, peeled, seeded and diced
salt and black pepper to taste
Method:
Cut meat up into managable chunks. (If using a whole stewing chicken, cut as if you were going to fry it, except don't separate thighs from legs and wings from breast, and leave back and neck in the pot so that all the flavor is extracted from them during cooking.) For a beef chuck roast of about two pounds or so, I usually cut it into four or six pieces depending on whether or not I have a bone in the roast. (Bones are good for adding flavor to the cooking liquid, so do not be afraid of using roasts with the bones.)
Cut slits into the meat with the tip of a sharp knife, and insert slices of garlic into slits. (With chicken, you can insert the garlic under the skin if you don't want to pierce the meat.)
Heat up oil in the bottom of your stew pot or pressure cooker until it is quite hot and add onions. Cook, stirring constantly, until the onions turn a medium brown. Add garlic, chile and spices, and cook a few more seconds, until the whole is very fragrant. Add meat and brown on all sides.
Add the rest of the ingredients and bring to a boil. If you are using the pressure cooker, cover with the lid, lock it down, and bring up to full pressure, then turn the heat down to low, and allow to cook for the manufacturer's recommended time, and release pressure naturally as discussed above. If you are using a regular stew or stockpot, turn heat down, skim any scum off the top of the broth, cover and allow to simmer until the meat is so tender it falls off the bones, or when you stick a meat fork into it, it falls apart and the fork can be pulled out without the meat chunk sticking to it and coming out of the pot with it.
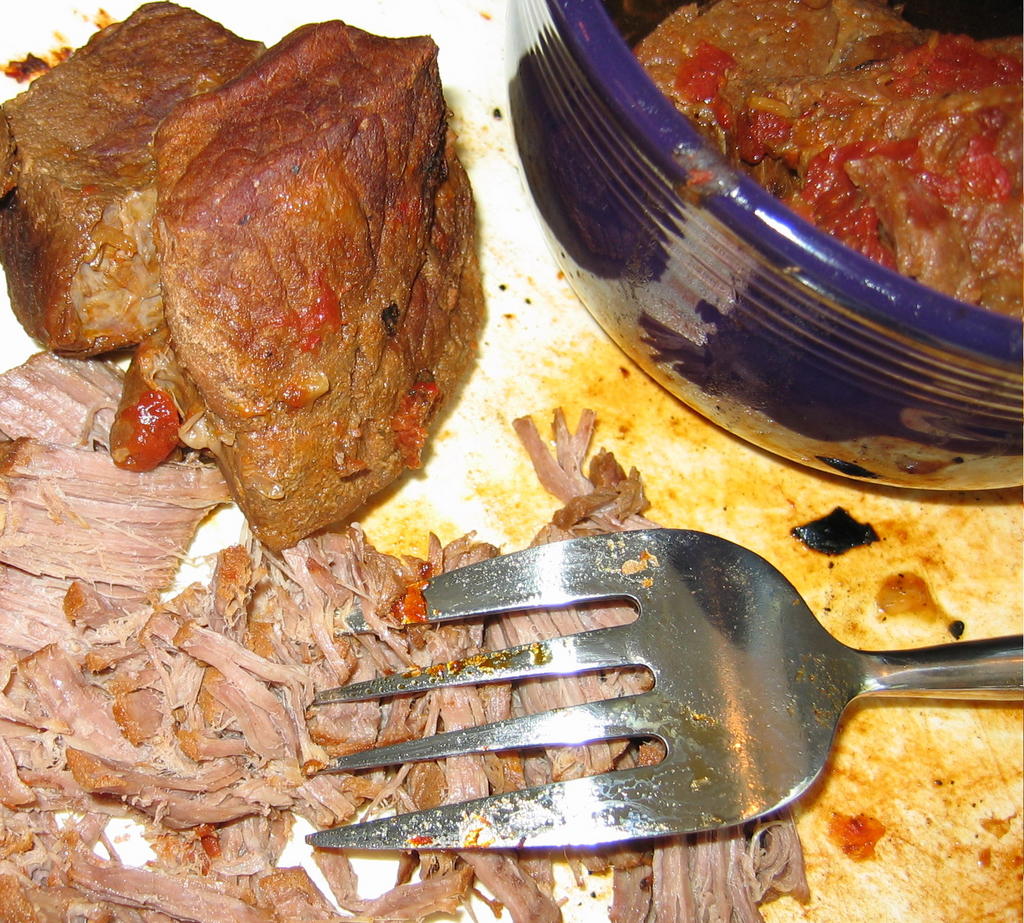
When meat is done, pull it out of the liquid, set it on a plate and allow to cool until you can easily handle it. Remove all hunks of skin, fat and connective tissue, and with a fork, gently shred the meat. Generally, I hold the fork tines down, as if I was holding a piece of meat to cut it, and hold the piece of meat steady with my other hand, and in a gentle up and down motion, attack the meat with the fork, tearing it into thin shreds.
Any accumulated juices on the plate should be poured over the meat. (You can also moisten the meat with some of the cooking liquid--this helps keep it from drying out while you wait to fill the enchiladas.)
Cover the meat until it is to be used as a filling.
Notes:
Spices can be varied according to what meat one is using. For beef, I use more cumin and less coriander, and a lot of black pepper and some dried or fresh thyme. For pork, I use more coriander than cumin, about a teaspoon of juniper berries, and a little bit of rosemary. For chicken, I use sage and rosemary, more coriander than cumin, and a pinch of allspice. For lamb, I use rosemary and thyme, more garlic and a lot of ground black or white pepper. For venison, I use lots of garlic and thyme, a teaspoon and a half of juniper berries and a lot of black pepper.
To use the cooking liquid, it is best if you remove as much fat as possible before using it to make a sauce; to do so, cool it completely and the fat will congeal at the top, making it simple to lift out by hand or with a spoon. I like to leave some fat, though--that is where the flavor is, and it will make a sauce with more body than a completely defatted broth will.
Shredded meat can be further seasoned, if you wish, with caramelized onions, roasted sweet or hot peppers or more spices. Ths is great to do if you are using it as taco meat, but if you are using it for enchiladas, which have a sauce, it is not necessary. For tamale filling, it is customary to mix the meat with a sauce before using it to fill the little masa packets, so extra seasoning is usually not necessary. Remember, you want people to be able to taste the meat, not just the sauces and spices.
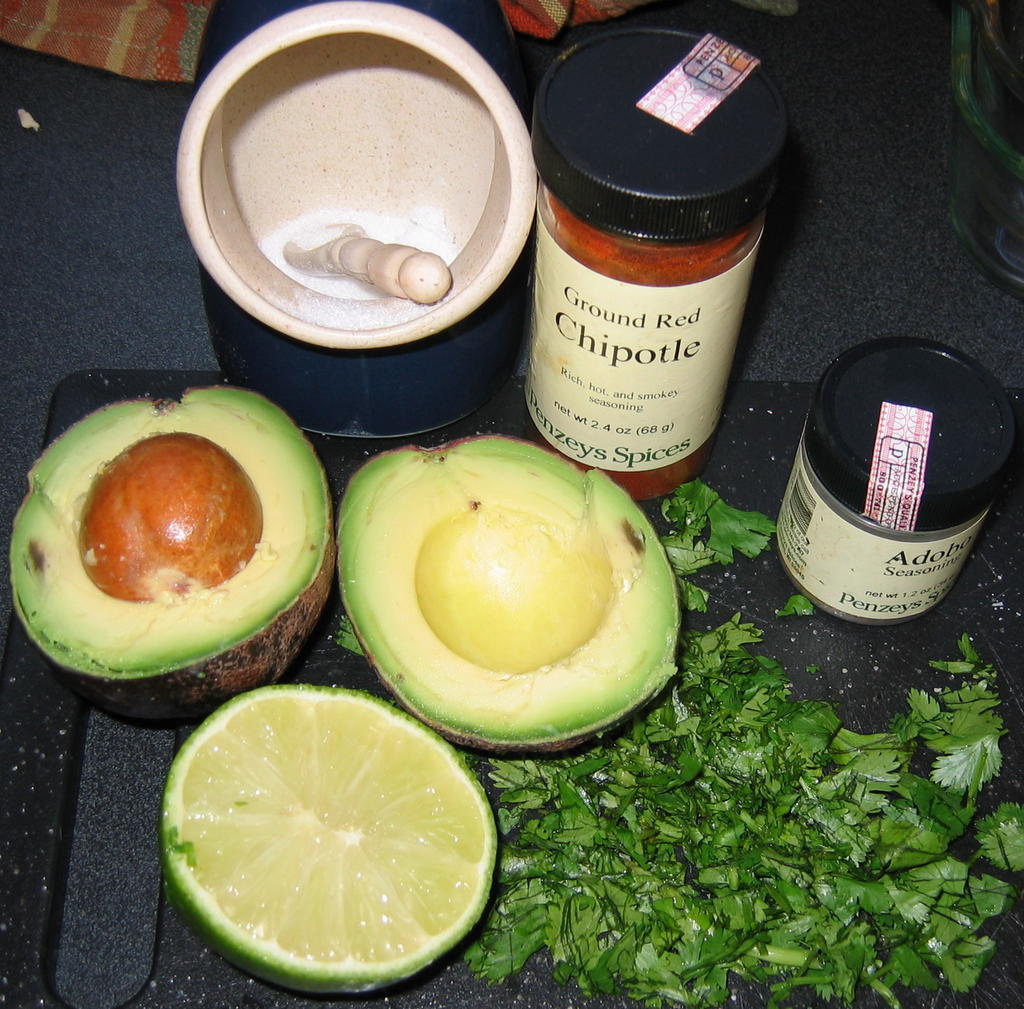 When I make enchiladas, I always make guacomole to serve on the side. With enchiladas Colorado, it provides a lovely contrast in color; with enchiladas verde, it provides a contrast in texture and especially in flavor.
Quacamole is one of those recipes where less is more. The first homemade quacamole I had included either sour cream or Miracle Whip salad dressing, and while that was tasty, I have come to love a more traditional, minimalist's version where the richness of the avocado is offset by the smoky warmth of ground chipotle, the bite of raw garlic and the sparkle or lime juice. I finish it off with salt, a tiny sprinkling of adobo seasoning or ground cumin (about a pinch's worth) and freshly chopped cilantro. Anything else seems to muddle the flavors and cover the natural beauty of the avocado.
Oh, and I only use Haas avocados--those are the bumpy-skinned black ones about the size of my palm that make me really understand why avocados are sometimes called "alligator pears." They have a fuller flavor and better texture than those big bright green waxy-skinned ones. I always choose ones that are fairly soft, as well, without being completely squishy--I like mine a little less ripe than other people do, apparently. But they should give to gentle pressure without threatening to burst and go "spoo" all over the place. The really mushy ones like that are either overly ripe or have been bruised and pummelled about and will make really ugly quacamole.
 Guacamole
Ingredients:
1 good sized, ripe Haas avocado
1 lime
1 small clove garlic, minced
1/4 cup freshly chopped cilantro
salt to taste
ground chipotle to taste
1 pinch ground cumin or adobo seasoning
Method:
Cut avocado in half, and remove pit. Squeeze pulp into a small bowl.
Squeeze the juice from half the lime over pulp, add minced garlic and cilantro. Mash avocado to a lumpy paste (smoothly pureed guacomole is yucky, in my opinion) and add salt, chipotle and cumin or adobo seasoning to taste.
If the avocado is particularly rich, you may need to add just a bit of the rest of the juice from the other half of the lime.
Notes:
How do you keep your guacamole from turning brown? Do not expose it to the air. I usually manage this by making it right before I serve it, but if you are making a bunch of it for a party, you can do this by doing as late as you can before your party, and then when it is done, covering the top completely with plastic wrap that is set down completely over the surface of the avocado pulp, sealing out the air. The myth about the pit stopping the browning is just that--a myth--Harold McGee debunked it in his book, "The Curious Cook" years ago.
Saturday, August 27, 2005
Weekend Cat Blogging: Grimalkin
 Here is Grimalkin, also known as Grimmy, Grimble, Grimblkins, Grimsy and Gimblekitten. You have seen my round busybody girl cat here before.
For such a round cat, Grimmy is certainly acrobatic, however, in today's photo, she is just sitting on a box which contains some shelves that should be assembled and hanging on the wall above my keyboard in my office, but currently are useful as a cat platform. She is peering around my desk; it is her favorite place to sleep and keep me company when I write.
I hate to take it away from her, which is my excuse for not building the shelves.
The real reason is that they are going to be beastly to build, but Grimmy's continued happy presence gives me a really good reason to procrastinate.
That is also where I set cookbooks to wait between being looked through and then reshelved.
Grimalkin is my helper cat--she helps me write by sitting in front of my computer screen or delicately picking her way across the keyboard on the way to my lap. She plays fetch with little mousey toys and goes through phases where she is a cuddle bug and where she wants to have nothing to do with anyone. She is extremely playful, though and has fun no matter what she is doing.
Right now she is in the same place on the box, curled up asleep.
I bet she is dreaming of mousies.
To see what other food blogger's cats are up to, check out
Farmgirl Fare for a glimpse at a flying cat. Okay, really, he is sleeping, but he looks like he is flying if you have an imagination. I bet he is dreaming he has wings!
Masak-Masak brings us her Bollywood edition of WCB, with courtship and a tree!
Tasha shows us how cats sleep down under at A Few of my Favorite Things.
Handsome Hamlet lounges on a desk at Anne's Food.
Kiri is grazing at Eatstuff.
Abe & Ike are watching CatTV at Restaurant Widow.
Friday, August 26, 2005
The Whole Enchilada Part I: The Sauce
 I used to make enchilada's "from scratch--" meaning I took store bought corn tortillas, doctored a can of store-bought sauce, made a filling out of some sort of meat and shredded cheese and wrapped the tortillas around the filling, poured the sauce over, dumped shredded cheese in and baked it and called it "home-made."
Yeah, well, that was a long time ago and that was how my friend from Texas did it, so I thought it was okay, and that is the thing. The results were just "okay." There was nothing really great about the enchiladas--they were just okay. Not good, certainly, as the canned sauce tasted tinny and somewhat flat and bland, but not bad, either, in that they were edible.
So, a year or so ago, I got on a Mexican food kick, bought up all of Diana Kennedy's books, even the ones that were out of print, dragged out some Rick Bayless, Mark Miller and Cheryl Alters and Bill Jameson's books, and started studying up on the subject.
And I realized that there was no real reason for me to be intimidated by Mexican food. I loved chiles, I knew from tomatoes, and sauce making had lost its fear factor after having gone through culinary school, and I had a Sumeet grinder, so I had no real excuse not to throw down and develop my very own enchiladas Colorado sauce.
Colorado is the red sauce that you see on enchiladas that are not Tex-Mex in derivation; the Tex-Mex version relies on chile gravy for its saucy kick, which is a totally different beastie altogether. (Over the years, I have found that I prefer the flavors of New Mexico and Arizona to Texas, so my Mexican foods tend to be derived from those border states instead of the Tex-Mex that is more familiar to more of the country.) The main flavorings and coloring of the red Colorado sauce comes from dried chiles, though certainly tomatoes and sweet bell peppers play their part in my version as well.
 Which chiles do I use in my sauce, one might ask?
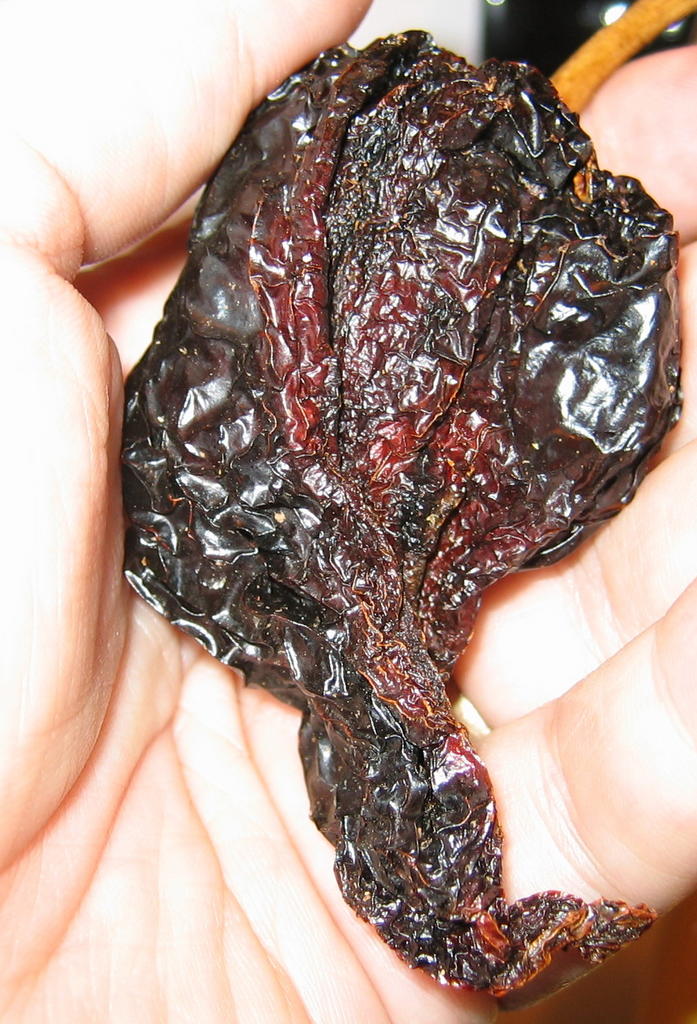
Well, several, and the kind and amount change depending on my mood, what I have in the pantry, what filling I am using, and for whom I am cooking. But three chiles are constants in this sauce: anchos, New Mexico reds and chipotles, either dried or en adobo.
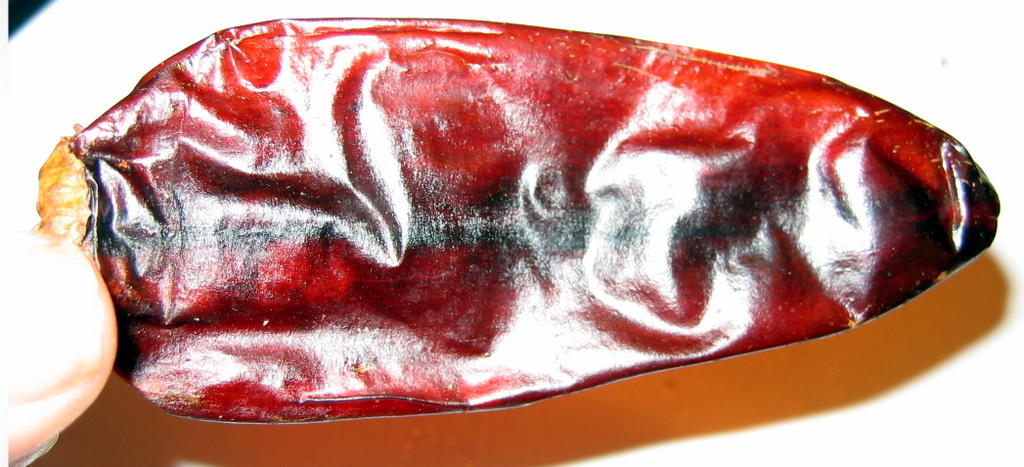
Anchos are the ripened, dried version of poblanos, which are the thick-walled, wide-shouldered green chiles that classic chile rellenos are made of. As you can see at the left, they are very wrinkly, and deep reddish to black in color, and vary in size from about two and a half inches long to three or four inches long, and half as wide.
Good ones should not be brittle, but should be somewhat soft and pliable, and should have a sweet, almost raisiny smell to them. They are very mildly hot, and add a honey-like top note to the sauce when used in moderation. When you use too many of them, they make the sauce too sweet, and darker than is appetizing. (This one is from Penzey's.)
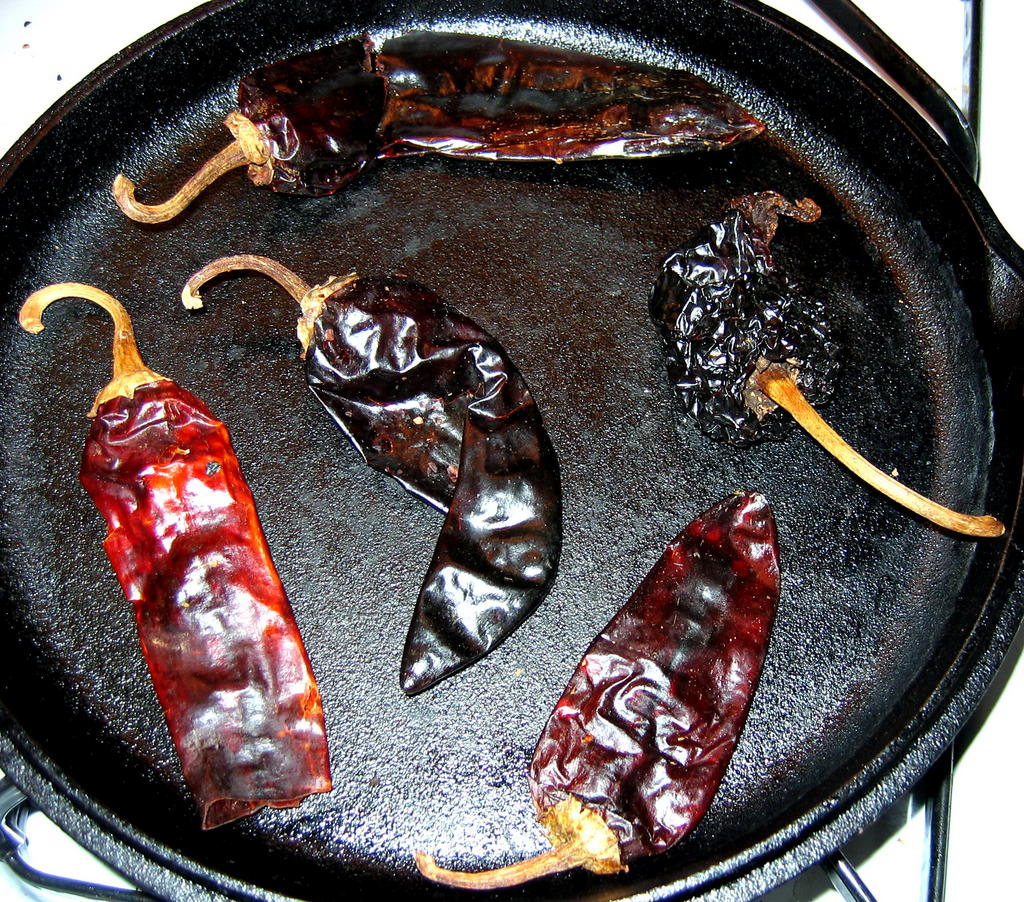
 The New Mexico red chiles are the backbone of the Colorado sauce. I have also seen these chiles called chiles Colorado, but it is under the name New Mexico that you will find them marketed by the company Badia (the pictured one is a Badia chile), in grocery stores and Latin American markets. (You can substitute California chiles for the New Mexico chiles; the flavor profile is very similar.)
These give the characteristic brick-red color and soft heat to Colorado sauce. They are a rich cherry-red color, and are from three to six inches long, and fairly narrow. They are thinner-walled than the anchos, but they are still somewhat fleshy. They, too, should not be brittle, but should be pliable and somewhat leathery in texture for best flavor. Good ones smell sweet, but not as sticky-sweet as anchos, and there is definately a sharper, chile undertone that is unmistakeable.
One good rule of thumb when it comes to buying dried chiles is to try and bend them and smell them. If they do not break easily, and you can smell them through the cellophane or plastic bag they are packed in, then they are good and fresh, and will make outstanding Colorado sauce.
If they are brittle and break easily, then, you should probably pass on them and try another store where stock moves more quickly. Both Penzey's and Badia put out good quality dried chiles, though Penzey's is a good bit more expensive.
 The chipotles I used this time around are the canned ones en adobo. A chipotle is a ripe, smoked and dried jalapeno, and in its whole, dried form, it can be had in two ways: "chile alhumado", and "morita."
Chile alhumado is the traditional chipotle; it is greyish tan, and is very heavily smoked. The morita (which means, "little blackberry" is the form most often sold in the US; it is blackish, softer and less smoked, so it has a milder smokey flavor. Moritas are generally considered inferior to chile alhumado, but that doesn't mean that they are bad--they are still quite good-tasting and useful for cooking.
For reference photographs and links to purchase either chile alhumado or moritas, look here.
The brand of chipotle en adobo I have found most commonly in the US, and which I use, is La Morena. I find that the sauce is a useful addition to any number of bastes, rubs, salsas and condiments where I just want a touch of smoky heat, and the flavor of the chiles is full, round and not at all tinny.
 Before using the dried chiles to make a sauce, they must be toasted and soaked, then ground up.
A lot of folks apparently skip the toasting part, but Diana Kennedy and Rick Bayless both insist that toasting brings out more of the flavors of the chile; having tried it both ways, I tend to agree with the experts. Toasting does deepen the flavors of the chiles, and in particular seems to bring out a lot more of the sweetness that lurks beneath the heat.
Toasting them is a lot easier than one would think. I use the flat cast iron griddle pan, which in Mexico is called a "comal," put it on medium-high heat, get it hot, and lay the chiles in a single layer on it. Then, I watch them obsessively, and turn them frequently, until they just start to blacken a bit and smell really good. After that, I stick them all in a bowl, and add hot water just to cover them and let them soak until they are nice and soft. The soaking can take as long as an hour, particularly for the anchos, which are quite tough-skinned and leathery. Be patient--the longer you allow them to soak, the more easily they will be to grind later.
At that point, I pop the stems off, and scrape out some of the seeds, and using my Sumeet Multi-Grind, I grind the squishy chiles, along with the chipotle en adobo into a nice, deep red smoky-sweet paste. (If you do not own a Sumeet, you can use a blender, but you must add a bit of the soaking water in order to get it to grind up well enough; if you cook a lot of Mexican, Thai and Indian food, however, I would suggest investing in a Sumeet.) At the same time as I grind the chiles, I grind toasted whole cumin, coriander and black peppercorns, along with onion and whole garlic cloves.
The resulting thick, fragrant past is the backbone of the sauce.
 The body of the sauce is made with cooking stock and roasted vegetables. The stock is the braising liquid for the meat I will use for the filling. In this case, I used Pacific Natural Foods beef broth to which beer, roasted tomatoes, caramelized onions, whole chipotle chiles, bay leaves, a pinch of Mexican Oregano and roasted red bell peppers had been added. This particular stock had been used three different times to cook beef, and had been kept and frozen between uses.
The first time I cooked beef in it, I used it in a shredded beef and rice casserole last summer. Then, it was thawed out a month or so ago when I felt the need to make enchiladas verde. After I shredded the beef for that recipe, I froze it one more time, and then thawed it out for its final run as a meat-cooking medium.
Each time I used it, I added more roasted tomatoes, (I roast tomatoes the same way I roast tomatillos for enchiladas verde) more peppers and more chiles. When it cooked down, I added either more beef or vegetable broth, and often more beer. By this third time it has been used, the stock had become rich and slightly thick with suspended particles of beef and broken down vegetables, and was filled with the promise of making a good, strong sauce. But, as there were two quarts of the stock, and I only needed one quart of sauce, I began letting it reduce over medium heat, while on two of the other burners, I roasted sweet red bell peppers.
The process of fire roasting bell peppers is simple: set them on a gas flame, and turn them as they char. Keep doing this until the skins are completely blackened, then stick them in a bowl, cover them tightly with plastic wrap and allow them to steam. After they cool to room temperature, rub the skins off with your fingers, tear off the stems, and scrape out the seeds and placenta--the white pithy bits that hold the seeds.
After the stock had reduced almost by half, I threw in the roasted red peppers, and the cup or so of chile, onion, garlic and spice paste, and stirring constantly, let the stock reduce until it was pretty much cooked down to half its original volume.
At that point, the smell is incredible; the disparate ingredients danced together into a rich melange of scents: the chiles and sweet peppers took the lead, with the beef, cumin and coriander just behind. There was the slightest bitter medicinal tang of the Mexican oregano, while the tomatoes and bay leaves were perceptible only in the tiniest whiffs.
Once that wonderful scent comes forth, it is time to break out the immersion blender and grind everything up into a thick, brick red sauce. While running the blender, I leave the pot on the heat and allow the blender to stir it as I allow the sauce to reduce the final tiny bit; this ensures that while water boils away the sauce doesn't scortch and stick to the bottom of the pot.
It should be thick enough to coat the back of a spoon without dripping off immediately, as shown in the illustration above.
I ended up with a tiny bit more than a quart of sauce, which is enough for about four huge pans of enchiladas. If that is more than is needed, it is no hardship to freeze the leftovers; in fact, that allows me to make enchiladas in the future without having to take the time and trouble of making sauce. Colorado sauce is useful not only for enchiladas, however. It goes beautifully with huevos rancheros--"eggs, ranch-style" a classic border dish of two corn tortillas topped with red sauce and two over easy eggs served with cheese and refried beans. Tamale filling of shredded pork or beef is enriched by the use of this sauce, or one could use it as the base of a quick chili--just add shredded meat and beans.
At any rate, no matter what use one puts to it, this sauce beats the pants off of any jarred or canned enchilada sauce on the market, and if you have the appliances and the time, is well worth the effort of making.
 Sauce for Enchiladas Colorado
Ingredients:
2 quarts beef broth which has been enriched with 2 large caramelized onions, 5 cloves minced garlic, roasted tomatoes (about one pound of tomatoes, roasted, peeled and seeded) 2 bay leaves, 1 chipotle en adobo, a bottle of beer, a pinch of Mexican oregano and 1/2 teaspoon each ground cumin and coriander, in which beef for shredded beef filling has been cooked
3 ancho chiles
4 New Mexico chiles
1-2 chipotles en adobo
1/2 tablespoon whole cumin seeds
1/2 tablespoon whole coriander seeds
1/2 teaspoon black peppercorns
1 medium onion
4 large cloves garlic
2 red or orange sweet bell peppers
salt, to taste
Method:
Bring stock to a boil on medium heat, and allow to simmer uncovered to reduce while you prepare the rest of the ingredients. Keep an eye on the stock and stir now and then to keep it from sticking to the bottom of the pot.
Toast and soak chiles as directed above. Toast spices in a heavy bottomed small frying pan or saucepot, until they darken slightly and smell quite fragrant. Remove stems and some seeds from the chiles. Peel the onion, and cut into chunks. Load the chiles, spices, onion, and garlic into a blender, multi-grind or mortar and pestle, and process into a thick paste. (Even a Sumeet Multi-Grind will have some problems with the ancho chiles. Just cut it up into chunks first, and if it is more roughly ground, do not worry--the immersion blender will take care of that problem.)
Roast, skin and deseed the bell peppers as explained above. Cut into several pieces each.
When the beef stock is reduced by half, add the bell pepper pieces and the chile paste, and stir constantly. The chile paste will want to stick to itself, and will be difficult to dissolve into the stock. Keep working with it until the paste is evenly distributed into the simmering liquid.
Turn the heat down, and allow to simmer, stirring constantly until the stock is reduced by half. Using an immersion blender, puree the still simmering sauce, until it is completely smooth. Check consistency by dipping a table spoon into the sauce. If sauce coats the back of the spoon without sliding off easily, it is done. If it is still too thin, allow to reduce on the simmer further, stirring with the blender to keep the sauce from sticking.
Add salt to taste, and either use sauce immediately, hold it over 140 degrees for service, or cool down and refrigerate or freeze for future use.
Thursday, August 25, 2005
The Locavore's Bookshelf III: Coming Home To Eat
 Gary Paul Nabhan writes in the poetic phrases of a prophet, his words ringing with eloquent truth as he weaves myriad different threads of fact, memory, experience, statistic and dream into a complex narrative that is filled with the wild and domesticated flavors of the Sonoran desert.
Coming Home to Eat: The Pleasures and Politics of Local Food is ostensibly a book about a man who decided to take on the experiment to eat as locally as possible, with emphasis upon the wild, native foods of his Arizona home. And while generally, Nabhan does thematically stay with the subject of his experiences in trying to eat a majority of his diet locally with emphasis upon the traditional desert foods available in Arizona, his narrative does stray hither and yon, often going far afield on tangents that at first glance seem to lack relevance. However, as the reader plows forward, the threads that bind the seemingly tangential material to the central theme of the importance of a local, sustainable food supply come into sharp focus.
Eventually, the seeming mish mash of fact, statistic, memory and experience, come together into a tapestry that illustrates Nabhan's central point: "life," he asserts, " tastes good."
There are flaws in the book, to be certain. I found that there was a certain amount of romanticization of the past, particularly of hunter-gatherer ways of life, that I found to be irritating, especially when the author noted that he was being unreasonably idealistic about the realities of subsistence farming and hunter-gatherer societies, and yet continued in that vein anyway. He is an idealist, and somewhat obsessive in his quest for local foods, to the point where I found some of his actions to be distinctly-off putting.
He is also a pessimist, and much of his narrative focuses on the negative actions of the dominant society surrounding his attempts at eating locally and seasonally. His tales of land developer's greed and rapacious behavior in the Sonoran Desert are disheartening, and all-too based on fact, however, when contrasted with his very militant reaction to commercial foods which used the image of the Sonora--the saguaro cactus--to sell non-cactus related products, I found his guesture to be wasteful, childish and futile, which was profoundly sad. It accomplished nothing to help conserve the saguaro, and didn't even seem to make the author feel any better.
These jarring bits of storyline, however, do not erase the essential beauty of the tales told within the book. Nabhan is a born storyteller, and when he relates his and his brothers' journey to their ancestral home--a tiny village in the mountains of Lebanon, I found myself moved to tears as I experienced with him the joy of homecoming and the flavor of welcome. When he tells of his experiences gathering traditional desert foods such as the fruit of the saguaro and "sand food" with the O'odham, I was spellbound, eagerly savoring every word and phrase he crafted to evoke those memories.
In the end, I found that while Coming Home to Eat was certainly inspirational, it was less useful to me than Joan Dye Gussow's This Organic Life: Confessions of a Suburban Homesteader. Too many of Nabhan's experiences and tales were specific to one ecosystem--that of a desert which is unique in all of the world, while Gussow's experiences were more universally adaptable by anyone with the willingness to take up seed packet and spade, canning jar and drying rack.
That is not so say I regret having read the book, and feel that it serves no purpose. On the contrary, while I found myself at times more irritated by the author than charmed by him, I would not have missed the eloquence of his prose and the emotive strength of his narrative for any amount of money in the world. His writing is much more facile than Gussow's; his voice is tinged with the poetic authority of Annie Dillard and his ability to pull a reader into the immediacy of his tale is reminiscent of Barbara Kingsolver's works.
Coming Home to Eat is the kind of book for us food-obsessed folk to curl up with in a comfortable corner chair, something to savor in nibbles and gulps, while a pot on the stove bubbles merrily away, cooking up something hopefully local, fresh and delicious.
Wednesday, August 24, 2005
Cooling Down With Heat
 When it gets unbelieveably hot in August, sometimes the last thing I want to do is cook.
Often, the second-to-last thing I want to do is eat.
When I am sweaty and miserable, food is generally the last thing on my mind. The first thing on my mind is where I can find a nice cold body of water I can sit my sticky self into and never leave. Or, rather, not leave until October, when the temperatures decrease to the point where normal human beings can walk around in the sun without fainting.
Long August afternoons when the heat makes nothing sound appetizing call for stern measures in the kitchen. Cold dishes are the only cure for what ails the overheated cook. Minimal cooking times and equipment, the ability to utilize leftovers and whatever fresh produce lurks in the refrigerator, and light, snappy flavors that will stimulate a sluggish appetite are the lifesavers of the summer kitchen.
Hunan Cold Spicy Noodles fulfill each of these rather stringent requirements with ease.
You only need to cook the noodles, and you can do those ahead of time, in the dead of night, when the temperature has at least dropped five degrees or so.
You dirty only a few utensils--the pasta pot, a cleaver or knife, a cutting board, a bowl, a whisk or a jar, and your fingers.
Leftovers can make the noodles as plain or as fancy as you like, and the dish keeps perfectly in the refrigerator for whenever hunger strikes with a vengeance.
I learned this dish at the behest of a friend who fell in love with it at a very short-lived Chinese restaurant that opened up in Athens about ten years ago or so. Though the dish was served as an appetizer, it was what she ordered for lunch every day after she had walked downtown to attend classes at Ohio University, because it was the only thing she could consider eating after pounding the pavement in the insanely humid August weather.
After the little restaurant closed and we moved to Maryland, she beseeched me to figure out how to make "that nice Chinese noodle salad we used to eat."
I looked in cookbooks and found nothing, but going from my memory of how it tasted and her description, I came up with a recipe that is remarkably like the one in Henry Chung's Hunan Style Chinese Cookbook. In his cookbook, he gives a recipe for the dressing, which is the heart of the dish and instructs the cook to use it for cold, marinated summer salads such as are popular in the region of Hunan, which is apparently afflicted with long, humid, beastly hot summers like we have here in Southeastern Ohio. (I always assumed, since I couldn't find the recipe in any cookbooks that the name of the dish had little to do with Hunan province, and that it might have just been named that by the owners of the restaurant to sound trendy. However, I am happy to find out years later, that the recipe probably is pretty well authentically Hunan.)
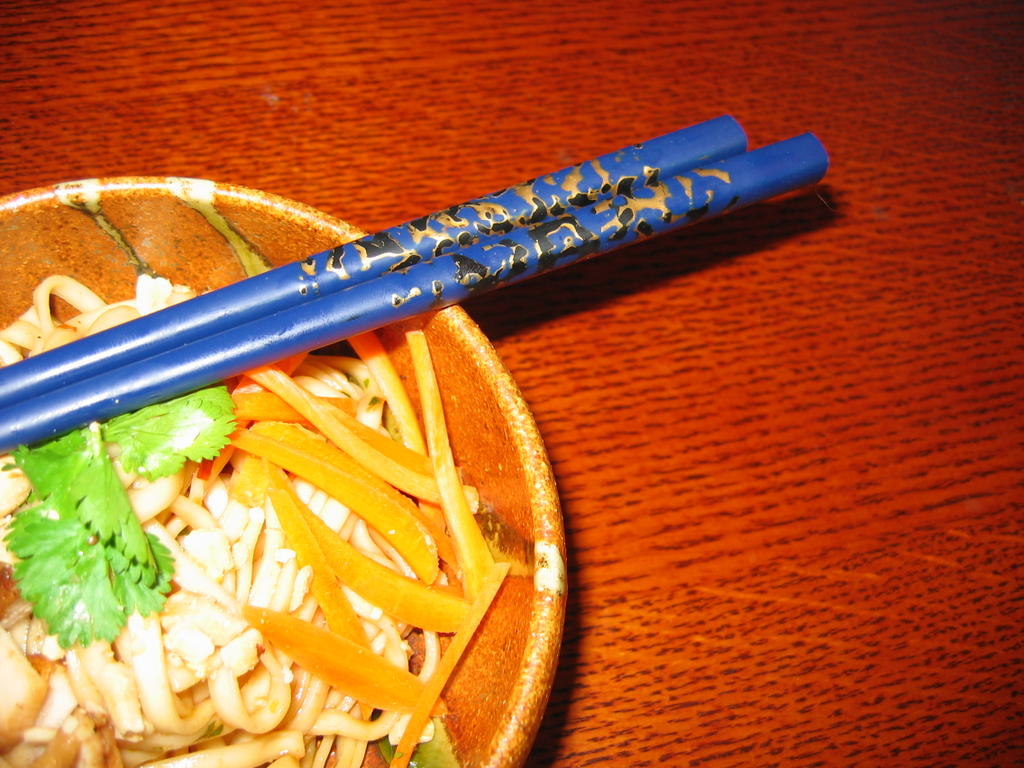
I made this salad for Morganna to take with her for lunch on her first day of school yesterday, and shredded up the leftover yakitori to add a bit of protein to the mix. I used carrots, too, but no cucumber, even though it is traditional. Morganna doesn't care for cucumber; she thinks it both feels and tastes funny, so I left it out and instead used extra cilantro and scallions, both of which she does like.
 Hunan Cold Spicy Noodles
Dressing Ingredients:
(I am giving these ingredients in proportions, rather than in specific measurements, so you can make as much or as little dressing as you need. It is a very forgiving recipe.)
1 part thin soy sauce
1/2 part Chinkiang vinegar
1/2 part white rice vinegar
1/4 part sesame oil
1/4 part sugar or honey(optional, or to taste)
1/4 part minced fresh ginger
1/4 part minced fresh garlic
1/4 part minced scallion
1/4 part minced cilantro
chile garlic paste to taste
black or white pepper to taste
Method:
Stick ingredients in a jar, screw cap on tightly and shake until combined.
Ingredients for Noodles:
Fresh or dried Chinese wheat noodles (I used Rossi Pasta linguine for this), cooked until al dente, rinsed in cold water and drained
1/2 teaspoon sesame oil
Shredded vegetables--about half as many in volume as you have noodles
Shredded cooked meat--optional
Big handful of fresh, coarsely chopped cilantro
1/4 cup coarsely crushed dry roasted peanuts (optional)
Method:
Put noodles in a bowl and toss (it is easiest to do this with clean hands) with sesame oil to make certain that the noodles do not stick together.
Add dressing, and toss until noodles are completely coated with dressing.
Put into serving bowl, and arrange shredded vegetables and meat prettily on top, then sprinkle with chopped cilantro and if using, peanuts. Cover and chill until service.
Toss just before serving to combine.
Tuesday, August 23, 2005
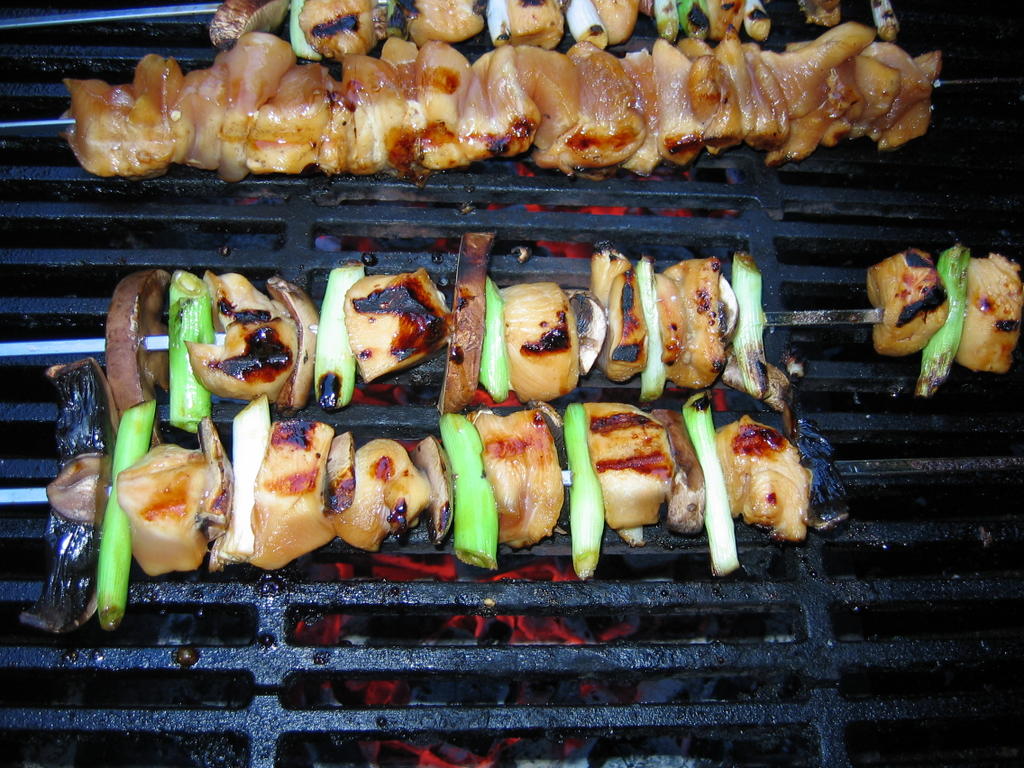
Yakitori: The Zen of Grilled Chicken
 Simplicity of preparation and beautiful presentation are hallmarks of Japanese cookery. A perfectly composed meal should be a gustatory poem or a painting meant to be appreciated with all five senses, instead of just one or two.
The sense of smell is engaged by the delicious odors of the cleanly prepared ingredients, carefully enhanced by a minimum of extraneous flavors. The sense of sight is rewarded with the use of contrasting colors within the ingredients and the serving pieces themselves. Hearing is delighted by the sounds of cookery in process: the sizzle of of a bit of meat touching a hot grill or the whisper of simmering stock both bring joy to the ear of an appreciative diner. The sense of touch is never forgotten by the careful Japanese cook; every dish or meal should have a contrast in texture present in some form.
Taste, of course, is paramount, and the Japanese philosophy of the freshest ingredients cooked or presented simply shows the seminal essence of kitchen Zen. Foods should taste naturally good, with minimal enhancements utilized, not to hide the flavor of the main ingredient, but rather to bring forth the fullness of its true nature.
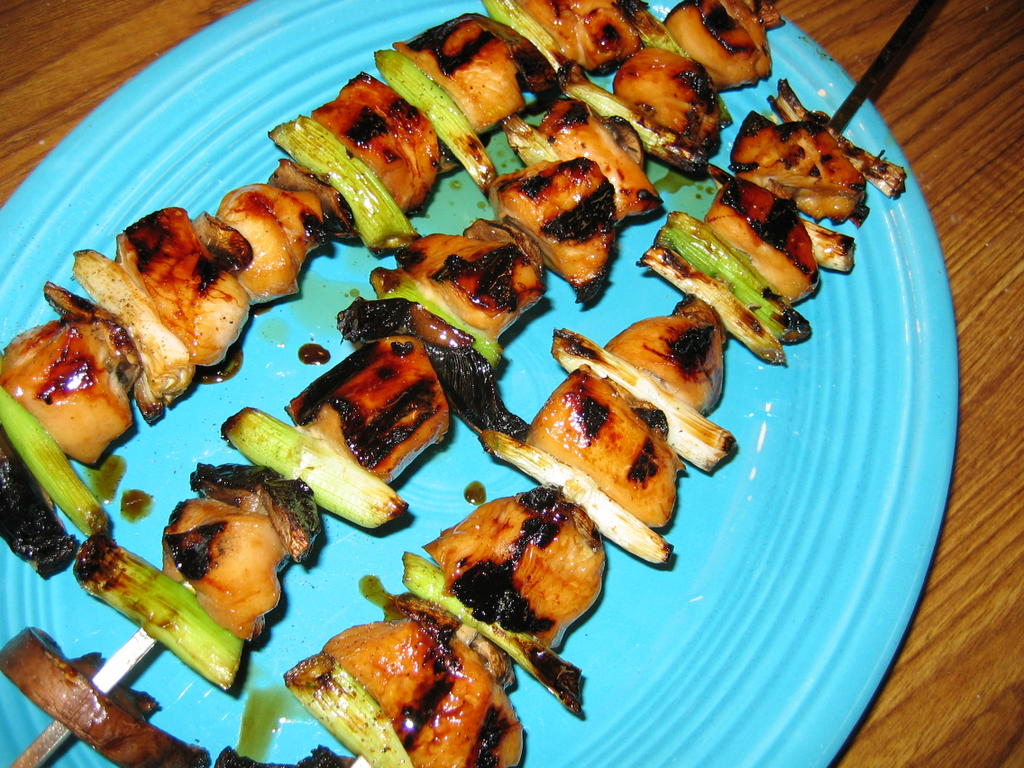
Yakitori, chicken bits threaded on skewers and grilled, is a dish which illustrates the principles of Japanese cookery perfectly. Small cubes of chicken meat are marinated in a sauce that contains sake, mirin, sugar of some derivation, soy sauce and sometimes chicken broth, then threaded on soaked bamboo skewers with or without vegetables. Then, they are grilled over high heat and basted with the sauce, until the outside is golden brown marked with charred strips where the hot grill seared the chicken meat. The interior should be just barely done in order to preserve the moistness of the meat and to provide a contrast between the juicy, tender meat in the center and the sweet, toothsome gold and black outer crust.
Overjoyed to find that Canaan Farms Chicken once more had fresh chicken breasts for sale at the Farmer's Market, I decided to make yakitori to go with the edamame.
So I picked up some scallions and after finding some leftover portobella slices in the refrigerator, decided to add mushrooms to the skewers.
Although it is traditional to use bamboo for skewering the meat, I went ahead and used the metal skewers I had instead. For one thing, you have to soak bamboo skewers, and I had no intention of doing that; for another thing, one generally discards of bamboo skewers after using them once, a practice which I find to be utterly wasteful.
Having made and eaten yakitori made with the bamboo skewers before, when I compared them to the ones put on the metal skewers, I found no discernable difference between the two types of skewers in practice. I guess that since yakitori started out primarily as a street stall food, eaten by patrons on the run, it made sense to use bamboo skewers for portability and ease of disposal; having a patron walk away with a skewer one was intending to throw out is not tragic.
Having someone walk off with your metal skewer, on the other hand, is not only expensive, but is an invitation to any number of possible accidental blood-spillings.
However, unless one intends to open up a yakitori stand on the corner, I suggest you use metal skewers, if you have them. If you don't, but you grill a lot, go out and get some. They last forever, and in a pinch, the two and a half foot-long ones I have with wooden handles can be used as fencing foils.
 Chicken Yakitori
Sauce Ingredients:
1 1/2 cup sake
1/2 cup mirin
1/4 cup honey (I used local wildflower honey sublty flavored with pure lemon oil)
2 cups dark Japanese soy sauce
1 tablespoon tamari soy sauce
1/8 cup chicken broth
Further Ingredients:
1 whole chicken breast, boned, skinned and cut into 1" cubes
1 bunch scallions, washed, trimmed and cut into 1" lengths
1 large portobella mushroom, stem removed and cut into 1/2" thick slices, each slice cut into half lengthwise
1 teaspoon sesame oil
Method:
In a saucepan, mix together sauce ingredients over medium heat. Bring to a boil, and turn down to a simmer--cook until mixture reduces by about 1/4. Cool to about room temperature, and add chicken, scallions and mushrooms.
Allow to marinate at least three hours or so. Overnight would probably be even better.
Thread chicken and vegetables, alternating, on skewers of choice; if you use bamboo skewers, be certain to soak them in water to cover for at least three hours, preferably overnight. Reserve marinade.
Bring marinade back to a boil and allow to boil vigorously for about two minutes, in order to kill any bacteria that may have been introduced to the mixture by the chicken.
Grill skewers over high heat, basting with boiled marinade and turning frequently, until chicken has firmed up and is streaked with golden brown and black, and the mushrooms and scallions have blackened considerably.
Drizzle with sesame oil.
Serve immediately, on the skewers or off.
Note:
Leftovers can be saved and utilized in cold dishes like grilled chicken salads or Cold Hunan Spicy Noodles.
If you like dark meat, boned and skinned chicken thighs and legs can be cut into chunks and used to great effect in this recipe, as these pieces are naturally more juicy than breast meat.
Be certain that you do not overcook the chicken pieces. Check them for firm texture (when you poke it with a finger, the surface "springs back") often. If they are the tiniest bit soft, but golden and black on the outside, take them off anyway--they will continue cooking off heat in their own retained heat for several minutes, and if you wait until they are perfectly firm, they will likely overcook.
Monday, August 22, 2005
Edamame: They're Fuzzy
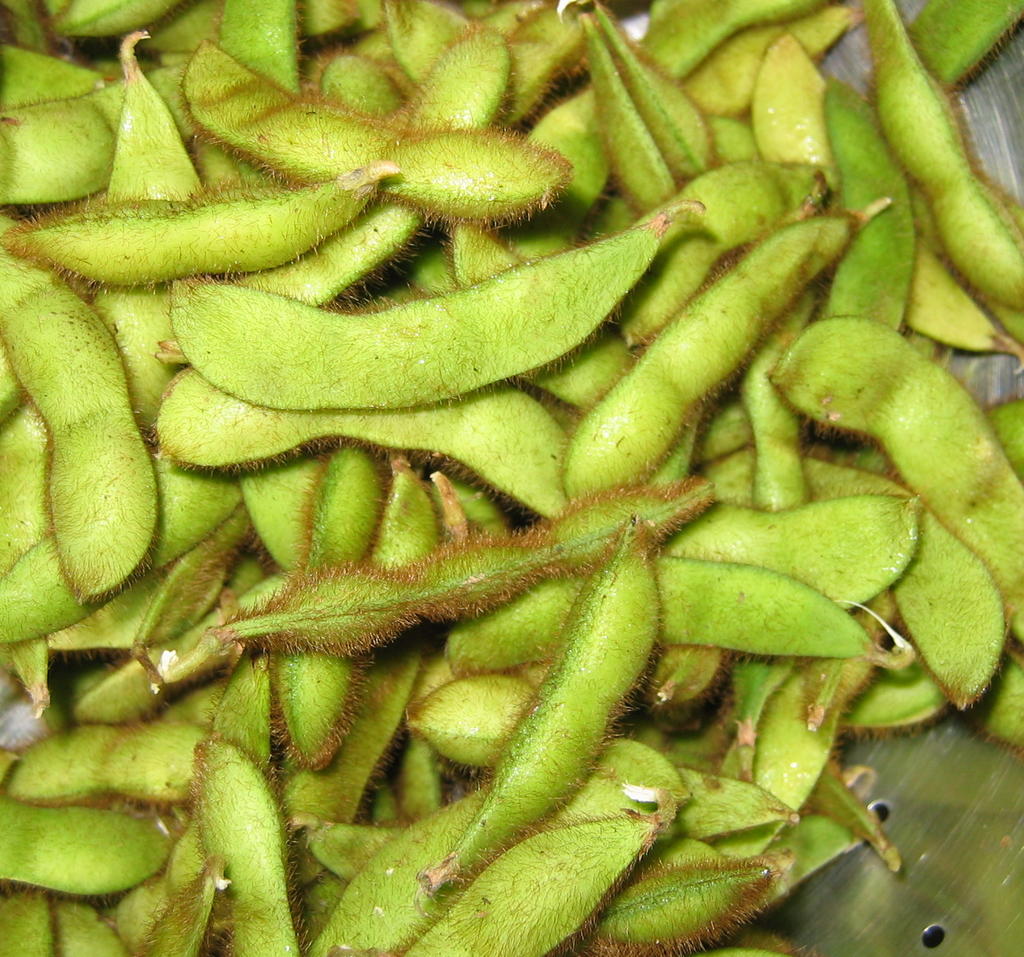 For all that I adore Asian foods and teach Asian cooking, I don't often cook or eat Japanese food.
I am not quite certain why that is--I do like most Japanese foods, but I simply do not have as much experience with them, nor have I made a large study of them over the years, as I have with Chinese, Thai and Indian cuisnes.
Sushi is divine, and miso soup is comforting.
However, if I were to choose a single Japanese dish to call my favorite, it would have to be boiled edamame with salt and lemon.
I love it even better than tuna or salmon sashimi; for anyone who knows me and has eaten sushi with me, this admission should speak volumes. I have often stated, after having gobbled down an immoderate amount of raw salmon, that I hope in my next life I come back as a grizzly bear, so that I can gorge myself on fresh raw salmon caught between my own paws.
The fact that I like edamame even better than the king of fish is amazing.
 For those who have never had them, edamame are fresh soybeans. They come in wiry, tough pods that are covered in russet fuzz, with one to three beans packed tightly in their unappetizing jackets.
They are eaten as appetizers in sushi bars, simply boiled and salted, the more coarse salt the better, where edamame serve the same function that peanuts do in American bars--they are meant to make the patron thirsty, so that more alcohol is consumed.
One sushi bar I have been to throws lemon peel into the boiling water so that the pods and beans are gently infused with lemon oil, adding just a hint of complexity to the utterly sublime simplicity of the classic Japanese summer dish. I also like to squeeze fresh lemon juice over the pods before eating them; the citrus tang brings out the nutty flavor of the verdant beans.
I had never cooked them before, but when I found out that my CSA harvested some on Saturday, of course I had to take some. Canaan Hills Farms also had freshly slaughtered chicken, so I determined to pair the edamame with chicken yakitori (more on that tomorrow) and fresh grilled corn on the cob for an easy summer supper.
Of course, since I had never cooked them, I had to read up on them, so I dragged out the Japanese cookbook Morganna picked out for me when she was only eleven, The Japanese Kitchen: 250 Recipes in a Traditional Spirit, by Hiroko Shimbo, and started reading. Hiroko swore that one could remove the five o'clock shadow from the edamame pods by rubbing them between your palms with coarse salt. I had kosher salt in the kitchen, and so decided to give it go, but I found, that unless one is willing to give each pod individual attention, the salt thing doesn't do much in the de-fuzzing arena.
Some fuzz was removed, to be certain, as evidenced by the amount I rinsed down the drain before popping them into the boiling water, but nowhere near all of it was gone. A majority of the wee beans still had that rakish, unshaven look after my ministrations, such that I wondered what the point of wasting the salt had been.
More fuzz was removed by the boiling process itself, than by the rubbing, unless it was a combination of the two actions which resulted in the fur removal. Zak helpfully suggested Nair, however, I declined to attempt such an experiment.
After rubbing the pods with salt, the rest of the cooking operation was simplicity itself. Bring a pot of water to a rolling boil, toss in the edamame (You can add a lemon slice or some lemon zest or peel to the cooking water), and boil for 3-5 minutes. I opted for cooking them for 4 minutes, but upon tasting them, should have gone for 5 or 6; they were just a shade too crunchy for my taste.
When the timer goes off, drain them and rinse them in hot water, then pour them onto a baking sheet that has been lined with paper towels, or a cotton kitchen towel, to dry. Once they are dry, sprinkle liberal amounts of coarse salt over them, and toss them.
And so, for those who have never had edamame--I bet you are wondering how one eats them?
This is the fun part.
You pick them up with your fingers and bring them close to your lips, then squeeze gently from the bottom of the pod to pop the plump beans into your mouth. Or, you can be refined and use chopsticks, and instead of popping them into your mouth, use your teeth to scrape them free of the pods. If you use the chopsticks method, however, know that you will be dealing with the fuzz factor.
I say dive in with your fingers and have fun with it. Make a game of it, and while you are playing with your food, remember that edamame are not only a hoot to eat, but are nutritional powerhouses that are filled with anti-oxidants, protein, A and B vitamins and a reasonable amount of vitamin C.
It is rare for a food item to taste good, be fun to eat and on top of it all, be good for you--for this reason alone, I hope to find more people jumping on the edamame bandwagon and eating them as a summer treat when they come into season.
Saturday, August 20, 2005
Weekend Cat Blogging: Emergency Kitten Bath
 Thursday night, we were sitting about watching a movie, when Indrid popped up on the couch, soaking wet, and smelling rather--unappetizing.
Someone, namely, Indrid's person, had forgotten to close the lid on the toilet, and while it had been flushed, it is still a toilet and thus doesn't smell minty fresh, and the little bugger fell in.
So, he had to have a bath.
I had Morganna done her leather jacket, and I put mine on, zipping them up to our necks.
Cat-bathing is something that requires armor, you know.
They really do not appreciate water.
 So, there we were, looking rather like two biker chicks, picking on a poor innocent kitten, as we dunked him in the bathroom sink.
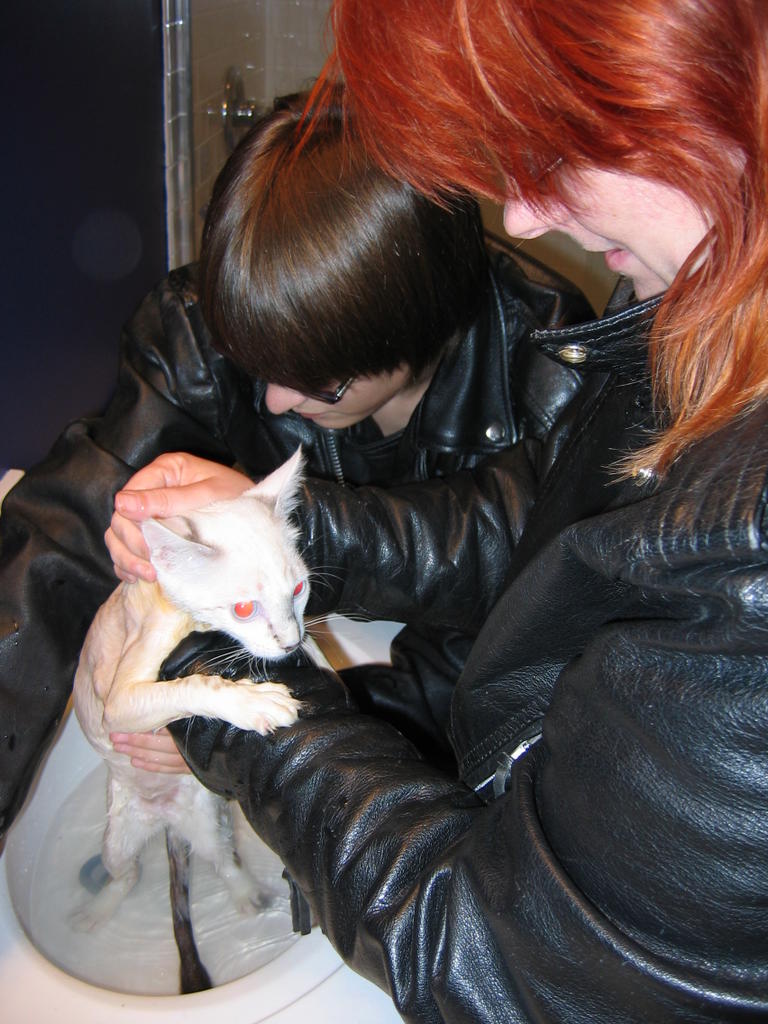 He was amazingly well behaved, considering that we were doing all sorts of awful things to his wee personage. I am glad to report, that although, after the ordeal, he huddled and shivered in a towel for about ten minutes, he is now fine, and is suffering no noticeable ill effects.
Thursday, August 18, 2005
Simplicity from the Earth
 For all that I love to make Asian foods, sometimes, I crave the plain comfort of country foods cooked simply.
Last night was one of those times.
Zak grilled bratwursts, and while those were cooking, I put a pot of some tiny Russian Banana fingerling potatoes on to boil in thier skins.
When I was a girl, my grandpa would dig up the very first potatoes in early June, just in time for the garden pea harvest, and we'd feast on creamed new potatoes and baby peas. He always grew Kennebecs, and when they were tiny--no bigger than a jawbreaker--their skins were so thin and tender you could rub them off with your thumb while washing the dirt off if you weren't careful. They were sweet, too, and waxy, though when they were mature, the potatoes had the drier starch characteristic of the Kennebecs. They paired perfectly with baby peas and spring onions in a light cream sauce, and it was a treat we waited all year for.
Fingerlings are a type of potato that are grown to be harvested immature, and I was thrilled to find out that my CSA grows my favorite type--Russian Banana. They tend to grow peanut-shaped, with russet-brown skins and a nutty-sweet waxy interior. I fell in love with them when I first started getting the at the North Market in Columbus, because they are simplicty itself to cook and they go with everything.
When I opened the cabinet I had stored the ones from the CSA in, I was greeted with the dark scent of the earth they were grown in, and as I scrubbed them, the delicious odor called to mind the feel of red clay soil warm beneath my feet and and dry against my fingers as I carefully dug up baby potatoes by hand, so as to not disturb the roots of the plant, so that the remaining potatoes would grow and become large enough to harvest in the fall.
I typically boil them in salted water until they are tender. Thier skins are tender enough to eat, but not so fragile that boiling them will make them crack and burst--they have a bite to them under the teeth, and if you have some tiny enough to leave whole, they will pop when you chew them with a satisfying "snick!"
After they are tender, I drain and rinse them, then cut them into halves longways. I let them dry, then heat olive oil in a skillet--maybe a tablespoon and a half or so, and then, throw in some minced garlic--usually about three cloves or so. I let it turn golden, then add the potatoes, cut side down, and let them soak up the garlic-scented oil. I sprinkle thier backs with salt and freshly ground pepper, and then turn them over, and watch to make sure that the potatoes crisp slightly and the garlic turns nut-brown, but doesn't burn.
In the last couple of minutes of cooking, I sprinkle over it all freshly minced herbs--last night, I used thyme, rosemary, oregano and chives. I have used basil in the past, cilantro, mint or dill. All of them are good, and they all add incredible flavor to the little nuggets that smell and taste of the fine soil they were grown in.
Then, we eat them, and we seldom have any left over, they are so good. But if there are any leftovers, they are good as a salad the next day.
There are variants, of course. Sometimes I brown a thinly sliced shallot with the garlic, and sometimes I add a chile pepper. But that is basically the dish--I don't complicate it overmuch, because the focus of it is the delicious little potatoes themselves.
Every time I eat fingerlings or new potatoes, I always think of my Grandpa, and how he would say that potatoes shouldn't be made into anything fancy. "They should taste of the good earth itself," he'd say, "So don't put too much weird stuff in them."
While others in my family thought me strange for liking to eat them raw, straight from the ground, Grandpa understood. "They are full of goodness right from the dirt," he'd say. "And they are good for you--don't let anyone tell you different. They don't make you fat. All that butter and sour cream people heap on them makes them fat. Just give me a potato baked or boiled with just some salt and pepper and a little butter, and that is the best meal the ground ever gave me."
Wise words from a wise man.
Wednesday, August 17, 2005
Food in the News
 I just happened to notice a few news items this week, and thought I would share them with the readers out there in foodblogland.
First Lady Picks First Woman Chef
Laura Bush has chosen a woman to be the new White House Executive Chef. Cristeta Comerford, a naturalized citizen from the Philippines, was promoted to the position of executive chef from within the staff of former Executive Chef Walter Scheib III, who as her mentor, was thrilled to see his protege step into his place.
While Women Chefs and Restauranteurs might smugly take some credit for the appointment of the first female White House chef, since they sent a letter to the First Lady, asking that she hire a female chef to serve as a role model to women in the culinary arts, none of the women suggested by the organization were interested in the position, which pays much less than top chefs can make working in the private sector.
But, hey--as far as I am concerned--it is still a reason to celebrate. Besides, the new chef lives with her family in my old neighborhood--Columbia, Maryland, so I feel like I am celebrating the success of one of my neighbors.
Vat-Grown Meat A Closer Possibility
Remember that little article I linked to in my "Meat Comes From Animals: Deal With it Or Eat Vegetables" rant that was about growing meat from cloned cells in a laboratory?
Well, the same researchers are in the news again, because of a paper they recently published in the journal, Tissue Engineering (sounds like scintillating reading, doesn't it?), and this time, the story isn't just being reported by a few outlets. It is being picked up here, there, and everywhere, with reporters putting the spin on whether or not this will pose an ethical dilimma for vegetarians.
If no animal died to produce it, is it still a bad thing to eat meat?
While the idea of vat-growing meat doesn't gross me out like it does some people, I noticed that what they are talking about growing at this time are only processed meats like chicken nuggets and hamburgers.
I don't eat chicken nuggets now, and I am not likely to start, just because they are grown in a lab without harming any chickens. This is mainly because I am pretty sure that most modern chicken nuggets didn't start out as chicken either. Maybe the things they sell at McDonald's and the frozen foods aisles came from alien pods from outer space, but I really don't think they taste like chicken.
On the other hand, the researchers point out that vat-grown meat will be guaranteed to be free of disease, something which segues nicely into my final news flash.
Note: No animals were harmed in the writing of this post.
More Mad Cow Madness
Maybe I will eat vat-grown hamburgers after all, so long as they do it my way: hold the pickles, lettuce and BSE.
Bloomburg reported a few dismaying facts yesterday gathered from the US Department of Agriculture: "U.S. government inspectors cited meatpackers more than 1,000 times over a 17-month period for violating rules concerning the removal of tissue associated with mad cow disease, the U.S. Department of Agriculture said.
Some 1,036 ``non-compliance'' reports covering the January 2004-May 2005 period were released, the USDA said. The reports document instances of meatpackers failing to properly remove ``specified risk materials'' or SRMs-- brains, spinal cord tissue and other tissues that scientists say harbor the disease."
Okay, Maybe dismaying isn't a strong enough word here. How about I use "horrifying" instead?
Oh, but there is no need for alarm. We are assured by Lisa Wallenda Picard, a spokesperson for the USDA's Food Safety and Inspection Service that "no specified risk materials got into the food supply."
Right. I am so sure. This comes from the same USDA that has been a poster child for potentially lethal beaurocratic incompetence.
Why exactly, I ask, should we trust anything that the USDA has to say on the issue of BSE? The entire situation has been bungled from the beginning, and the USDA rules appear to be made more for the cattle industry's benefit than to actually ensure the safety of the US food supply.
This issue is enough to keep me committed to eating food grown locally by people I know and trust.
And, on this uplifting note, thus ends our first installment of Food in the News.
Tuesday, August 16, 2005
Cooling Dishes for Hot August Nights
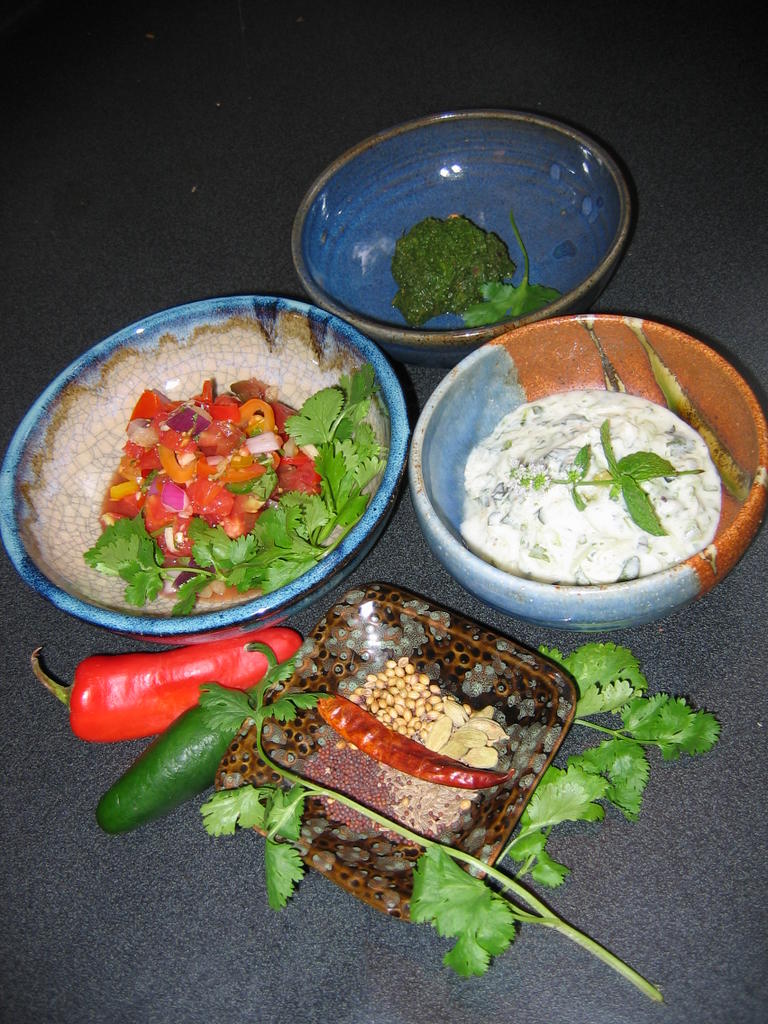 Cold dishes are an important part of the cuisines of the Indian subcontinent. Not only are they served chilled or at room temperature to contrast with the dishes which are served warm or hot; they often contain herbs and vegetables that are considered to be cooling to the human constitution, and so are considered as a necessity to help relieve the extreme summer temperatures.
When it is ninety-something degrees outside and humid here in Ohio, I cannot help but agree with the traditional views of Indian cooks that a cold dish is a necessity to cool the body and soul.
As I mentioned yesterday, several types of cold dishes are typically served at most Indian meals. Salads, which can be as simple as some sliced melons with no dressing, or as complex as a composed salad of disparate ingredients arranged beautifully on a platter, are considered a necessity by most Indian families, and when I worked for a few Indian families as a personal chef, I found myself becoming very creative in my salad making endeavors. My favorite one is pictured on the left side of the photograph above; it is a tomato salad that is akin to a very chunky fresh chutney, but it is meant to be eaten separately as a salad. This version is cooled with ginger and, sweet peppers and lime juice, and heated with spices and thinly sliced chile peppers. I use ingredients of many different colors and textures--coontrast of all sorts is important in Indian cookery.
Raita, which is a dish based on yogurt, is particularly of importance to vegetarians in India. Many of them eat meals of dal, (a lentil or bean-based dish), grain in the form of wheat bread or rice, raita and pickles, as their every day fare, and the combination is both highly flavorful and nutritious. There are probably as many versions of raita as there are families in India; it is quite possible to eat a different type of it every day and not run out of variations or get bored with the flavors.
This particular version of raita is fairly commonly found in Indian restaurants in the USA; it contains a great combination of cooling ingredients: cucumber, mint and cilantro, contrasted with the warm muskiness of cumin. It is so simple to make I often make a quart of it at the beginning of the week and eat it as a snack during the day or as part of breakfast, particularly in the dog days of summer when it is hard to excite myself over eating anything.
Chutneys and pickles are the third group of cold dishes that are big necessities on the Indian table. A chutney can be one of two different types--a cooked, preserved sort of condiment, or a condiment that is freshly made and eaten quickly, often the very day that it was made. (Pickles are an entirely different thing and deserve their own post; I will describe them in the future when I get around to making my own lime pickles.)
I like the interesting flavors of preserved chutneys quite well, but I prefer the zingy flavors and crisp textures of freshly made chutneys that are eaten while "young." My very favorite of them all is green chutney, which is primarily made from minced or ground up cilantro, though it is often paired with wildly cooling mint. In our house, Zak and I simply call it "Green." As in, "Honey, can you pass the green?" I always make extra of it, because I can find any number of uses for it during the week or so it survives in the refrigerator.
In fact, I find that keeping some of these cold dishes around for a while helps me with the enduring dilimma of what is for lunch or breakfast when the mercury climbs into the stratosphere at the end of summer. Conviently enough, that time is also the peak for all of the various vegetables and fruits which are main ingredients in these dishes.
Here are some recipes to get you started on making a truly complete Indian meal.
 Sari Silk Tomato Salad
Ingredients:
2 pounds fresh, ripe tomatoes (I like to use heirlooms of various colors--here we have Mortgage Lifter and Cherokee Purple), cored and diced macedoine
1/2" cube fresh ginger, minced
2 garlic cloves, peeled and minced
1 small red onion, diced finely
2 medium hot chile peppers, preferably yellow or red, sliced thinly
1/2 small sweet bell pepper, preferably purple or brown in color, diced finely
1 teaspoon cumin seeds, toasted and finely ground
1 teaspoon coriander seeds, toasted and finely ground
1 teaspoon mustard seeds, toasted and finely ground
1 handful fresh cilantro, roughly chopped
salt to taste
juice of 1/2 lime
Method:
Mix together all ingredients, making sure to save as much juice from the tomatoes as possible when cutting them. Scrape the cutting board down into the mixing bowl. Chill completely, and present in a bowl lined with either lettuce leaves or cilantro.
Note:
You can remove the seeds of the chiles, if you want to lesson the heat, but I find it is more sporting to leave them in. Food shouldn't all be comfortable and safe, you know. There is always room for surprise.)
In order to toast the spices, put them in a small heavy bottomed frying pan (I use a tiny Le Creuset pan) and heat on medium, shaking all the while. They are ready when the cumin and coriander darken and release their scents and the mustard seeds turn from brown to grey and begin to pop.
I call it Sari Silk Tomato Salad because of the smooth texture of the very ripe tomatoes and the vibrant mixture of colors in the dish; they recall to me the particularly vivid colors of summer silk saris I have seen.
 Cucumber Mint Chutney
Ingredients:
1 quart whole milk or lowfat yogurt (don't use nonfat, please--or, if you do, don't tell me about it!)
3 medium cucumbers, peeled, halved and seeded
1 small tomato, cored and cut into a very fine dice (I used a Green Zebra for this version)
1 1/2 cups packed spearmint leaves, minced finely
1 cup cilantro leaves, minced finely
2 teaspoons cumin seeds, toasted
Salt to taste
Method:
Put yogurt in a medium bowl, and whisk until well smoothed.
Using the large holes on a box grater or in a food processor grating attachment, grate the cucumbers. Squeeze out excess water, and add flesh to yogurt.
Add all other ingredients, and stir until well combined.
Refrigerate for at least four hours before eating so that the flavors can blend, or up to a day or two before serving.
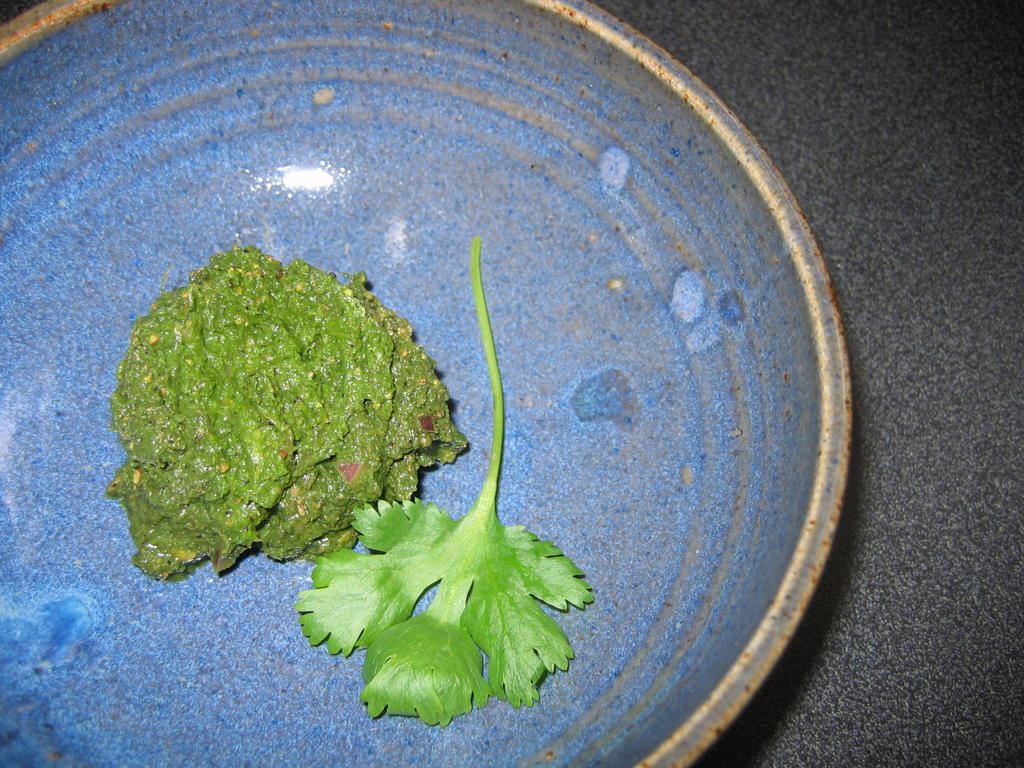 Fresh Green
Ingredients:
2 cups cilantro leaves and stems, washed and dried
1 cup mint leaves, washed and dried
1/2 small white onion
seeds from one cardamom pod
1/4 teaspoon white or black peppercorns
salt to taste
juice from one lime
1 1/2 tablespoons finely diced red onion
Method:
Pack all ingredients except last three in a Sumeet grinder or blender, and grind into a fine paste.(If you use the blender, add the lime juice and/or some yogurt to help liquify the other ingredients.) Add last three ingredients, and allow to sit at room temperature for about two hours, then cover and refrigerate until quite cold before serving.
Note:
This is particularly good with Chappli Kebab or Seekh Kebab, but is also good to dip pappadum or vegetable samosas.
Local Tofu?
 Regular readers might remember that I like tofu, and made it one of my exceptions when it came to this month's local eating challenge.
Every kind of tofuI have found that I like comes from California. And I really didn't want to go without tofu for an entire month. So, I decided that, like rice, coffee, chocolate and Asian ingredients like soy sauce and fish sauce, I would make an exception for tofu.
Except, I discovered today, that I don't have to do that.
I found tofu that is made seventy-five miles away from where I live in Athens, Ohio out of organically grown soybeans from Mt. Vernon, Ohio.
Spring Creek Natural Foods Tofu has been made in the little town of Spencer, West Virginia for the past twenty-five years. It started as a worker-owned business back in the 1970's when some hippies who came from some unspecified "big cities" to live off the rich farmland of Roane County, West Virginia. They found that they couldn't make a living farming, so decided to take up selling the really good tofu they made by hand in thier kitchen.
And then the business grew, and they have a facility that has employed up to seventeen people, all of them locals. They supply tofu to the socially conscious students in the dining halls of Oberlin College, and just last year, they won the Green Entrepeneur Award presented by the West Virginia Environmental Council. Apparently, they have fans as far aways at the tofu-loving California, who swear that they cannot find finer soy products than those produced by Spring Creek.
 Apparently, late last year, the company suffered some setbacks in the form of equipment failure and damage, and had to close down operations and lay off workers while repairs were made. After months of work, the facility just started production again this week, apparently, in enough time to send a shipment out to the local Kroger's store here in Athens.
I have to say, I agree with the fan in California who swears it is the best tofu he's ever eaten. I tasted a cube of it raw while I was cutting it up, and I was pleased with the texture, which is firm, with a definate chew, but not mealy or gummy. When tasted alone, it had a bit of a tang, almost as if it was slightly fermented, but mostly, it had the clean, somewhat sweet flavor of soybeans.
Needless to say, I will be buying this product again; not only am I supporting a local food manufacterer; I am also supporting a local organic soybean grower.
And, on top of it all--it tastes better than any other tofu I have eaten.
You can't beat that.
Monday, August 15, 2005
Feasting Indian-Style
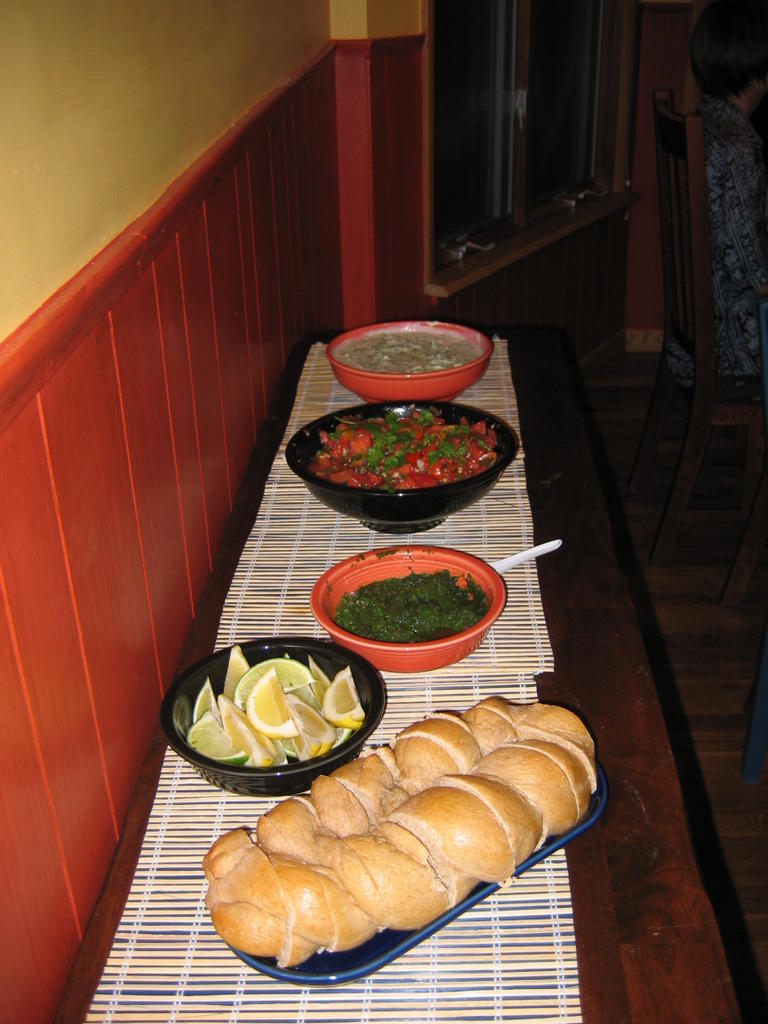 Saturday was a flurry of shopping, visiting, cooking, eating, laughing, and some more eating after that.
We celebrated the return of our friend Heather, to the US after spending the summer at a university in Beirut, learning Arabic in an intensive language course. We also celebrated Morganna's homecoming as well; she has officially moved into our home from her father's, and will be starting school here in Ohio in the fall.
Heather asked, through Dan, before she made it home, that I cook either Indian or Chinese and something spicy, as she found Lebanese food, while delicious and satisfying, to be less spicy than she preferred.
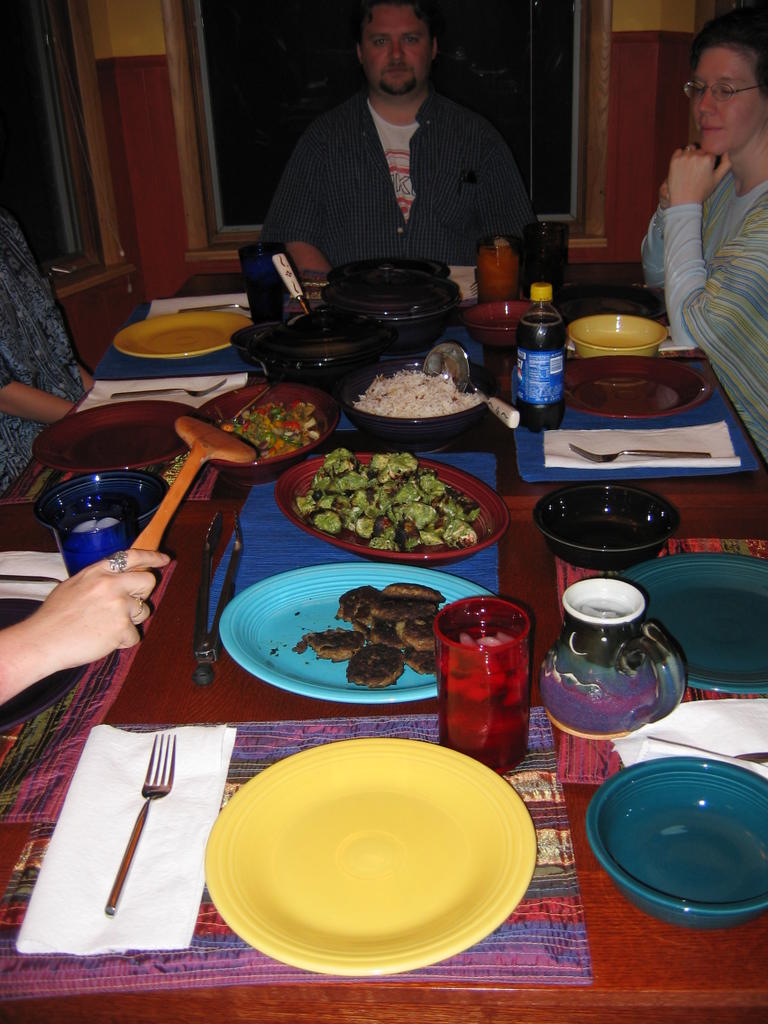 I was happy to comply, and chose to make Indian food, since it is simpler to do in the format of a feast situation for a moderately large dinner party, and because I could cook so much of it ahead and have it only improve from sitting about, pre-cooked.
Let me talk a bit about the structure of a typical Northern Indian dinner; everything I prepared for the celebratory feast was from the culinary traditions of the northern parts of the Indian subcontinent. In large part, that is because most of my exposure to Indian foods has come about from my interactions in Indian restaurants in the states, most of which serve Northern Indian cuisine, and also because my Indian friends and clients have all been northerners.
Indian meals are built around a grain product; either rice or some sort of bread. Sometimes both are served at a meal, but that is rare. I broke with tradition and served both a basmati rice pillau with golden raisins and almonds, and some bread, which was an even larger break with tradition, it being challah, a Jewish braided egg-bread, as opposed to naan, chapati or roti. I just happened to have a piece of very excellent bread from a local bakery pressed into my hands to try at the farmer's market and decided to take some home, determining it would mean that I didn't have to bake, griddle or fry any bread for that night.
There is nearly always a dal, or legume dish on the menu of a typical Indian meal. I once again broke from tradition by not featuring any bean or lentil based dishes, in large part, because I had a lot of fresh vegetables to use up in the meal and I wanted to make sure and use them in preference to any dried beans. If I had a few more diners coming, I would have presented either channa masala or perhaps some variant on my beloved masoor dal tarka. (I adore that dish.)
Various vegetable dishes are also served. On Saturday, because of the abundance of local eggplant I had (Somewhere along the lines of about a dozen), I decided on baigan bartha; I had just picked up a quart of blue new potatoes from our CSA, so I served saag aloo. (Besides, Tom--pictured at the head of the table-- was coming, and since the only Indian food he has eaten has been what I have cooked and he adored saag aloo so much the first time he had it, I wanted to serve it again just for him.)
Then, there are the cold dishes--accompianments. A lot of Americans will leave these dishes out, but while at the market, I had mentioned I was cooking Indian food to a woman who is married to a wonderful man from the subcontinent, and that was the second question she asked me--what cold salads was I serving?
Raita is a natural; it is a yogurt based dish that can be used as a sauce with a main course, as an appetizer, a soup, a side dish, or for a light breakfast or lunch. I served a cucumber, tomato and mint raita made with whole milk yogurt, though I am also partial to potato raitas as well. I just thought that a second potato dish would be too much.
I also served a fresh tomato salad and utilized the lovely, richly flavored heirloom tomatoes which have weighed down my market bags recently. I love Indian salads; they are an excercise in contrasting flavors, colors and textures, and they are so refreshing when eaten next to warm dishes or eaten along with meats.
Finally, I also presented green chutney, which is a finely ground mixture of cilantro, onion, mint, spices and lemon juice, to which I added finely diced red onion for a contrast in color and texture.
The meat dishes, which are not necessary to a balanced Indian meal if a dal is served, were three very different than the usual sauce-laden meat curries. I served the sindhi murgh elaichi--green tandoori style chicken-- which I served at the dinner where we said goodbye to Heather earlier this summer, which allowed us to use the charcoal grill to cook outside, thus reducing the heat of the kitchen to some extent. Also cooked on the grill were chappli kebab, a minced lamb patty that I first read about in Madhur Jaffrey's little book, Quick and Easy Indian Cooking. Finally, I used cubes of lamb shoulder meat to make bohti gosht--which translates as "meat cubes." Another dish I first learned from that same Madhur Jaffrey book, but which, over the years, I have changed to suit my own taste. It is cooked in the pressure cooker, and results in very moist, tender unsauced meat where the spice paste clings tightly to the cubes.
 Chappli kebab, I am told, both by the text in the afformentioned book, and by Pakistani friends, is a specialty of the Pakistani city of Peshwar. It is delicious served wrapped in flatbread with some lettuce salad or tomato salad, and topped with green chutney. The original recipe, and the way I made it for my clients, is very, very spicy, with sliced chiles peppering the meat patties throughout; this version is toned down a bit to allow for the differences in heat tolerance among my friends. I also ground up the chile so the flavor was intense throughout the meat. I also had Zak grill them instead of frying them in oil; it cuts down on fat and it adds a delicious smokiness to the meat that is very enticing.
It is a simple dish which is perfect for a dinner after a busy day; you can prepare the spiced meat the day before or that morning and shape and cook the patties that night, either in an oiled pan on on the grill.
Chappli Kebab
Ingredients:
2 tablespoons chickpea flour (called gram or besan at the Indian market)
1 pound finely ground lamb
1/4 cup finely chopped cilantro
1 fresh Thai bird chile., stem removed
1 1/2 teaspoons cumin seeds, toasted
1 1/2 teaspoons coriander seeds, toasted
1 teaspoon white peppercorns
contents of one green cardamom pod, husk removed
1 teaspoon salt
1 small lightly beaten egg
Method:
Put chickpea flour and meat into a medium sized bowl. Grind together finely the remaining ingredients save the egg. Add spice mixture and egg to bowl, and then using your hands, mix together well.
Cover and refrigerate for at least three hours.
Remove from fridge, form into eight patties, and either grill or fry in an oiled cast iron skillet until they are done to your taste. Take care in turning them over as they are very fragile, and will form a bit of a crust on the outside that is delicious.
Note: They got a bit more done on the outside than I prefer, (Zak was grilling in the dark and was having a hard time seeing how done anything was) though it didn't really affect their eatability--everyone really enjoyed them, especially topped with the green chutney or dipped in the raita.
Local Eating Update:
The main components of the afformentioned meal: the lamb, chicken, vegetables, fruits, butter and eggs were all local.
The rice was Indian basmati, the spices were bought at the local Penzey's store in Columbus, though of course, they were grown all over the world, and the yogurt was from Vermont.
I am thinking of picking up more of the Hartzler's milk the next time we are in Columbus, some for drinking and some so I can try my hand at making my own yogurt. If I can get a good starter going, I may just make my own yogurt as a matter of course. It will be my first step in trying my hand at cheesemaking, yet another long-term culinary project for me to undertake.
Sunday, August 14, 2005
Better Late Than Never Weekend Cat Blogging...
 And so it is that I am late for this weekend's edition of Cat Blogging.
I was so busy yesterday preparing a feast of Indian food (and yes, yes, there will be posts all about that soon) to celebrate the return home of Heather from her sojourn in Beirut, and my daughter Morganna, that I forgot completely that I should be posting wonderful kitty pictures here for everyone to see.
How neglectful of me. How wretched, evil and awful.
Especially since we have a new member to our household.
Yes.
Morganna has a kitten. His name is Indrid, and he came from a cat rescue association in Columbus, Ohio. He is half Siamese and half tabby/white domestic shorthair, and all cuteness.
As you can see.

Here he is sleeping in his bed, which is a shoebox with a towel and some of Morganna's old t-shirts and a teddy bear. And yes, he sleeps in it of his own volition, and cuddles with the bear. It is kind of gross, he is so cute.
He is twelve weeks old, and has already captured Gummitch's heart, and is well on his way to getting Grimalkin's, too. Minna, well, for her, she is well-behaved and is showing great curiosity and fortitute. Ozy--he's seen so many kittens in his time, nothing startles him anymore. Neither Jack nor Tristan have met him yet, so they are without opinion on the issue.
 Of course, Morganna and Zak and I are charmed.
I guess we will never lack for photogenic cats in this family.
What I find to be really adorable about this guy is that he will fight sleep. He will crawl up into his bed, and curl into a ball, and then his eyes will close, and suddenly, he will wiggle, and roll, like you see over there on the right, and bat at nothing, just to wake himself up.
Just like a toddler who doesn't want to go to bed, because he might miss something interesting that the adults are doing.
Friday, August 12, 2005
Lard
 New York City's health department is asking for all city restaurants to voluntarily give up using trans fats in their cooking.
Trans fats, as we should all know by now, are the artificially hydrogenated vegetable oils that seem to be in every commercially produced baked good, snack food and fast food in the country. They also seem to be worse for humans to eat than either butter, or the subject of today's postlet--lard.
Some folks seem to be scared of lard--probably because of all its bad press over the years as being the world's most unhealthy of fats, but I think a lot of it comes from the fact that the word itself just has a pejorative connotation. When we want to insult someone, we call them "lard-ass" or "tub-of-lard." Lard comes from pigs, who are among the maligned of animals, being as they have the reputation of being fat, gluttonous, and smelly. Calling someone a pig is a dire insult indeed, but I notice that for all that people revile pigs as creatures, they sure do like the way that they taste.
The fact is, lard really is better for you to eat than Crisco. My Gram knew it had to be so all along--but medical science has born her intuitive mistrust of artificially hydrogenated fats, and the result is that the FDA has ruled that for reasons of public health, every food that has trans fats in it will have to be labelled as such by 2006. Warning labels--hrm--what other consumables have such things? Oh, yes, alcohol and tobacco products. Hrm.
Back to lard.
I am not saying that lard is a health food here. It is fat. You shouldn't sit your butt down and eat a big bowl of fat every hour of the day. That will kill you.
However, lard is not as bad as we have been led to believe.
Listen to the statistics reported in a New York Times OpEd piece this morning: "It has half the level of saturated fat of palm kernel oil (about 80 percent saturated fat) or coconut oil (about 85 percent) and its approximately 40 percent saturated fat is lower than butter's nearly 60 percent. Today's miracle, olive oil, is much lower in saturated fat, as everyone knows, but it does have some: about 13 percent. As for monounsaturated fat, the current savior, olive oil contains a saintly 74 percent, yes. But scorned lard contains a very respectable 45 percent monounsaturated fat - double butter's paltry 23 or so percent."
Doesn't sound that evil, does it?
That is probably because it really isn't that bad. Again, I am not advocating that you toss out your olive oil and canola oil and fry everything in gobs of lard here, and eat pie crust made from lard thirty two times a week--what I am saying is that folks might want to think about giving lard a second chance.
 Besides its partly undeserved bad health rap and pejorative connotations, I think lard also suffers because it isn't very easy to work with.
While it makes the best pie crusts in the world, hands down, it is a pain in the tuckus to work with.
The reason for this lies partly in its slightly healthier fat profile than butter--it isn't hard and solid, even when refrigerated, the way butter is. It has less saturated fat than butter--and saturated fat is what makes a fat solid at room temperature. Well, if you set butter and natural lard (not that artificially hydrogenated lard stuff that is godawful) next to each other on the counter and let them come to room temperature, they will have different consistencies.
The butter will soften, but the lard will become practically gooey.
That is why when I gave my recipe for the half lard half butter pie crust, I advocate all those little tricks and techniques to keep the dough cold at all costs. Because if you get lard warm at all--it will gum up the works of any pastry making endeavor.
Compared to Crisco, which you can cut into flour while standing on your head in a hot room with the oven door open and blasting, lard is just unruly and horrible, so no wonder people switched over. Besides a lot of housewives had to render their own lard, which is a smelly and inconvenient process, which I have helped with many times.
Crisco was easy, lard was hard, and then, suddenly, lard was unhealthy, so why bother?
Except that now, we understand that not only does Crisco make a tasteless pie crust, it isn't even good for you to eat it. Why then, make something that neither tastes good, nor is good to eat?
So, we come to the moral of my story: don't be afraid of the pig. If you can find a source for good unhydrogenated lard, buy it and use it. (If not, give a shot to rendering your own, though do realize that if you have a small apartment, your entire place will smell like lard for a good long while.) Remember, it is soft and so might be fractious if you are making pie crust, but if you use my little tricks and tips, you can get through it. Or melt it in a pan and shallow fry up a batch of chicken--it will be the best you have ever tasted. (Or, do like my Grandma did and use mostly liquid vegetable oil mixed with lard or bacon grease for flavor.)
I have to go now and bake two pies with all butter crusts--they are for a celebration welcoming Heather back from Lebanon. I do have lard, but she's Muslim, and well, while I don't hold truck with fearing lard for health reasons or just because the thought of it is icky, I will not mess with spiritual reasons for avoiding the pig.
Thursday, August 11, 2005
Childhood Food Memories
Lamb: My Dad's mother, whom most of the grandkids called "Gram," (except for the ones who called her Hoohoo--but that is another story) taught me how to cook a leg of lamb. It was her holiday dish, her specialty, that we had once, maybe twice a year. She would order the leg special from Pearl Damus at Damus' Market--a tiny neighborhood grocery store that Gram shopped at for about forty years. Gram always said that Pearl got the best meat, especially lamb, and she trusted Pearl and George, her brother, to get excellent lamb because they, being Lebanese, ate a great deal of it themselves. So, they knew what to look for.
The process of cooking the lamb started the night before we were to eat. She would take the leg out of the refrigerator, and unwrap it from the heavy butcher's paper, and then would wash it gently. She'd set it on a rack over a baking pan to drip, then would pat it dry with a cotton towel. She didn't like to use paper towels, because she said they smelled funny. As she washed and dried the leg, she would examine it all over with her eyes and hands; her long, narrow fingers would probe and smooth the flesh in circular patterns.
After it was dry, she would take up the sharp carbon steel butcher's knife, its blade sharpened to a mere sliver of its former length and width, the steel blackened by age and use, and she would trim the silverskin and some of the fat from the leg. She was very careful in her trimming; the knife would skim over the meat in delicate strokes, and only shreds of fat and connective tissue would fall from its blade. Her hand was so practiced, she never wasted a single ounce of precious dark pink flesh.
My hands were busy with peeling fresh garlic cloves; garlic was a precious commodity, seldom used in the kitchens of my childhood, so my blunt chubby fingers picked at its papery skin carefully, not wanting to waste a single sliver of its deliciously scented mystery. An array of small jars and bottles stood like soldiers over the red formica tabletop, waiting for Gram to marshall them to her purpose.
"Lamb can be made beautifully," Gram would intone, her cracked voice going smooth as she spoke in rhythym with the movement of her hands. "Or, it can be turned into the worst meat you have ever eaten." The knife was laid down on the tabletop, the worn wooden handle clicking with finality. Scooping up the trimmings, she saved the morsels of fat for her dog, sealing them in an old margerine tub from my mother's house. Into the refrigerator they would go, and to the sink went Gram, to wash her hands.
Drying them on a faded dishtowel, she took up the knife again, and said, "You have to be careful with it, and not cook it too much; if the meat goes all brown, you cooked it too long, and it will be tough and gamey. It has to be pink inside."
Laying her left hand on the leg to steady it, her right hand brought up the knife like a dagger, and quick as a fish, the thin blade darted into the flesh, making a series of shallow and deep punctures at regular intervals in the flesh. "If you just put the garlic on the outside of the meat," she instructed," the flavor won't get inside and make the meat sweet. Besides," she paused and looked at me, her hazel eyes dancing, "if you leave the garlic on the outside, it will burn, and burnt garlic is right nasty."
She'd keep stabbing the meat, turning the leg over as she needed, until it was riddled with small punctures of varying depths. Then, her attention would turn to the peeled, pearly garlic cloves, and she would smile as she sliced them into paper-thin slivers. "There's no need to hurry," she said. "If you hurry, you take the pleasure out and cut yourself and make awful messes. Start the process in enough time, and work at your own pace. You cut that last clove, and mind--make them thin--if they are this thin, they dissolve as the meat roasts and mix in with the juices of the roast and make everything good."
My little knife flashed as I carefully, under Gram's sharp gaze, tried to cut garlic slivers thin enough to see through, like Gram's. Mine never were that thin,, but she'd smile, showing her gapped front teeth and say, "That's good. You're getting better. Now--here's where those little fingers will come in right handy--we need to tuck a sliver or two in each little slit in the meat, like tucking in a doll goodnight."
Gram, of course, was right--my little fingers were better than her big ones at getting the garlic into the slits in the meat--especially the ones she cut deep. She finally stopped working at that task and pulled a punchcup out of the cupboard, and lined up her little bottles of herbs and spices .
"Now, listen, while I tell you which herbs to use," she said, as I went on with my tucking and poking, my fingers slippery with lamb fat and garlic juice. "Marjoram, just about a teaspoon, rosemary, the same, but you have to crumble it--here--smell it. Isn't it nice?" She'd waft the open jar of rosemary under my nose and laugh when I sniffed and nearly sneezed. "Strong, isn't it?" she'd say when I nodded.
"Thyme is my favorite," she said, as she put about three teaspoons of it into the cup, crushing the leaves lightly between her fingertips and thumb. "It really brings out the best in lamb, even more than it does for beef." She opened up a new jar of cracked black pepper, and dumped a liberal two teaspoons into the cup, and said, "Now, that is my secret. Plain black pepper tastes like dust compared to this--never be afraid to use plenty of pepper. It marries with other flavors and awakens your tastebuds. "
She opened up some paprika, and poured in about four tablespoons. "Paprika is more for color than flavor," she'd mention, as she sprinkled the brick red spice over the herbs and pepper.
Then, she poured about a teaspoon and a half of kosher salt from its red and white box into her palm, and held it out to me to examine. "This is the best salt to cook with. Morton's is fine for the table, but for cooking, kosher salt is best."
"Grandma makes pickles with it, "I volunteered.
Gram nodded. "I bet she brines her bacon and hams in it, too, though the irony of that is interesting." I didn't really understand what she meant, but I was too busy watching her mix the herbs and spices in that little cut-glass punchcup to worry too much about it .
"Now," she said, "We rub these onto the meat. When it goes in the oven, all of this will dry out, and make a brown, crisp crust."
So, we'd scoop out the salt, spices and herbs, and rub and massage it over the meat. Gram always took a lot of time doing this step; she said it was crucial to get a little bit of the rubbed stuff down in all the slits and crevices we'd made, so it would flavor the inside of the meat, too, not just the outside.
Then she'd set the rack with the leg on it into her big black and white speckled roasting pan, cover it with the lid and set the whole thing into the bottom shelf of the refrigerator (unless it was wintertime, in which case, she would put it in the enclosed back porch) and let it sit to "settle" as she called it overnight.
The next day, she would roast it in a hot oven, basting it with the juices and a little bit of wine and melted butter. She'd take it from the oven and let it sit while she made the richest deep mahogany gravy from the drippings, along with some thinly sliced onions and some cream, flour and water. It was delightful, especially over her creamy mashed red potatoes. When it was time to slice the meat, Pappa would carve it, and it would fall away from the bone, perfectly done: the outside crackling crisp and flaky with herbs, the immediate interior a pale brown, and the very middle, near the bone, pink and sweet.
The flavor was incomparable.
To this day, although I make delicious lamb roasts, and I do it mostly like she did, mine never tastes like hers. Probably, because I cook it more rare, and use olive oil instead of butter for basting.
I think that part of what made her lamb so special is because we only ate it once or so a year, and the process of making it was such a ritualistic process that it lent the entire meal an air of festivity that colored the flavor of the food in our memories.
Saurkraut: For all that my Dad's family were Bavarian, not many of them ate or liked saurkraut. I grew up with a taste for it, though, because Mom's parents made it at home, and thiers tasted fresh and wonderful. The stuff we used to buy in cans had a harsh metallic taste that I could never abide, but when it came fresh from the crocks in Grandma's basement or from one of her canning jars, it was mild, with a complex, almost floral flavor that I have never tasted again.
I used to help "put up" the saurkraut, which was an all-day affair, involving many hands, what seemed like mountains of fresh cabbages a pair of huge salt-glazed pottery crocks that must have weighed over thirty pounds each while empty, a bag of kosher salt and a battery of odd-looking and somewhat lethal tools.
We always started in September or early October, as I recall, and the first step, was the harvesting of the row upon row of cabbages. Grandpa excelled at growing massive heads of cabbage--giant heads that were larger in circumference than my own, cupped in deep green outer leaves that I once tried to taste, and found to be bitter. It was my job to run each head, back to the bushels at the end of the rows. Grandma, Uncle John, Grandpa and Mom each wielded a wicked looking machete which they used to hack the heads from the stalks with a solid thwack. Into my hands the head would go, still cradled in the outer leaves, and off I would dart, toward the big baskets, stripping leaves as I went.
Into the keeper bushel went the cabbages, with a satisfying whump, and into the other bushel went the outer leaves. When that basket filled, which it did quickly, I would heave it up and run off to the chicken coop, where I would scatter the leaves, then pause to watch the chickens descend upon them as if we hadn't fed them in months. Those hens loved greens and would fight over the choicest bits or on a beetle that was found harbored beneath a pecked leaf.
Then, back I would go to pick up the piles of cabbage heads the cutters had left for me, and I would work fast to catch up, sweat beading on my arms and pouring down my back. The red clay dust would cling to my skin and get under my nails, then mix with the sweat and stain me so that my pale arms and face would streak with cedar-colored stain. Grandma and Mom would laugh at me and call me a redskin and say that finally, thier Indian blood was "showing" on me.
By then, the bushel of outer leaves would be full and it would be time for me to run it to the pasture where the cows placidly chewed grass and clover. They, too, loved cabbage, and would come running when they got a whiff of the sulfurous odor of it on the breeze.
I liked to feed them by hand, and pet their broad white muzzles while they chewed, thier huge molars grinding the tough, bitter leaves with a slow, determined rythym. They smelled good to me--of sun and soil, animal sweat and green grass, and they liked it when I scratched at their deep red necks and flanks, which would twitch under my fingers, as their ears flicked at flies and sweat bees.
After the heads were cut, we'd haul the baskets down to the basement, and the welcome cool darkness would enfold us. The sweat would dry, and we'd actually shiver, so cool it was kept, insulated by thick concrete block walls and poured concrete floor. Grandma would cut the heads in half, and Mom would fill the sink with cold water, and she'd salt it slightly, as we tossed the halved heads in to soak. The salt would draw out any worms or bugs hiding in the cabbage, and they'd float to the top, where I would skim them from the top, collect them in a cup and when we were done, I'd run them to the chickens who would have already had thier appetizer of cabbage leaves and would be waiting impatiently for their main course.
When I got back, Grandpa and Mom would be shaving the cabbage into whisper-thin slices on the kraut cutters that Grandpa had made--they looked like the fancy mandolines chefs use, but were made of wood with carbon steel blades he had made from an old broken tiller. The blades were wicked-looking things--the angled shape made them look like guillotine blades and the time-darkened steel looked ominously as if it were blood stained. It didn't help that he had them honed to so sharp an edge, I wasn't even allowed near the things; just looking at them made me shudder.
Mom and Grandpa used them blade guards that he had also made--blocks of wood with nails stuck through them. The nails would dig into the cabbage head, and they could hold the blocks of wood and thus run the cabbage up and down over the blade. The cutters were set up on cinderblock risers, so that a pile of icy-white cabbage would flutter down like snow, for me to gather in big enamelled basins, which I would carry to the crocks.
Grandma and Uncle John had the tampers--big, heavy oak pestles that Grandpa had turned on his lathe--they were slenderer at the top, then flared wide at the bottom, and each weighed close to five or six pounds. Along the length of the pestles, he had turned pretty shapes, embellishing a tool that was used at most, twice a year, because to Grandpa's mind, just because something was functional didn't mean it had to be ugly.
They held the tampers at the ready, hovering near the crocks, and I'd pour the basins of cabbage in, a little at a time. At Grandma's direction, I'd dip into the kosher salt bag with a teacup, and sprinkle the proper amount over the cabbage, then layer more cabbage and more salt, ending with salt.
Then, when I went to gather more shredded cabbage, she and Uncle John would set to pounding it down with the tampers. Even in the cool of the basement, they'd work up a sweat, and pretty soon, Mom would take over the tamping, and Grandpa would shred alone, and Grandma would go upstairs to finish cooking supper, while I ran back and forth with snowy piles of cabbage in those basins, and sprinkle salt. Mom would tease her younger brother, John, if he got winded or complained of a sore back, and she would raise her tamper higher and pound harder, to urge him on to greater efforts.
On and on it would go, until supper was ready and we'd stop and eat, and then back we'd come to finish.
The last hour would seem to go on forever, as the crocks slowly filled with shredded, crushed cabbage and salt, layer after layer, ounce by ounce.
Finally, the last shred was in and Grandma would salt it one more time, then in each crock, she would do the final pounding, because she didn't trust either Mom or Uncle John to pack it as tightly as she said it had to be. Mom would pull out the sterilized plates--big round stoneware platters that fit just perfectly inside the cirumference of the crock opening. She'd lay these on top of the cabbage, then press down with all of her weight, while John would heft up a cloth-wrapped clean cinderblock, which we used to weigh the plate down, making a good seal.
"Where's the vinegar?" I had asked the first time I helped make kraut.
Grandma laughed. "There's no vinegar in it," she said. "We aren't making pickles."
"Then what makes it sour?" I asked, confused, as I looked over at the untouched gallons of cider vinegar stashed nearbye.
Grandma smiled and said, "Magic."
Grandpa snorted and shook his head. "Don't fill her head with nonsense, Dean--tell her the truth." He knelt down next to me and said, "It ferments. There's little microbes in the air down here that get in there and they start to eat the sugars in the cabbage and turns them sour. The salt keeps the bad microbes from growing in the crocks and the good ones turn the cabbage into kraut if you leave them alone and don't stick your fingers in or blow your nose on it or something dirty like that."
Microbes seemed as improbable as magic to me, but then, the first time I was really little. Now, of course, I know that it is a lactic acid fermentation that makes saurkraut, and that there is nothing particularly mystical about it at all, but tell that to a small child.
After that, we cleaned everything up, resterilized the cutters and put them away, along with the basins, the tampers and the machetes. We'd be tired--kraut making is tiring work, especially if you aim to have a hundred or so pounds of it when you are done.
After that, we'd wait while the magic or the microbes or whatever did its work. Every weekend, when we'd visit, I'd go down to the basement with Grandma to check the kraut. She'd lift off the block, then pry up the plate and beneath it, there would be bubbling and fizzing and wonderful smells forming as the fermentation went about its business.
After it was done, Grandma would have us back and we'd can some of it and leave some in a smaller crock. Canning it changed the flavor somewhat, but Grandpa didn't like to keep it stored all winter in the crocks--he had seen a few batches of kraut stored that way go bad and stink up the house and make people sick, so we'd only eat a bit of it "fresh" after transferring it to a much smaller crock. The rest we'd put up in jars, to eat all through the fall, winter and spring, while we waited for the first fresh vegetables of the season: radishes, peas and lettuces.
The flavor of the kraut, which Grandma would cook with pig's knuckles and knackwurst that they'd buy from a German farmer down the road, was phenominal. Grandpa put his over mashed potatoes, but I ate mine separately, with bread and butter, and boiled potatoes on the side. It was delicious, very complex, not just sour, but with a greenish, somewhat herbal or flowery flavor that was surprising. It almost tasted like spring in a way, even though the snow was blowing and the sky was grey.
Noodles: Gram taught my Mom how to make homemade noodles.
She learned from her mother-in-law, Grandma Fisher, whose mother brought the recipe from Bavaria.
I learned to make them from my mother, though I cheat and use my Atlas hand-cranked pasta roller to roll and cut them out instead of doing it all by hand.
Which is cheating, I suppose.
But it was my favorite dinner of all in my childhood, and still holds a special place in my heart.
They start with plain all purpose flour, eggs and water. Nothing else.
Mom made a pile with the flour, like a hill, and then would make a well in the center, into which she would drop the eggs, one by one. Then, a drizzle of water into the egg volcano, and she would start stirring with a fork, down in the crater. The dough would start to form as the egg yolks broke and stirred thickly into the flour. She'd stir faster and harder, and the dough would come together as a stiff mass with ragged, crumbling edges.
Then, she'd flour her hands, and start kneading it into a smooth, elastic pale yellow dough with quick movements of her small hands. She wouldn't knead too much--the Bavarian noodles were supposed to be tender and soft, then she would tip a bowl over the dough and leave it to relax for a while--about a half an hour or so. She used to tell me that the dough had to nap, and would tell me to go be like the dough, so I would curl up under a laundry basket and try and sleep, while she drank a cup of coffee, had a cigarrette and went back to whichever Stephen King novel she was reading that day.
After it had rested, I had napped and she had smoked, she'd clear off the aquamarine-colored formica counter, wipe it down, let it dry and then sprinkle it well with flour. Then, taking up her rolling pin, she would cut the dough into pieces and start rolling it out, thinner and thinner, leaning hard into the task as she put most of her weight into it. I'd beg to help, and she would let me stand on a chair in front of her and put my hands over hers and we'd roll together, but she told me the dough was too hard for me to roll alone. We'd roll out about four or five balls of dough, one after another, down the long blue counter, like an assembly line with only two workers.
Then, she'd move the chair to the side, so I could climb up and watch as she used the old butcher knife from the long closed Fisher and Fruth slaughterhouse, and cut long, 1/2 inch strips of noodle dough out of each rolled out piece. These she cut crosswise into strips about three inches long, and then sprinkled flour over them lightly, and left them to dry. She'd go on down the line, cutting and sprinkling, and I'd watch the noodles start to curl as they air dried in place.
What a mess the entire process made! And how time consuming.
Meanwhile--while the noodles dried, Mom would put on a whole chicken to stew, along with some onions sliced up, some dried sage and thyme, salt and pepper. She'd bring it to a boil, skim the foamy bits and then cover it and let it simmer the rest of the day, while the noodles darkened slightly and curled up into brittle bits that looked somewhat like the pale shavings of wood my Grandpa made when he carved white oak on his lathe.
After the chicken meat had cooked up pink and was falling from the bone, and smelled like heaven distilled into a pot, she'd fish it out, let it cool, pull the meat from the bones and cut it bite-sized, then put it back in the pot. Celery and carrots went int then, and sometimes, if she felt extra rich, a jar of sliced mushrooms.
When Dad was home from work, she'd throw in the noodles, at last. I'd gather them up for her, shaking off the excess flour and putting them in a bowl, and she'd cook them up, then thicken the broth with a little flour and water. Salt and pepper went in, and maybe just a pinch more sage, and she'd mash the potatoes with margerine and milk, using her hand mixer to make them light and fluffy.
We'd spoon up great mounds of potatoes onto our plates, and make wells. Into the wells went ladlesful of chicken, noodles, and broth. On the side we usually had some of Grandma's frozen corn and peas, both seasoned with margarine, and then, we'd eat until we felt like we'd burst.
That was my birthday dinner for every birthday from age one to age fourteen, I think. Soon after that, Mom quit making the noodles, because she said they were too much trouble.
I was glad to find out that my Aunt Judy still makes them, so at least I am not the only one in the family who makes them now and again. I would hate for Grandma Fisher's noodles to cease to exist.
Chocolate Mousse: Aunt Judy made the first taste of French cooking I ever had.
She lived with her Siamese cat, Bingo, in a carriage house in Nashville, Tennessee, where she majored in Journalism at Peabody University. She was very much my role model; to my eyes, she was worldly, glamorous and beautiful, and she always had tales of adventure and romance to tell us all when she drove up to visit us in Richard, her lion-hearted cream-colored 1962 Volkswagon Beetle. She was creative, and always dabbling in the arts--painting, sculpture and calligraphy, doll-making, petit-pointe and music were all things she could do as easily as most people breathed, and she loved to cook and eat, and she was constantly wanting to try out new and interesting foods.
So, it should come as no surprise, that on one visit to West Virginia, she packed up not only Bingo, her suitcase, and walking shoes, but a dufflebag full of odd-looking kitchen equipment, some strange ingredients, and a two-volume set of a cookbook: Mastering the Art of French Cooking.
And so, she arrived, and on the third day of her visit, resolved that she was going to make us supper, in the French fashion, and was going to wow us with something called chocolate mousse, for which she had brought some special chocolate that had come all the way from France at a price she could barely afford on her single working student's budget.
Ah, but she would not be stopped, nor deterred, nor disuaded. Off to the market and the grocery stores she swept, with me in tow, and we drove all about town, picking up this and that and the other thing, and coming home with a veritable mountain of purchases piled precariously in Richard's back seat. A feast were going to have, and a feast she was going to make.
So, she did. There was chopping, there was mincing, there was grinding, and whipping and grating, and she whirled like a dervish in Gram's tiny, green-painted kitchen. Her long chestnut hair done up in a scarf to keep it out of the way, she moved from stove to table to stove and back again, as she simmered, poached and roasted the main courses. The scents were incredible, and the steamy kitchen grew hotter and hotter, but I was not about to quit the premises. My eyes were filled with too many interesting sights to leave.
The books were marked and dogeared and scribbled upon in Aunt Judy's spidery handwriting that is so full of whorls and curliques that looked rather like a language other than English. I didn't get a chance to read much of them over her shoulder, until she opened to the recipe for the mousse, a page that was littered with chocolate brown fingerprints and smudges.
"Oh, yes," she muttered to herself, as she plopped another pan into the teetering stack in the sink. Gram hovered in the corner, watching shrewdly. "Jude," she finally said, "I do believe you have dirtied every pot in this kitchen."
"I'll wash them directly, Mamma, don't you worry, I just have to make the mousse, then I will be right on it."
That was my cue to hop down and do the dishes, but I wasn't moving until I saw what a chocolate moose looked like. I had it in my small-child's mind that she was going to mold large forest ungulates out of chocolate, and while I had eaten many chocolate rabbits in my time, and more chocolate eggs than I could count, a chocolate moose had never been on my menu before.
Well, I was surprised to find out that a mousse is not a moose, and is in fact rather like a pudding, even if it is spelled like mouse and pronounced like moose.
At first, I was disappointed, and dejectedly, went off to help Gram with the dishes, trying to hide my sorrow at not being able to eat a moose for dessert.
That lasted until Aunt Judy served the mousse after a long, fine, meal full of rich textures and wonderful flavors that had never struck my imagination until that evening.
She set before me a little punchcup full of chilled mousse, and one of Gram's nice silver spoons, polished for the momentous dinner.
I remember scooping my first bite out rather hastily, as I was still a bit stung at not having a moose, and thinking that the French must all be mad to think that a mousse is pronounced moose, not mouse.
As soon as I popped it into my mouth, my doubts and sorrows, distain and haughtiness melted away, along with the chocolate on my tongue.
It was a cloud--a cloud made of chocolate--a Willy Wonka dream of a dessert. It was fabulous, fantastic, and beautiful beyond my understanding, and all I could do was close my eyes and wiggle in place out of joy and rapture. "Mmmmmousse," I said, smacking my lips.
I opened my eyes to see Aunt Judy grinning at me, her smile knowing.
Pappa scraped his punchcup clean and declared, "Well, that was an awful lot of trouble for some chocolate pudding, but I reckon it was worth it."
I just licked my spoon, dove into the cup again and smiled at Aunt Judy, and said, "Mmmmousse."
She nodded in understanding and winked as she took another shiver-inducing bite of mousse.
Thus concludes my Childhood Food Memories. I know I am supposed to come up with five of them, but these were so long, I stopped at four. As it is, I fear that I am going to bore everyone to death with these. If you made it this far, you deserve a cookie.
If you are tagged, here's what you do: Remove the blog at #1 from the following list and bump every one up one place; add your blog’s name in the #5 spot; link to each of the other blogs for the desired cross-pollination effect.
BeautyJoyFood
Farmgirl Fare
Becks& Posh
TheCooksCottage
Tigers & Strawberries
Next: select new friends to tag and add to the pollen count.
Then create a post listing your own five food memories.
Barrett of Too Many Chefs
Zarah Maria of Food and Thoughts
Pim at Chez Pim
Kate at Accidental Hedonist
Wednesday, August 10, 2005
The Locavore's Bookshelf II: Eat Here
 I wonder if anyone could possibly read Brian Halweil's Eat Here: Reclaiming Homegrown Pleasures in a Global Supermarket and fail to be inspired to do something, anything, in order to help create a grassroots local food movement in their own hometown.
He sure got me fired up, in large part because while the book is a textbook and a manifesto and is filled with a lot of really disturbing and depressing facts about the attempts agribusiness has made to monopolize world food supplies--it is also filled with success stories.
He tells the stories of thousands of people around the world who got fed up with the way that corporate agricultural giants did business and instead of being ground under bootheels, stepped up and changed the rules of the game.
One of my favorite anectdotes involves a group of women in Zimbabwe whose husbands had been laid off in a factory closing, decided to go into the peanut butter-making business. They realized that the peanut butter they were buying was made by foreign-owned corporations with imported nuts, yet peanuts are a major crop in Zimbabwe. They decided that they could buy peanuts from local farmers and produce peanut butter more cheaply, thus saving local consumers money, supporting local farmers and providing local jobs.
It sounds kind of like a weird pipe dream--but they did it. It worked. Their homegrown company is self-sufficient, has turned a serious profit and their product has been outselling mainstream brands in local stores and supermarkets.
Halweil's information gathering is truly global--his statistics and anectdotes are drawn in from around the globe. He even mention people and businesses closer to home--ACEnet (The Appalachian Center for Economic Networks) and Casa Nueva, a worker-owned restaurant that sources 85 percent of their food locally, are both based in Athens, Ohio, and are part of the backbone of the serious community efforts to create a viable, sustainable local foodshed in southeastern Ohio.
ACEnet's community kitchen and business education programs are held up by Halweil as being great examples of grassroots organizations helping citizens start up small, local food-based businesses. He mentions several of the dozens of local food startups that have been given a leg up by ACEnet in the past decade, including Herbal Sage Tea Company and Integration Acres.
The book fairly teems with inspirational stories; each chapter ends with an in-depth profile of an individual or group whose efforts have succeeded in promoting the cause of a safe, inexpensive and reliable local food supply. Far too many books of this kind focus so intensely on the negative, on the overwhelmingly dysfunctional state of agriculture today, that it tends to make the reader feel as if we are powerless to stop the tide of unsustainably-raised, nutritionally inferior and grotty-tasting foodstuffs that threatens to engulf the plates of the world. Halweil's approach is not to rely on fear and anxiety to sell his message; he doesn't sugar-coat the ugly facts in order to get his readers to swallow them, but instead balances them with concrete ideas for what ordinary citizens can do, and have done, in order to make the dire situation better.
And I think that is what the main thrust of the book is--it is about reminding people that we all have the power to change the world, in large and small ways, with each action we undertake. It is about standing up and doing something--not just laying down and accepting that the world is the way it is, and there is no sense in bothering to try and change it. Halweil compiles a list of things that anyone can do to help step away from the unsustainable agriculture merry-go-round, and then in his appendices, gives a huge list of resources with web addresses to help the reader find more information on how to achieve their own personal goals of food independence.
Tuesday, August 09, 2005
What the Hell Does "Sustainable" Mean, Anyway?
 "Sustainable" is a term that is appearing much in the news these days, and it is often paired with the word, "local" and "agriculture," or "foodshed."
I'd like to take a moment here to discuss what "sustainable" actually means, and then we can pair it with the term, "agriculture" to see if I can build an understanding of what exactly I am talking about when I say, "sustainable agriculture." Because, while I have in my mind a fairly specific idea, I may not be conveying it very well to readers who may not have as much background in farming, gardening and the study of food to really grasp what it is I mean.
First of all, the Merriam-Webster dictionary gives as a primary definition of "sustainable" the somewhat redundant statement: "capable of being sustained." When one looks up "sustain," one learns that the primary definition is "to give support or relief to," while the secondary definition is "to supply with sustainance, or to nourish," and the tertiary definition is "to keep up or prolong."
While the primary and secondary definitions are tangentially applicable (particularly the secondary meaning), it is in the tertiary definition that we find the crux of the matter. Something which is sustainable is something which can be kept up or prolonged over a period of time.
When you return to the entry for the word "sustainable," you find that the secondary meaning is an explication of how the word relates to agriculture: "of, relating to, or being a method of harvesting or using a resource so that the resource is not depleted or permanently damaged."
So, when I talk about "sustainable agriculture," I am not necessarily talking about only organic farming, and when I talk about "sustainable foodways," I do not intrinsically mean only "local, vegetarian, organic, traditionally-farmed, or non-genetically-modified" foods and food systems. To be "sustainable," a farming practice does not necessarily have to be anti-modern; "sustainability" does not always infer a preference for traditional methods over technology.
Balance
To really understand what sustainability means, one must examine the large picture, and imagine the hundreds of thousands of interactions between human activity and environment and how these interactions impact entire ecosystems. One must look at the balance of benefit and detriment, but not only in a short term view, but also in a longer-term analysis.
The way that I see it, for something to be "sustainable," it must be in balance.
In short, "sustainable" refers to an environment made up of ecosystems where human, animal, plant, and microbial life work together along with non-organic, non-living components of the biosphere in ways which do not deplete the terrestrial resources necessary to sustain life.
Human beings, because of our ability to reason, build tools and most importantly, our ability to manipulate living systems on large and small scales, are the greatest determining factor over whether or not an agricultural system, society or foodway is sustainable or not. Humanity is an integral part of the environment--we are not apart from it, though much discussion in the popular media and political realms gives the illusory impression that human beings should be seen as separate and distinct from "the environment." This fallacious line of thinking is part of the worldview that reduces complexity that is "the environment" to simply a set of resources meant to be exploited for human gain, and is intrinsic to the religious idea that humans are somehow above "Nature" which must be subjegated or tamed.
The most basic argument against that worldview is the simple fact that the resources on this planet are finite, that there are historic and prehistoric examples of societies which have risen to great heights only to fall due to the practice of unsustainable food production techniques, and that while our current level of technological ability has given humanity the ability to feed every human on this planet adequately, there are still those who starve to death while others eat so much that they die of diseases related to the ingestion of too many calories.
The world is out of balance.
Adoption of sustainable methods of agriculture may help humanity take few steps toward creating a healthier balance within the various ecosystems that make up the entire biosphere of this planet.
Resources
The basic resources necessary to sustain life on this planet are air, water, soil and sunlight. Extensive damage to any one of these resources can compromise the ability of this planet to continue to teem with living beings.
Air, which is made up gaseous oxygen, carbon dioxide and various other gases, is a basic building block in all organic proceses. Of course, we know that all living animal species, and most microbial species must have oxygen to survive, while carbon dioxide is necessary for plants to carry on photosynthesis, which is the chemical process of converting sunlight into stored energy which can be used by plants and animals as food.
Air pollution can interfere with these basic life-giving processes in many ways. One of the most elemental ways is in the reduction of available oxygen, which depletes oxygen levels in the bloodstream of mammals, for example. Or, if a great deal of carbon particles are present in the air, they can be breathed into lungs and cause irritation and illness, reducing the lung's ability to dissolve oxygen into the bloodstream, which gives the net result of depleting the avialable oxygen in a given organism. An increase in carbon dioxide paradoxically helps plants grow lushly, yet is tied in part to a depletion in the plants' ability to store nutrients which are consumed by other life forms.
Water is even more necessary to life than food; a human, depending on how much fat reserves they possess, can live for about sixty days without food, but without water, one can only live for a maximum of about three days.
One of the reasons that the Earth is abundantly covered in a myriad of life forms is because of the large amount of water present in the biosphere. However, most of that water (around 92.7%) is saline, which cannot be consumed by most animal life and is deadly to most terrestrial plants as well. The remaining 7.3% of the Earth's water is fresh water, and it is upon that small percentage that all terrestrial (land-based) life depends.
Soil is a general term for the mineral and organic-based substance which covers much of the earth's surface in which plants grow. Soil is made up from ground up rocks, decaying organic matter from plants and animals, and microorganisms which facilitate the physical and chemical breakdown of organic materials. Naturally stratified into layers, with the uppermost layers (called, strangely enough, topsoil), being the richest in organic materials, soil provides the supplementary nutrients and minerals needed by plants to live; these materials are also stored by the plant in leaves, roots and stems and thus can be ingested and utilized by animals as well. Any sort of depletion or loss of fertile topsoil has the potential to jeopardize the ability of humans and animals to live in any given ecosystem.
Topsoil depletion can occur through the physical action of water in the form of runoff carrying particles downstream. The wind, too, can blow fine soil particles which are not covered by vegetation far away; one of the most famous historical occurances of massive topsoil depletion took place in the Great Plains region of the United States during the 1930's, in a period of severe drought that is commonly called "The Dust Bowl." In that period, agricultural practices combined with weather conditions to detrimentally affect soil retention, and helped lead to widespread hunger and economic instablity for a great many rural Americans, while separate economic factors including a crash in the stock market created similar circumstances for urban dwellers, leading to a decade-long economic collapse known as "The Great Depression."
Sunlight is a final basic natural resource for life. It is the major source of heat on Earth; in addition, it is the basic energy component upon which all life is based. Without adequate sunlight, plants cannot photosynthesize and convert sunlight into stored chemical energy or convert carbon dioxide and water into carbohydrates. The results of these proceses are the backbone upon which all other life rests. In essence, without sunlight, almost every physical and chemical process that supports life on this planet ceases.
Sustainable Models of Agriculture
Sustainable models of agriculture take into account the effects of any given agricultural practice on the health and balance of the ecosystem in which the farming is taking place, with emphasis placed not only on the short term economic advantages which may occur as a result of the practice, but also on the long-term economic, social, and environmental advantages. In taking this sort of holistic view of agriculture and putting methods of plant production and livestock managment into the context of the interconnected nature of the biosphere, sustainable agriculture is based in large part upon scientific observation of the effects of human activity upon natural resources and the environment. Although many of its techniques and precepts are based on traditionally practiced methods of agriculture, the ideals of sustainablity are not simply a nostalgia-driven harkening back to a mythic "Golden Age" when farmers worked their fields in harmony with Nature, which is often personified and anthropomorphized in the form of an Earth Goddess.
It is, however, a clear indictment of the opposing model of agriculture, which is based upon centralized economic control of natural resources such as water, the use of large amounts of unrenewable petroleum in the form of fuel to run mechanical planting, tilling and harvesting equipment and in the form of pesticides and fertilizers which are often derived from petrochemical sources, and the consolidation of farmland far from the urban centers which rely upon food produced in ever-more-distant areas. This corporate controlled, mechanical model of agriculture relies upon government subsidies of fresh water and petroleum in order to continue working; if either of those subsidies should cease to function, the abundance of cheap foodstuffs produced in this way will either cease to exist altogether, or, more likely, rise precipitously in price.
With crude oil prices recently soaring to the price of $64.00 per barrel, and the looming spectre of peak oil production imminent (or already reached), it is likely that the currently dominant, petroleum-based model of agriculture will cease to be economically viable, and instead of realizing its promise of a well-fed world, result in widespread food shortages and famine.
In addition to the decline of the economic feasiblility of petroleum-based agriculture, various troubling ecological consequences of modern factory farming models have arisen. The decline of underwater aquafers, contamination of groundwater with pesticide and fertilizer residues, and waste runoff from livestock feedlots, the increased production of greenhouse gases in the form of methane from increased numbers of meat animals, the rise of incidents of "dead zones" of de-oxygenated water in oceans attributed to agricultural runoff--all of these negatively impact the quality of the natural resources which sustain the life of every human being on this planet.
In imagining and utilizing alternative methods of plant and production and livestock management which take into account local differences in microclimates on available plots of land, and advocating for more localized food production and the growing of food closer to and within urban centers, sustainable models of agriculture may present some solutions to the problems created by petroleum-based factory farming. However, switching over from unsustainable agricultural practices to sustainable ones is a process which takes time, money, and consumer support.
Current research shows more Americans than ever before are interested in eating organically produced food. According to the Organic Trade Association, the U.S. organic foods industry grew 20 percent in 2003 and accounted for nearly $10.4 billion in consumer sales. The OTA also reports in their 2004 manufacturer survey that organic foods sales have grown between 17% to 21% each year since 1997. According to the USDA, the number of farmers markets in the United States has dramatically increased by 111% from 1994 to 2004. According to the 2004 National Farmers Market Directory, there are over 3,700 farmers markets operating in the United States.
These statistics clearly show an increased interest among American consumers in the development of alternative food sources that go beyond the factory farm/corporate grocery store model. Another sign that interest in sustainable agricultural models is increasing is the number of professional associations, consumer groups, and educational institutes which have formed in order to provide support, education and assistance to farmers and consumers who have a vested interest in more sustainable models of food production. A Google search on "sustainable agriculture" produces 1,260,000 links to websites pertaining to the issue, including links to these very active educational organizations.
As small farmers, many of whom are not eligible for the government subsidies that support giants like ConAgra, discover that they can make more profit by marketing directly to the home cooks and chefs, more and more will turn to producing food by sustainable methods. Studies have shown that even though sustainable methods are more labor intensive and require more extensive knowledge and understanding of the local environment than the equipment-heavy petrochemical model of agriculture, small farmers who practice these principles have managed to not only survive, but thrive and prosper.
In short, sustainable agriculture appears to be here to stay, if for no other reason than the simple fact that petrochemical based farming is simply not going to be able to survive the declining oil supply. This gives an unexpected advantage to small family farmers who perhaps are more able to switch to sustainable methods, and who can more easily diversify thier operations in order to meet consumer demands. Consumers also stand to benefit, though perhaps not necessarily in the short term; as oil prices rise and subsidies dwindle, factory farmed foods will no longer have the artificially low pricetag that Americans have come to expect. In response to consumer demand for less expensive organically produced foods, more farmers will step up to fill the demand, eventually leading to lowered consumer costs.
For more information about sustainable agriculture, here is a list of Web sources:
Sustainable Agriculture Research and Education
National Sustainable Agriculture Information Service
Alternative Farming Systems Information Center
In future posts, I will write more about specific sustainable agricultural practices, and muse further on the meaning of the word, "sustainable."
Right now, however, I have to run and make dinner!
Monday, August 08, 2005
Hillbilly Farmgirl Supper
But, the rest of it was good. I just thought it was an affront to the good Amish cheese to pair it with tortillas which tasted like they were made from cedar shavings. I found the cheeses, along with Walnut Creek butter, also from Holmes County, at Curds and Whey at the North Market in Columbus.
 We had errands to run in Columbus, so I figured I would see what local dairy products I could find while I was out.
I was thrilled to discover that Wild Oats in Columbus (we had to stop so Zak could get his cologne--WO is the only place he knows of where he can buy it without ordering it off the Internet) is now carrying Hartzler's Family Dairy milk. It comes in great glass containers--which you can return for a deposit, though, I think I will keep mine as it reminds me of the glass milk bottle my Gram kept in her fridge full of ice water in the summer.
Unfortunately, I picked up skim milk instead of two percent--because the glass bottles all look the same. From the appearance on the website, they usually have cardboard hangtags over the bottleneck to label thier products clearly so that ditzy folks like myself don't go and buy the wrong milk, but these tags were not in evidence at Wild Oats. So, when Morganna and I tasted the milk and said, "Ick. Tastes like skim," there was a reason.
It was skim.
Duh.
So, maybe I will make ice cream out of it!
Supper, however, was an unqualified success. We had ribeyes from Bluescreek Farms that Zak cooked out on the grill, grilled corn on the cob from Cowdery Farms, Green Zebra sliced tomatoes from Athens Hills CSA, and my very own country style green beans, which featured ingredients from all over the Athens Farmer's Market. Dessert was blackberry-raspberry pie; the fruit came from the farmer's market, the lard from Bluescreek, the butter from Holmes County, and the flour from King Arthur flour, which means it is from somewhere. I mean, I have no clue where it was grown, but it is great flour nonetheless. (I still haven't heard back from the farmer in Licking County on the issue of whether or not he can ship me some of his homegrown hard and soft wheat flour.)
 Now, let me talk a bit about supper.
It took me way back to my childhood--because it was very much a typical summer menu in my growing up days, whether I was in town with my parents or Gram and Pappa, or in the country with Grandma, Grandpa and Uncle John. In the summer, there were certain things that were nearly always on the table, and I want to talk a little bit about them.
First of all, there were always sliced tomatoes. At Grandma's house, they were apt to be on the table three meals a day, and we always ate them up, and never got tired of them. At Gram's house, they were always there for supper, but at lunch, tomatoes appeared on BLT's or on cheese 'n' mater sammitches. (That's how Pappa said it, so that is how I am writing it.) Those were made with thin sliced Pepperidge Farms white sammitch bread, homemade pimento cheese spread from Pearl Damus' Market down on Washington Street, and thick slices of ripe beefsteak tomato sprinkled with black pepper.
Man, alive, those were good. Pearl could throw down and whip up a batch of pimento cheese that would make your head spin and your eyes pop out it was so good.
At my parent's house, we had sliced tomatoes every dinner once tomatoes were in season, along with the usual meat, two vegetables and a starch. On a good night, we had sliced cucumbers or quick pickles, too. (Quick pickles, for those who are not hillbillies, are sliced fresh cukes, diluted white vinegar or cider vinegar, sliced onions, salt and pepper, and sometimes sugar. I didn't like them with sugar, but I did like that my Mom always put ice cubes in them to make them crispy-cold and almost frozen. Boy were they refreshing.)
So, I ate a lot of tomatoes growing up.
(And I was really depressed to discover I was allergic to them--not that it stopped me from eating them. Apparently, the allergy wasn't so bad as all of that, because I yet live and I still eat large amounts of tomatoes.)
Corn on the cob appeared at least three times a week in the season, except at Grandma's house. Then, it appeared nearly every night, and when it didn't, that was because it showed up at lunchtime. It was my job to go pick the corn and shuck it. Grandma would wait until the water was about to break into a dancing boil, and would send me out "quick like a bunny" to pick a big old basket of corn and shuck it as fast as my hands could tear. I hated the silk, and Grandpa was particular about it, so I had to be careful and pluck each bit up with shaking fingers, as I bounced in anticipation of the three to five ears I was fixin' to eat when we sat down.
Green beans were another favorite, and they were only fixed one way--long cooked.
Hillbillies don't know from crunchy green beans. I liked to eat them raw, myself, but I was looked upon as some sort of mutant life form from another planet because of that. I think my cousins thought I was half lagomorph or something because I ate every vegetable God made raw, including green beans. (I am also supposed to be allergic to green beans. You notice I am still eating them and am still alive. I think maybe my allergist was full of...well, beans.)
I always said, "But they taste so -green- raw."
And they would blink at me and say, "That's because they are green, ya dumb ole girl."
Well, be that as it may, everyone else, including me, ate them cooked in only one way--to death.
Now, let me qualify this. Green beans do taste lovely and fresh and green when they are raw. And when they are lightly cooked, such as sauteed or stir fried or steamed, and seasoned properly, they are perky and crisp and delicious.
But let me tell you--if you cook 'em up right when you are cooking them to death, they melt in your mouth and make you want to sing. They turn a deep olive green and start to break down into the cooking water, but that is okay, because that juice turns into something magical--it becomes pot likker, which is ambrosia to a hillbilly.
But there is a secret to long-cooking your green beans. You can't just stick them in a pot with water and salt and pepper and boil them until they expire into a huddled mass and expect them to taste like something. All that does is waste beans, water and time.
No, no, no. You must not do that.
You have to do what generations of Applachian cooks have done for centuries.
You have to put pork fat of some sort into the pot.
Smoked, preferably.
I bet you could see that coming. Smoked pig bits make everything better.
And, you can throw in some tiny new potatoes, too--because they will soak up that pot likker and turn all melty delicious.
And onion--onions are classic in the dish.
And, if you are me--you have to throw in some garlic and a chile pepper, just because to not do it is a wasted opportunity for goodness.
But, you know, you don't have to cook them all day. Naw, not at all. My grandma did cook them all day when she wanted them for supper, meaning the evening meal, but if she cooked them for dinner, meaning the noon meal, she never cooked them all day, yet they still came out all melty-smoky-wonderful with gold-green pot likker that I would drink in a cup.
She was a clever woman, and employed technology--she used a pressure cooker.
Which is what I did last night when I made my very own rendition of the dish, which I call
Hillbilly Nouveau Haricots Verts
Ingredients:
2 thick slices bacon cut into 1" square pieces
1 medium onion, sliced thinly
2 cloves garlic, minced
1 jalapeno chile, sliced (you can leave it out, but I'd rather you didn't)
1 pound strung, snapped, washed and drained fresh green beans (half-runners are the best)
6-10 tiny new potatoes, scrubbed and quartered
1 1/2 cups chicken broth
salt and pepper to taste
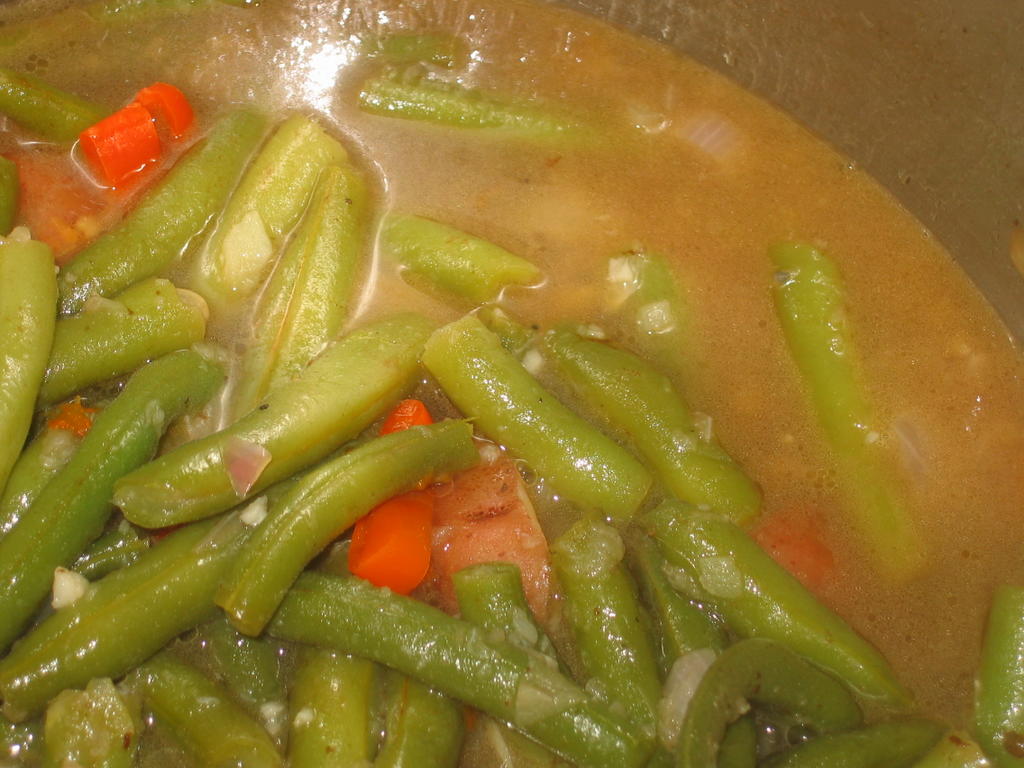 Method:
In the bottom of your pressure cooker, spread out your bacon, and cook on medium heat until crispy-chewy. Remove bacon and drain on paper towels and reserve. If there isn't enough fat, add some bacon drippings (y'all do save those don't you?) or some olive oil.
Add onions, and cook until they are golden and smelling really good. Add garlic and chile, and keep stirring until the onions are a nice brown color and everything smells delicious.
Throw in the beans and the potatoes, then the chicken broth, salt and pepper. (Be careful with the salt--how much you add depends on how salty your bacon is.)
Bring to a boil. Put the lid on your cooker, lock it down, bring to full pressure, turn down the heat to low and cook on full pressure for 12 minutes. Remove from heat, release pressure, open cooker and take a look. If the beans are dark olive green and starting to fall apart, and the potatoes are starting to break down and it all smells really good, it is done.
If the beans look too green and healthy, put the lid back on, bring the pressure up and cook for another couple of minutes.
Check for salt and pepper and serve with the bacon sprinkled on top.
Note:
If you don't have a pressure cooker, be prepared to cook the beans all day. Put them on the back of the stove, bring them to a boil, turn the heat down and simmer until they are dead and gone. Then, they are good. You will need more broth to do this--like maybe a quart or so, to make up for all that will simmer away. The pressure cooker is blessed in that it uses much less liquid.
Now, you will note that in all this recitation and talk about my childhood meals, I haven't mentioned the meat. Well, there is a reason.
I don't much remember it. There was no typical meat of my childhood suppers. It was the vegetables that every table had in common.
But right here--I do want to say--David and Cheryl at Bluescreek grow some mighty fine ribeyes, and Zak cooks 'em up right fine and dandy.
Sunday, August 07, 2005
Za Jiang Mein
 It is hard to eat locally when you cook a lot of Asian foods.
For example, the dinner we had Friday night was not exactly what a purist locavore would have approved of.
To be sure, the ground pork came from Bluescreek Farms in Marysville, Ohio, and the onions, garlic and cucumber came from the farmer's market here in Athens. The noodles were plain soft wheat fetuccini from Rossi Pasta--which very closely approximated fresh Chinese wheat noodles.
But the rest of it--eh--not so much. The Chinese ingredients were all from--guess where? China. Soy bean pastes and sauces, Shao Hsing wine and toasted sesame oil all came from the motherland, while the ginger and tofu were from California, and the carrots--well, I don't know where they came from, as I bought them a while back. Near as I can tell, they came from my vegetable drawer.
But, I was in the mood for something quick, filling and delicious, and I had ground pork thawed out, and all of the ingredients in the pantry, so za jiang mein it was.
Za jiang mein is to Beijing what spaghetti with meatballs is to middle America. A hot, filling, flavorful dish of meat sauce and wheat noodles. There, however, the similarity ends; the seasonings in za jiang mein are completely unrelated in flavor to the tomato and oregano-laden Italian-American dish. The meat sauce is at once sweet and savory, salty and hot, rich and oddly light, usually due to the addition of raw or blanched vegetables as a garnish.
I first ate this dish at a pan-Asian restaurant called Noodles Corner in Columbia, Maryland, and fell in love with it immediately. It consisted of fresh egg noodles with a topping of a rich minced pork and pressed tofu sauce garnished with raw cucumber shreds and cilantro. The waiter told me that it was a dish that originated in Beijing, where it was made in homes, small cafes, and in street stalls, and that some people made it spicier and some made it sweeter. The main flavoring, he told me, was bean sauce or bean paste--the Chinese version of miso.
I tried making it years ago with miso and it turned out godawful. I have since learned that while the fermented soy bean pastes and sauces of China are similar to miso, they are not the same, and really shouldn't be used interchangeably.
I finally decided to recreate the recipe myself Friday evening, because I was craving it something fierce.
I consulted three different recipes, from three different Wei Chuan cookbooks: Classical Chinese Cooking Noodles, Chinese Home-Cooking Noodles, and Chinese One Dish Meals. The three recipes were similar, but differed in the amounts of the various bean sauces that were used to give the dish its characteristic complex sweet-salty-rich flavor. I added ginger and garlic to the dish, because I know that they used them at Noodles Corner, and I also used the pressed tofu cut into tiny dice.
Here is a good place to talk about soy bean sauces. As I mentioned before, these fermented soybean products are similar to the Japanese miso, but have a completely different flavor profile. Sweet bean sauce should not be confused with red bean paste, which is a sweet product made from adzuki beans which have been cooked with sugar, and is used as a filling in sweet buns or pastries. Sweet bean sauce is made from fermented soybeans and isn't actually sweet--it just isn't as salty as regular bean sauce or chili broad bean sauce. One of the recipes I looked at used three different kinds of bean sauces, and I used them all--soy bean sauce, Sichuan broad bean paste with chili, and sweet bean sauce.
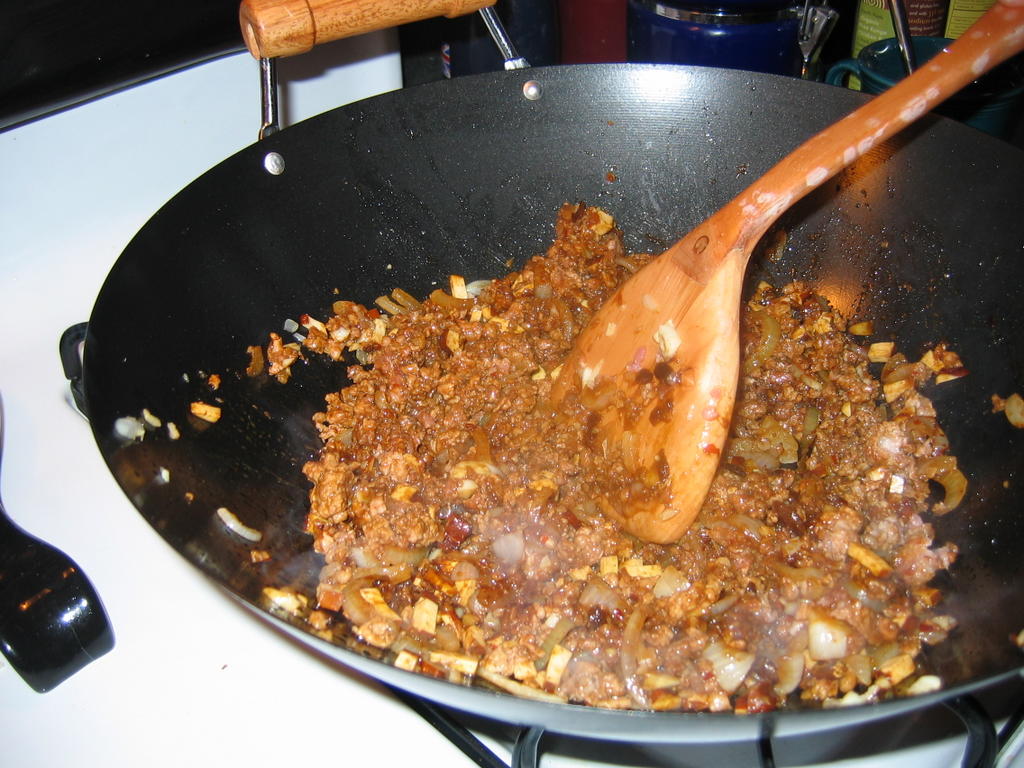 That was the correct answer.
I went ahead and used a good amount of Shao Hsing wine, just as they do at the Hometown Oriental Deli and Carryout where they make this dish and call it "King Du Noodles." That little dive in Columbus is a great place for homestyle foods, primarily Cantonese, though the family who owns the place is all from Hong Kong. Because of their background, the foods are a bit more complex than most purely Cantonese foods, and represent the wider tastes of Chinese regional cuisine. They also specialize in roasted duck, pork, braised pork belly and soy sauce chicken, but I digress.
Finally, I used chicken broth instead of water to make the sauce, as I saw no reason to diminish the flaovors in any way.
The Wei Chuan recipes all included shredded raw carrot as a garnish, so I used that, as well as the cucumber shreds, though I was the only one who ate those. Neither Zak nor Morganna will be convinced that cucumber is a good tasting vegetable, so I don't push it.
The dish is astonishingly simple to make, tastes wonderful and comes together very quickly. Morganna loved it--it was her first time eating it, and she and Zak declared this a keeper of a recipe, though I think I will refine it the next time I make it.
I think I will add minced black mushroom caps and the mushroom soaking water to the sauce, and for fun, I may add a bit of Sichuan peppercorn. I also think that cilantro would be an amazing addition, as I could just imagine how that fresh green flavor would contrast with the rich, deeply-flavored sauce.
All in all, for such an easy dish, the flavors are amazingly complex: the sauce is sweet and salty and mildly spicy with a strong flavor of wine. The noodles are toothsome and slippery without being slimy; their velvety texture contrasts beautifully with the fresh crisp crunch of the raw vegetables. Za jiang mein is a testament to the power of the simplicity of home cooking to speak to the soul of a hungry diner.
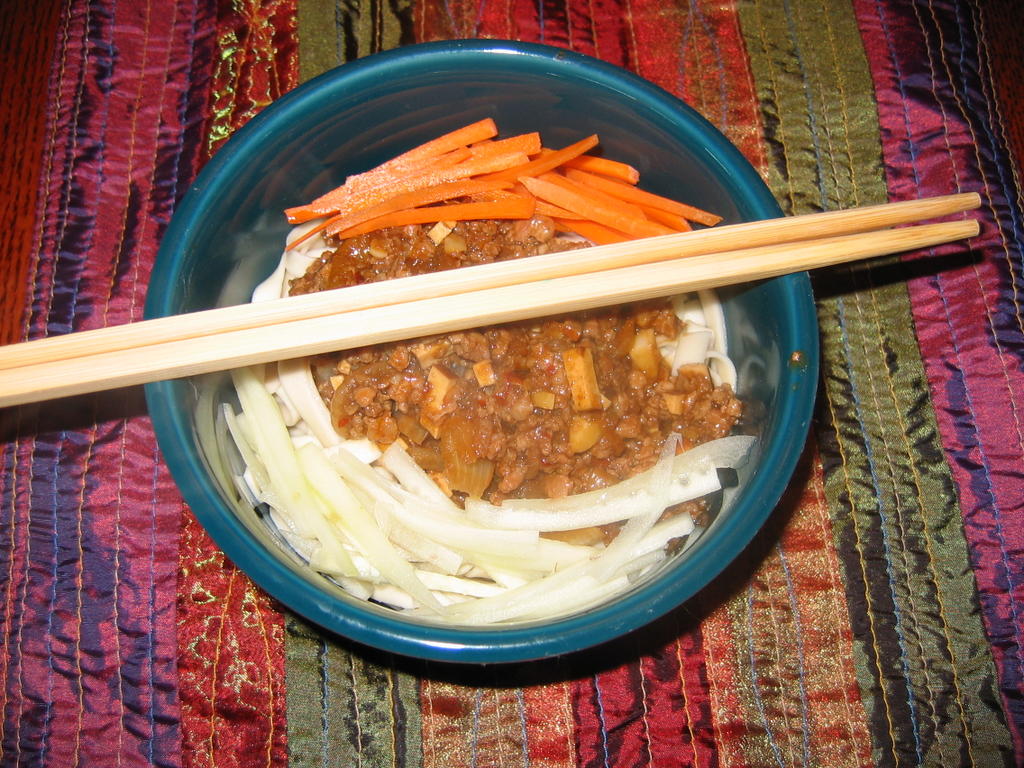 Za Jiang Mein
Ingredients:
2 tablespoons peanut oil
1 medium onion, thinly sliced
1" cube fresh ginger, minced
2 garlic cloves, minced
4 ounces pressed spiced tofu, diced finely
1 pound ground or minced pork
1 tablespoon sweet bean sauce
1 tablespoon Sichuan hot bean sauce (broad bean paste with chiles)
1 tablespoon soy bean paste or sauce
1 teaspoon sugar
3 tablespoons Shao Hsing wine
1/2 cup chicken broth
1 1/2 tablespoons cornstarch dissolved in 1 tablespoon cold water
1 teaspoon sesame oil
1 cup shredded carrot
1 cup shredded cucumber
1 pound cooked fresh egg noodles, cooked al dente and drained
 Method:
Heat oil in wok for stir frying. When it is done, add onions and cook and stir until they are just beginning to take on color. Add ginger and garlic, stir fry until fragrant--about forty-five seconds or so. Add pressed tofu and continue stir frying another minute.
Add pork, soy bean pastes/sauces, and sugar, and stir and fry, chopping at the meat to separate it with your wok shovel. Cook until most of the pink is gone from the meat.
Add wine, cook off alcohol. Add chicken broth and cornstarch mixture, cook, stirring, until thickened.
Remove from heat, drizzle with sesame oil.
Divide noodles into bowls, and top with meat sauce and vegetable shreds. Serves around six moderately hungry people if there are other dishes, or serves four really hungry people with no other dishes.
Note:
Some places make this spicier than others. At Hometown Oriental Carry-Out, they add a lot of chile paste for me, because they know I like spicy food, and the dish is usually fragrant with white pepper. It is amazing--even if they don't use the tofu or the shredded vegetables. It doesn't matter--it is still a wonderful dish that I crave when I am really, really hungry.
It is especially good in the wintertime, though I will eat it whenever. I love spaghetti, but I think I love this even more.
The Path of Pie III: The Best Pastry Crust in the World
 As I have noted in previous posts in this short series, the thought of making pie crust used to give me fits of anxiety. I had convinced myself that not only did I lack the "touch" necessary to make good pies, but that such a touch was not a learned ability but some mystical inborn talent which had been gifted by the gods to some people and not others.
Since I have devoted this summer to learning how to make good pies, I have this to say about my former superstitious beliefs: utter balderdash and poppycock. As a rational human being I should be ashamed of myself for harboring such nonsense about the simple matter of making good pastry dough. It isn't an inborn talent--it is a learned ability, and that is that. I am living proof of this fact, and I set before you the example of the blackberry pie I made for Morganna a couple of weeks ago as testament the fact that with a few months of focussed work and practice, I could indeed learn to make good pie.
And that means, dear reader, so can you. I offer here my recipe for a crust that combines the superior flakiness of lard and the delicious flavor and easier handling of butter, which, even in the summer, if one takes care and utilizes every trick at the baker's disposal, will make a lovely and flavorful pie that will not cause too much in the way of weeping, wailing and gnashing of teeth in frustration.
One must simply pay attention, go slowly and be patient. This recipe makes enough dough for a double crust pie. If you are making a single crust pie, you have several options: you can simply halve the ingredients, or freeze half of the dough, or make two single crust pies with this recipe.
You will note that I am not giving food processor or mixer instructions on how to make this dough. That is because I have noticed that for every person who makes good pastry in the food processor, there is another person who mangles the same dough using the appliance. Yes, you tend to handle the dough less in the food processor with your nice warm hands, but at the same time, you also risk over processing the dough. I have also found that what makes really flaky pastry are non-uniform pieces of fat cut into the flour--some should be big, some should be crumbs. The food processor makes too uniform of a dough.
Having not had such good luck with making pie crust in the food processor, I resolved to make it by hand. It is neither an onerous or lengthy process, so I am firmly of the belief that it would harm no one to try learning how to make pie crust by hand. After you get the hang of it, it actually becomes pleasant and somewhat meditative, and might even lower one's blood pressure.
Here is how it goes:
Barbara's Lard-Butter Pie Crust
Ingredients:
2 3/4 cups all purpose flour
1 1/2 tablespoons raw sugar (you can leave this out--but I like it better left in)
1 teaspoon salt
1/2 cup (one stick) cold unsalted butter, cut into cubes
1/2 cup cold natural unhydrogenated lard, cut into pieces and then frozen until quite firm
6-9 tablespoons ice water
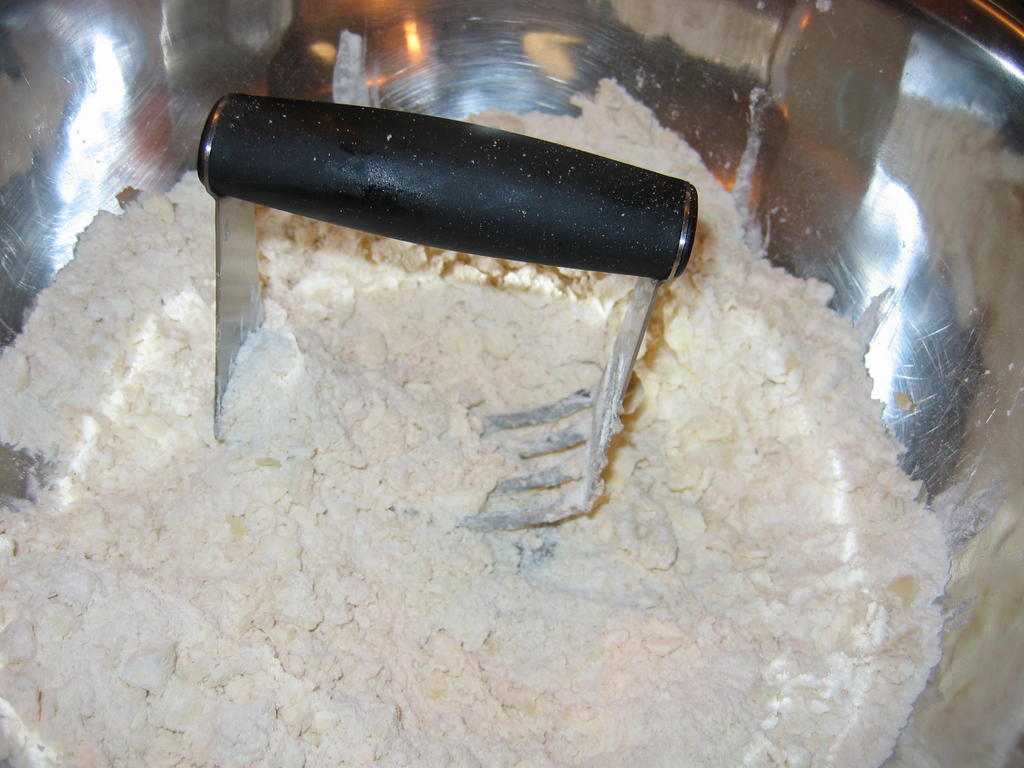 Method:
First of all, chill your marble slab, mixing bowl and pastry cutter in the freezer. Go ahead and chill your silpat and rolling pin, too. Have several pieces of plastic wrap at the ready, as well as a couple of food storage bags. If it is really hot out, measure out your lard (I pack it into a dry measure, then level it, the displacement method gets too much liquid in the fat and is messy as hell), cut it into bits the size of your first finger joint of your index finger, more or less, and stick them in the freezer to firm up really well.
Take the mixing bowl out, wipe any condensation from its interior, and put all the dry ingredients into it, and mix thoroughly. Scatter butter cubes and lard pieces evenly over the flour and take up your pastry cutter and cut the fat into the flour using quick pouncing and rocking movements with the cutter. You will need the clear the blades with a table knife once or twice. Don't use your fingers--you don't want to melt the fat by playing with it with bare hands. keep up this pouncing, scraping, and rocking business until the fat and flour are mixed together in a bunch of uneven looking clumps. Some should be crumbs, some should be pea-sized and some should be bigger than peas--about the size of raggedy little lima beans. Scrape the blades of the pastry blender one more time, and if the room is really warm and the lard has started to soften a lot, put the bowl, fat and flour and all, back into the freezer to firm up a little.
If the fat is still firm, just continue onward: add the ice water to the fat and flour mixture by measuring it out tablespoon by tablespoonful, and sprinkling it evenly over the mixture. I usually start with six or seven tablespoons. After it is in there, go to the sink and rinse your hands in as cold water as you can stand, or stick them in a bowl of ice. Dry them off. Using your hands and working quickly, bring the mixture together into a smooth dough. Don't knead it! Just try and squish it gently together into a ball. If it is still too crumbly, sprinkle another tablespoonful of water over and try again. Just add enough water to bring it together, and no more. After it clings to itself in a ball, carefully pat it down to a big disc and cut it in half--though not quite evenly. I cut it so that one piece is just a tiny bit bigger than the other, so that when you roll out the bottom crust, you actually have more dough to work with, because it needs to be slightly bigger to fit in the pan than the top crust.
Take the two disc halves, form them into discs, wrap them tightly in plastic wrap, stick them in storage bags, force out the air and stick them in the fridge for an hour or the freezer for fifteen minutes or so.
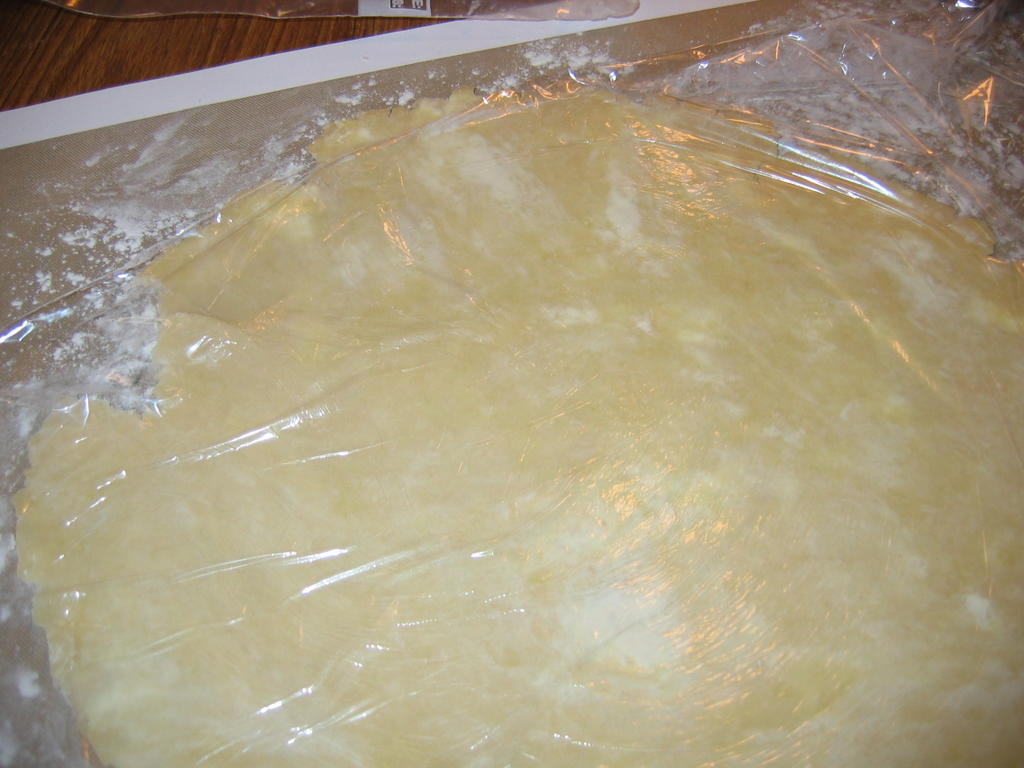 Now, you need to take your marble slab, silpat and rolling pin from the freezer and start getting ready to roll out the dough.
Preheat your oven to 400 degrees F.
Set your marble slab onto the counter and, then lay down your silpat to cover it. Wipe down any condensation on the top of the silpat, but leave any that is on the marble, because it makes the silpat stick well to the stone. With your fingers or your flour wand, sprinkle an even layer of flour over the surface of the silpat--I use as little as possible, because one of my personal preferences in making pastry dough is to make a drier as opposed to wetter dough, as I find that with lard in the crust, drier dough handles more easily. So, you really won't need a lot of flour to be added to the dough.
Bring out your larger dough disc, the one you intend to use for the bottom crust. Have your pie pan at the ready close by. Unwrap your dough disc, set it in the middle of the silpat, and sprinkle the top surface with a little more flour. Cut a fresh sheet of plastic wrap and lay it over the dough. (Even in cool weather, with the lard in the crust, I still use the plastic wrap to roll it out. Butter crusts I will roll out without it, but lard--nope. It is the magic of Saran Wrap that saves me every time.) Make sure you have a piece of wrap big enough to roll out a twelve inch diameter sheet of pastry. If not, use two pieces overlapped slightly.
Take up the rolling pin and start rolling. If the dough is too hard, let it warm up a little bit--no longer than five or so minutes, and try again. Julia Child whacked her dough with the rolling pin to soften it up--but that is a good way to break your cold marble slab, especially if you miss, so don't go there. Just let it warm up a bit. After your first roll in a direction (forward is the natural way to go), I do the next roll in the opposing direction, which if forward is back. Then, I turn myself one quarter turn to the right(I turn myself to avoid turning the dough and thus handling it and risking breaking a hole in it or tearing it), I do the same forward, back roll. Then I turn the opposite way a half turn (one quarter turn to get me facing straight ahead again, one quarter turn to the left to be facing opposite of where I was facing and do the forward, back roll. Then, I pick up the stone and give it a 180 degree turn, and continue rolling. as above.
If you do this way, you will quickly have a pretty close to circular piece (though, if you make your dough as dry as mine, it will be ragged at the edges) of dough, and you will be ready to put it in the pan.
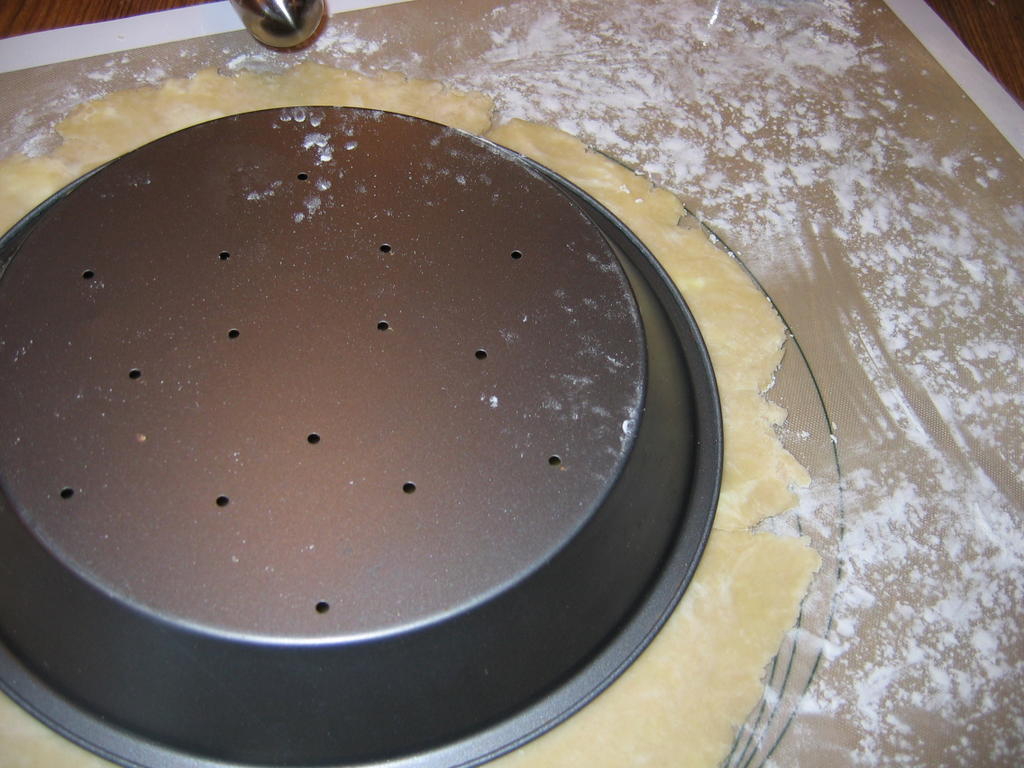 This is accomplished by peeling up the plastic wrap, and setting it aside for the next piece of dough, then laying the pan face down on the circle of dough, centered.
Then, peel up the edges of the silpat and wrap them over the bottom of the pan. (If my description is losing you, look at the pictures--it sounds more complicated than it is. Believe me, this is the simplest way to get the pastry into the pan--I have tried all the other ways of doing it, and have had very little success with them.)

Scoot your fingers under the edge of the silpat and under the edge of the pan, and gently grasp the bottom of the pan with your thumbs, while your fingers lightly cup the bottom of the pan and the pastry through the silpat.
Take a deep breath, center yourself and with a quick flip of the wrists, turn the whole kit and kaboodle over, and unroll the silpat so that the pan is sitting on the counter or marble slab and the silpat is laying flat on top of it.
Now, it is a simple matter of peeling the silpat up from the dough, and easing the dough down into the pan. Make sure to settle the dough evenly into the bottom of the pan, and rearrange gently as necessary to make everyone even and happen.
Using dedicated kitchen shears (please don't use the same ones you cut chicken bones with--ick), trim the ragged edges of the pastry to a simple one-half inch overhang from the rim of the pan.
 Fill the bottom crust with your filling of choice (recipe to follow)--for a standard-sized nine inch pan I use around five cups or so of fruit.
Roll out your top crust following the same directions (they worked so well the first time, you need to do them again to make sure) and then, put the top crust on the pie. The easiest way to do this is to peel up the plastic wrap (unless you like plastic in your pie) and slide one hand under the silpat to the center of the dough. Spread your fingers wide, and use the other hand to gather the two edges of the silpat in a loose half fold. Pick up the dough, bring it to the pie pan, drop one edge of the silpat, and invert the top crust over the pie. Peel off the silpat.
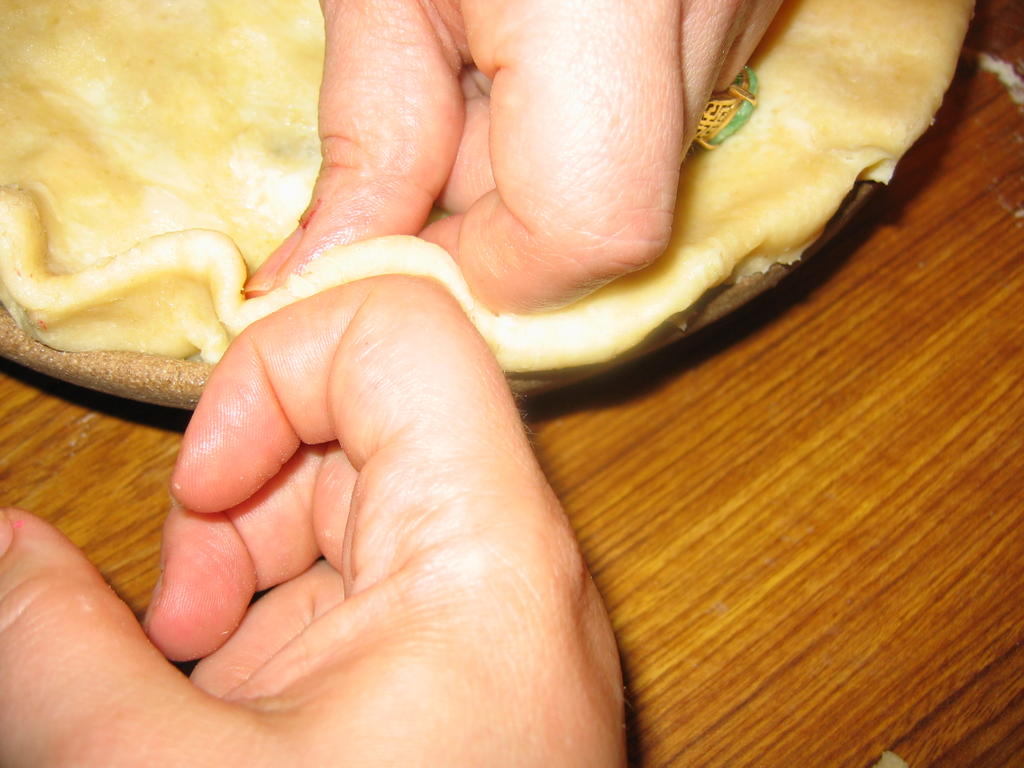 Center the top crust, trim the edges just a shade longer than the bottom crust, and turn the top crust edges under the bottom crust and pinch lightly to close.
Finish the edges as you like--I like to do flutes, but I warn you that high, dramatic flutes as pictured will droop in the oven, because lard crusts just are too soft for big flutes like that. You can trim the edges closer and thus make shorter flutes, or you can keep the big ones and not worry about how they look, because you like the crispy edges best, or you can press the edges decoratively with the tines of a fork. (I generally flute it and don't worry if they droop, because I like the crusty edges.)
 Cut vents in the top of the pie for steam; I usually do a monogram. You can do a letter to represent the filling, or do as I did and use the first letter of the person's name for whom you made the pie--in my case, it was an "M" for Morganna. Or you can cut flowers, little viney bits or other decorative designs using the tip of a sharp knife.
 You can brush the top of the crust with milk and sprinkle it with a scant teaspoon of raw sugar to make a nice sparkling brown finish on top that has a hint of crunchy sweetness.
Bake the pie in the four hundred degree oven for around thirty minutes. At that point, shield the edges of the pie with the chakram by placing it on top so that the flutes are covered and the rest is open(you know, it is really called a pie shield, but I so prefer chakram that I will always call it that from now on.) and lower the heat to 375 degrees F and rotate the pie 180 degrees if you have no convection fan (if you do have one, you don't need to do the rotating thing). Bake for another 25-30 minutes, or until the top is nicely browned and the filling is bubbling thickly through the vents.
Take out and cool on a rack. It is best to let them cool almost all the way before cutting into them--when they are really hot, the texture of the crust is apt to suffer and the filling will be runnier and is likely to burn your mouth. So, be patient before cutting into it.
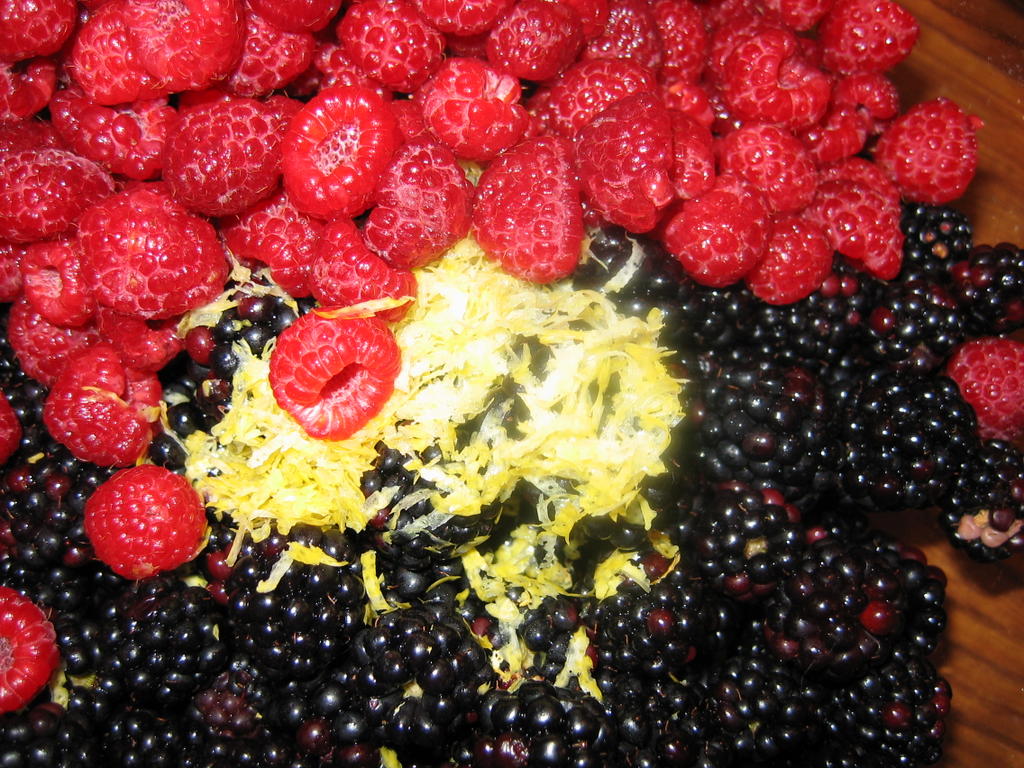 Blackberry Filling
Ingredients:
2 1/2 quarts fresh blackberries
1/2 cup-1 cup raw sugar
zest of one lemon
1 teaspoon lemon juice
1-2 tablespoons rosewater
4 tablespoons cornstarch
Method:
Pick over blackberries, and wash. Drain completely. Put into a bowl with sugar to taste, the lemon zest, lemon juice and rosewater. Allow to macerate for at least one hour. Add cornstarch and toss to incorporate, then fill pie and finish and bake as directed above.
Note:
You can substitute raspberries for blackberries--just use less sugar and more lemon juice. Or, as pictured above, you can use half blackberries and half raspberries. In that case, you still use a little less sugar, as raspberries are much, much sweeter by nature than blackberries.
Saturday, August 06, 2005
Weekend Cat Blogging: Cat Girl
 And now for something a little different: a cat, a girl, a catgirl.
In celebration of Morganna coming to live with us, I post a picture of her from five years ago, when we lived in Maryland. She was visiting us, and we had just bought her her "bad kitty" hoodie. She wanted to pose wearing it next to our poster of a vintage photomontage entitled, "Me and the Cat," while holding Minna in her arms.
How could I refuse to comply?
So, there they are--my two catgirls, Morganna and Minnaloushe, cooking up mischief and looking smashing together.
Over at Farmgirl Fare, see the new orange kitty. Claire's Kiri is looking pensive this week at Eat Stuff. And then, there is Kits, the manly cat at Boo's place at Masak-Masak.
Thursday, August 04, 2005
The Path of Pie II: Tools Without Tears
These paltry bits of kitchen tomfoolery I have cast aside, while the tools which have proven over time to be worthy additions to my ever-growing culinary arsenal, I will now explicate, hopefully to the edification and entertainment of all.
The first steps of making good an exemplary pastry crust involve measuring and mixing.
I went to culinary school, and was forced to take several pastry and baking classes, though it was somewhat against my will, I do admit. In these classes I was taught to measure all ingredients by -weight- not -volume-. To measure anything other than the tiniest amount by volume was the mark of an amateur cook, a housewife or a drudge, and was not only distinctly frowned upon, it was openly derided.
So, it should be surprising for the reader to see that I do not have a scale pictured as I discuss the indispensible tools for successful pastry making. I do own a scale--a very nice digital Salter, in fact, and have used it to make pie crust, but I decided not to measure my master recipes by weight, and instead measured, re-measured, tested and re-tested by using volume measures instead.
Why? Why should someone who is professionally trained do this?
I'll tell you why--because I believe that it is perfectly possible to make very good pie crust using volume measurements, and there is nothing wrong with doing so. I am not writing for a professional audience--I am writing for cooking enthusiasts who are overwhelmingly home cooks. And not all home cooks are serious foodies who run out and buy baking scales.
So, I wanted my master recipes to be accessible to all--including those who do not own, nor are going out to buy, scales.
Besides--the recipes I started with--my grandmothers'--were measured by volume. And their pie crusts were to die for--so to heck with those culinary purists who would look down their noses at volume measurements.
So--the first items on the list of necessary tools are some really good dry measures, in cups and in teaspoons and tablespoons. I like the scoop-like ones from OXO that I use the "swoosh-dunk/sweep" method with. That method requires a straight-edged tool like my icing spatula to work. A straight edged table-knife or chef's knife will do as well.
The next items are mixing bowls. For pie crusts mixed in the summer, I highly suggest wide, shallow metal bowls--the metal conducts temperature very well, so you can stick it in the freezer before using it, in order to keep your fat as chilled as possible while working with it. In the winter, when ambient room temperature isn't such a problem, a wide, shallow ceramic bowl works just as well. The wide, shallow shape allows you to easily reach into the bowl and work your wrist while cutting in the flour.
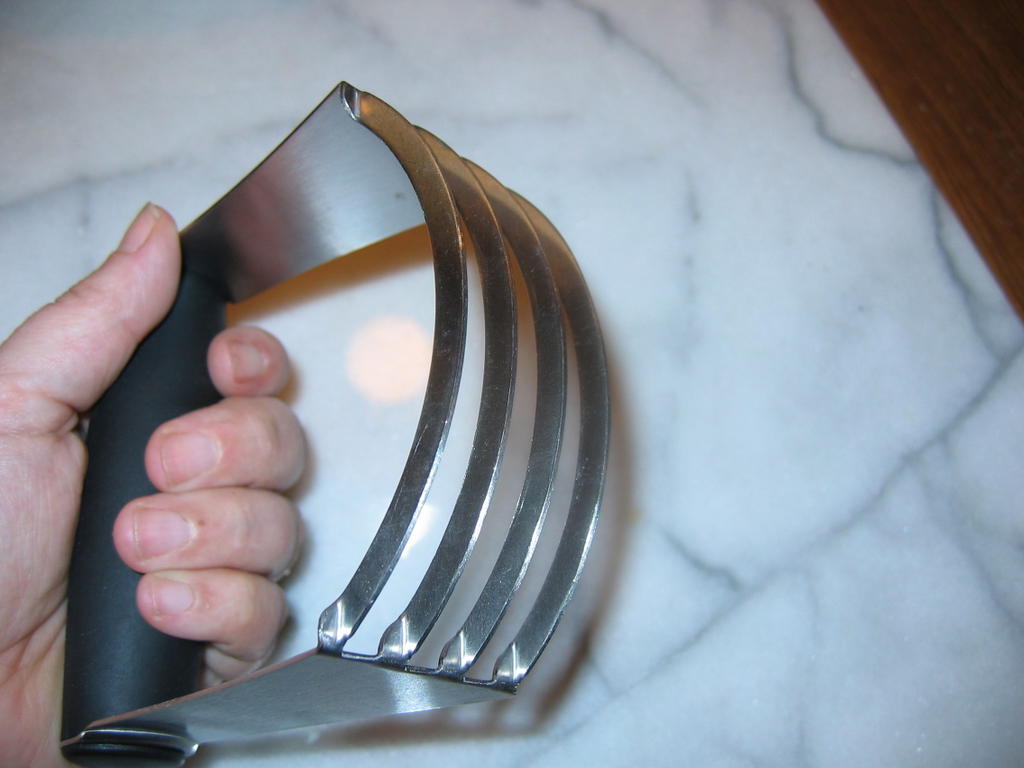 Ah, yes--cutting in the flour. I know a lot of people like using food processors to make pastry, but I think inexperienced people risk making tougher pastry by using the machine. Food processors create heat from friction, and while some may say that it doesn't generate enough to matter, I beg to differ. When we made bread dough in professional baking classes, we had a formula which we used to figure out what the optimum temperature of the water would be to get the yeast to become lively in the shortest time possible. Factored into this equation was the room temperature and the temperature rise from the friction generated by the mixer. I say that if bread bakers are so concerned with it--it must be important.
And it is. I cannot count how many pastry doughs I have mutilated using a food processor. So, I gave up on it and do it by hand, to much better effect.
Some people use a fork to cut the fat into the flour. I find that to be uncomfortable, unwieldy and messy. Others use two table knives, but I never could get the knack of that; I always flung so much flour hither and yon that I ended up looking as if I was made up for kabuki theatre.
The answer, of course, is the pastry cutter.
Ah, but which pastry cutter?
One that -cuts- the fat into the flour.
In other words, one that is sharp. That has blades. Not wires--they are rounded and they -mush- the fat into the flour and they are flimsy and bend and spring and work my nerves. Not odd looking things that look vaguely like potato mashers, though they do work better than those wire hoopy-doopies. Work though it does, it is slow and clumsy; the potato masher still cannot compare to the ones that have four curved blades brought together with a handle. That model makes short work of chilled fat and cold flour. With a firm grip and quick, practiced motions of the wrist, the fat is cut in, and all is well.
One must simply scrape accumulated fat out of the blades once or twice with the straight-edged spatula or table knife, and then go on until the fat and flour mixture looks like a bunch of powdery pale, shaggy peas.
 The next most harrowing step in making pie crusts involves rolling and shaping. This is a perilous step, which if done improperly can result in tough, mealy, greasy pie crust, and as we all know, no one really wants to eat that.
So--what tools are required to avoid the cardboardy crusts we are all familiar with?
First--a marble slab really does help, particularly in keeping the dough cold. Get one and hours before you roll the dough out, make room for it in your freezer and stick it in. Or, failing that--I know some of us feel the need to stuff every weird thing we can find in our freezers, like chicken feet, quarts of stock, half a carcass of a pig and vanilla beans, that we can never find space for a big hunk of rock--put a bunch of ice in a ziplock bag and set it on the slab to chill it. That doesn't work as well, but it does work. Just be certain to wipe any condensation off the slab before using it.
While a marble slab will keep the dough chilled, it will do nothing to affect the stickiness of the dough, which is affected more by the amount of liquid and the type of fat than it is by ambient temperature.
A silicone mat, known by the tradename Silpat, will go far in allowing a baker to successfully roll out pastry dough into a thin, round sheet without having it stick to the rolling surface. Some of them, like the one pictured above, are made specifically as rolling surfaces, and thus have helpful markings to show how round a 12 inch circle of dough should be. I picked mine up at Sur La Table, and have loved every minute I have used it.
You still need to flour your silicone rolling surface--that is where that weird looking wire contraption comes in. It is called a flour wand, and while it is not necessary, it is fun. You squeeze the handle and the spring opens. You dunk it headfirst into flour, then release the handle and the spring closes, trapping flour inside. Then you take it out and with a gentle shake, you can evenly sprinkle flour (or powdered sugar) over any surface without getting flour all over yourself and everything else. It only goes where you want it.
Rolling pins. You can use marble ones--I have, and I do like them--they are heavy and chillable. However, having also had one go rolling away and drop on the floor and crack--they can be dangerous. A plain wooden one like the one pictured, also does an admirable job, but my favorite is the silicone coated metal one. It is chillable, it has ball bearings inside it for a smooth roll, and the silicone, once coated with flour, makes for nonstick rolling, even of lard crusts, except in the hottest of weather.
In the case of hot August weather and lard crusts--even the silicone rolling pin cannot guarantee that there will be no sticking--in which case I suggest you use the greatest weapon in the pie-makers' arsenal, but which is not pictured--Saran Wrap.
Yes. Plastic wrap. When it was hot in the kitchen, and Grandma had no patience, she resorted to rolling her dough out between sheets of plastic wrap. I do the same, and it works like a charm every time. I flour the silicone rolling sheet, and lay the chilled dough disc on top of it, then sprinkle flour on top of it, and then lay a sheet of plastic wrap over it and commence to rolling.
When the dough is the desired size and thickness, peel the wrap off and lay it in the pan.
 There are a couple of necessary items for playing with fillings. If you are going to use fresh sour or sweet cherries in your fillings, invest in a cherry pitter, please. It will make short work of the thankless and irritating task of pitting cherries, and as a bonus, it will pit olives as well. The one pictured is simple to use and easy to clean.
A Microplane grater makes short work of zesting lemons; it reduces the vibrant yellow skin to whisper-thin shavings in no time. I find that lemon or lime zest is a very good addition to many fruit fillings, so I have found the Microplane to be invaluable. And, finally, for grinding spices, a few almonds or lavender petals, I like my plain old marble mortar and pestle. It is perfect for grinding up small amounts of anything that is grindable, and in making flavor enhancements for pie fillings--it is always a small amount, so there is no sense in dragging out a food processor or spice grinder. Besides, the mortar and pestle are much easier to clean up and they look neat on the counter.
 Finally, we have the shaping and baking--and a handful of tools I have found to be perfect for the job.
I like my unglazed stoneware pie pan--it bakes more evenly than metal, and it looks nicer and makes a drier bottom crust than glass, though glass is my second choice.
The little clay spheres are pie weights--they are used when I bake a pie crust "blind" or unfilled. You can use beans instead, but I had the pie weights, and figured I should use them. The scissors are for trimming the edges of the pie crust in order to make prettier, more even flutes.
Trimming with a knife is clumsy and sometimes dangerous--I find that a pair of dedicated kitchen shears work a hundred times better and are easier to use.
Finally, that chakram-looking thing isn't a leftover from my Xena, Warrior Princess days--it is meant to cover the edges of the pie in order to keep them from browning too much. The fluted edges brown before any of the rest of the crust, so once it has browned to your liking--usually after the first thirty minutes of baking, you set this contraption over the pie, and it shields the edges and lets the center brown, which results in a prettier, more evenly-browned pie.
The only other tool I use, which I forgot to photograph, is the pastry brush. I don't go for the weird silicone ones that look like squid, or anything like that. I just use a nice paintbrush that is dedicated to the task of pastry. It washes in the dish washer, and is perfect for brushing the top crust with egg or milk to make a pretty finish.
That is the roundup of tools--it isn't a huge amount of equipment, because I tried to pare it down to the essentials. Other folks may have other things they cherish--please post and let me know what you have used that works for you. These are just the things which have helped me master the art of pie baking so that I can stand up proudly as a worthy successor to my grandmothers, both expert bakers in their own rights.
Eating Locally; Tasting Globally
 Northern Italian style soft-wheat pasta is not the first local food item one would think of when one is living in Ohio.
However, right in the heart of the small Ohio river city of Marietta, stands a locally owned pasta factory that creates twenty-one different flavors of Tuscan styled noodles, the kind that Marcella Hazan calls "silken" with a "plump" texture and "marvelous fragrance."
Rossi Pasta, (which Zak and I have jokingly called for years Rasta Posse, because my dyslexia is endlessly amusing) is a locally owned and operated business that sells pasta to the gourmet food trade and to local grocery stores alike. Thier noodles, which come in several shapes, including no-boil lasagne, and pasta sauces have been local favorites for decades, but are also well-known across the country as a premier gift item, and have been sold in the Neiman-Marcus catalogue and used as corporate gifts by the Ritz-Carleton.
And that is the only problem with their pasta--it isn't cheap. At $4.95 per twelve-ounce package, their noodles do not fall into the category of "frugal food," but they do have several other factors working in their favor such that they have been staples of my pantry for years.
For one thing, the flavor and texture of the noodles is fantastic--they really are tender and silky, as lush as pasta fresh from my hand-cranked Atlas would be. The flavors are subtle, but quite present, and the pasta is as good simply dressed in a bit of olive oil and parseley as it is tossed with any number of mild or spicy variants on the standard Italian sauces. It also cooks very quickly--depending on the size and shape, the noodles can take anywhere from one to four minutes to cook completely once they hit boiling water, which makes them a boon for a cook who is too famished to spend a long time preparing dinner.
There is a bulk option when it comes to ordering; any single pasta variety is available in ten pound boxes for $44.95, which is an improvement on the price, and makes sense if one plans on eating a great deal of their pasta, but it is still significantly more expensive than even most imported durum wheat pastas.
But, for the local eating challenge, it is a perfect basis for a quick, locally-derived dinner.
 While I boiled water for the noodles, Morganna sauteed a cut up chicken breast from Canaan Valley Farms which is just outside of Athens, along with some baby squash, onions, bell pepper and a tomato from Athens Hills CSA. I heated up some pesto I had made last week and put into the freezer--all of its components save the olive oil, pepper, parmesan cheese and pine nuts were locally aquired. We cooked a combination of three different flavors of fetuccini: jalapeno (my favorite), spinach basil garlic, and garlic, then tossed them with the pesto and topped it with the sauteed chicken and vegetables. Some quick shavings of parmesan finished the dish beautifully, giving us northern Italian flavors born from the bounty of southern Ohio.
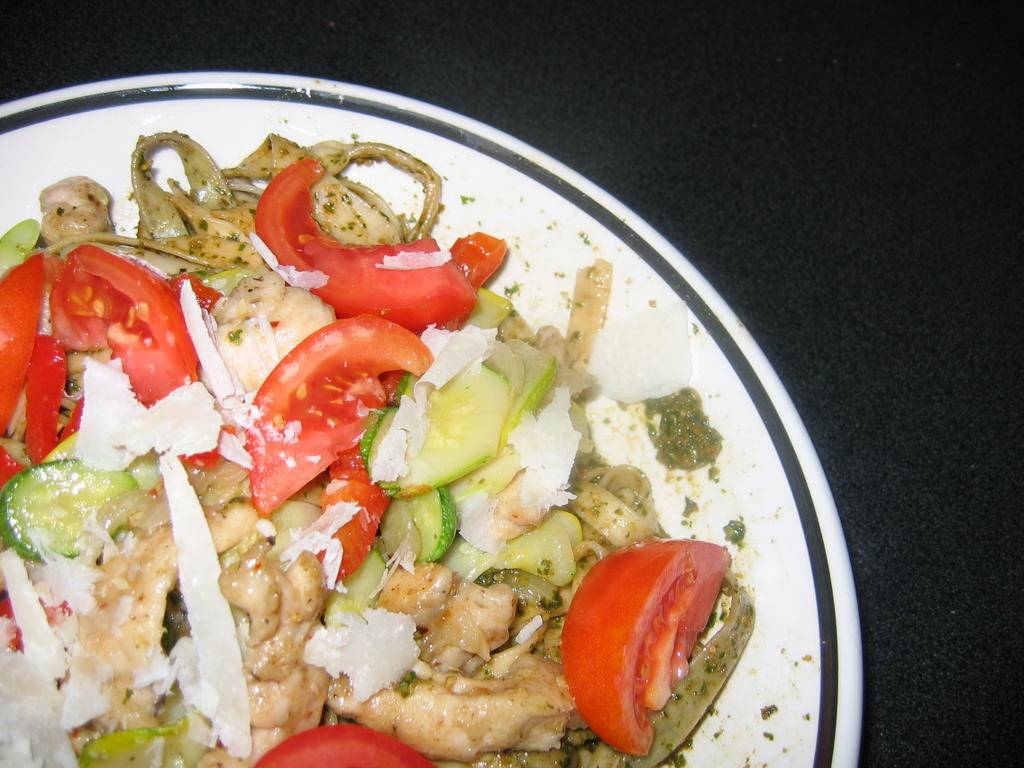 And what is even more exciting--the entire meal took us about thirty-five minutes to cook from start to finish. Wow. I don't think that Rachel Ray herself could have done it any better!
I'd like to reiterate once more that I don't feel as if the eating local challenge should be a case of deprivation and sacrifice--it isn't Lent. I see it more as a game where all the participants are trying to become more aware of our food, where it comes from, how it is grown or produced and what difference, if any, is there between non-local food and local food.
Wednesday, August 03, 2005
The Locavore's Bookshelf: This Organic Life
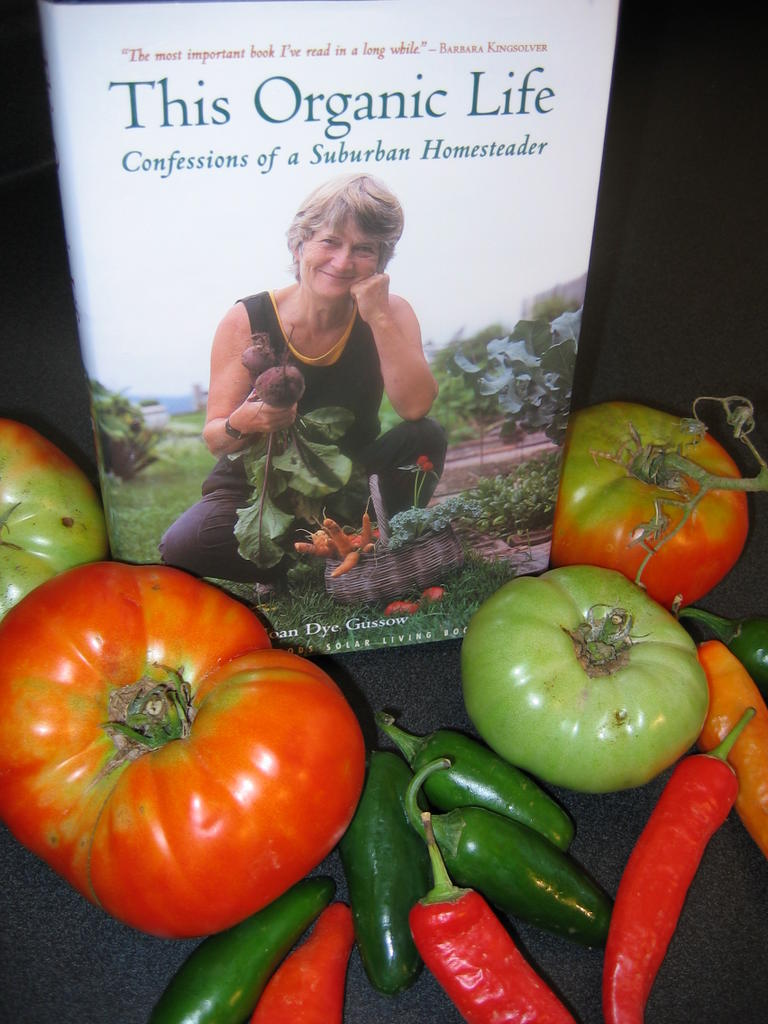 Joan Dye Gussow's book, This Organic Life: Confessions of a Suburban Homesteader is one of those that readers either love or hate. If you want an organized instruction manual on how to grow all of your own food, you will hate it. If you like amusing memoirs which are also packed with useful information on issues of sustainable food systems, you will love it.
I chose to review this book first among the titles I have chosen to highlight this month, in large part, because Gussow set herself the challenge to eat locally a long damned time ago, and went farther with it than I think most of us would dream is possible. She then sat down and wrote a book about it, though, in truth, it is also about a lot more--the loss of a spouse, how to grow organic vegetables, how not to buy a house, and how to trap garden-demolishing varmints.
Gussow is an engaging author; while she is very much a nutritionist and retired professor, she doesn't lecture like one. Even when she is quoting statistics, facts and figures, she comes across more as a friendly neighbor chatting over coffee than a fact-chewing drone. This may be seen as either a good thing, or a bad thing, depending on your point of view--if you don't want to hear about remodelling a house or the death of her husband, you will get frustrated as she recounts these tales in the early chapters of the book. If you are like me, and want to know everyone's story, then it won't bother you a bit that it isn't until the second half of the book where she gets down to business and starts really getting into the meat of the book, which is this: our food system is an incredible waste of resources and materials, and results in food that not only doesn't taste so good, but isn't necessarily that good for you.
She has her ranty moments--which is fine with me--I like a good fiery pulpit-pounding clarion call as much as anyone, and some of her rants are hilarious. Her story about how she horrified a vegetarian student in one of her classes by pointing out that farmers kill animals who try and eat their crops and that the blood of those animals is thus on the heads of those who eat those crops had me giggling gleefully. (It is the farm girl in me who is always amused at the discomfort city folks have in all the dirty, unpleasant business that goes on in a farm that gets me every time.) She also tells about her experiments with a genetically modified tomato--the tale is convoluted and long, but very amusing.
What is most valuable in this book is the fact that she set herself to only eat what she grew herself in her suburban yard (she converted grass to raised beds and grew vegetables and fruit on nearly every inch of arable space where once there was lawn) and what she could buy locally. She preserved her summer harvest for winter, and kept up this way of eating for years. Years.
She also started a community garden, so some of her neighbors could do the same.
And then she wrote a book about it, to prove that it could be done, it has been done and other Americans could do it, too.
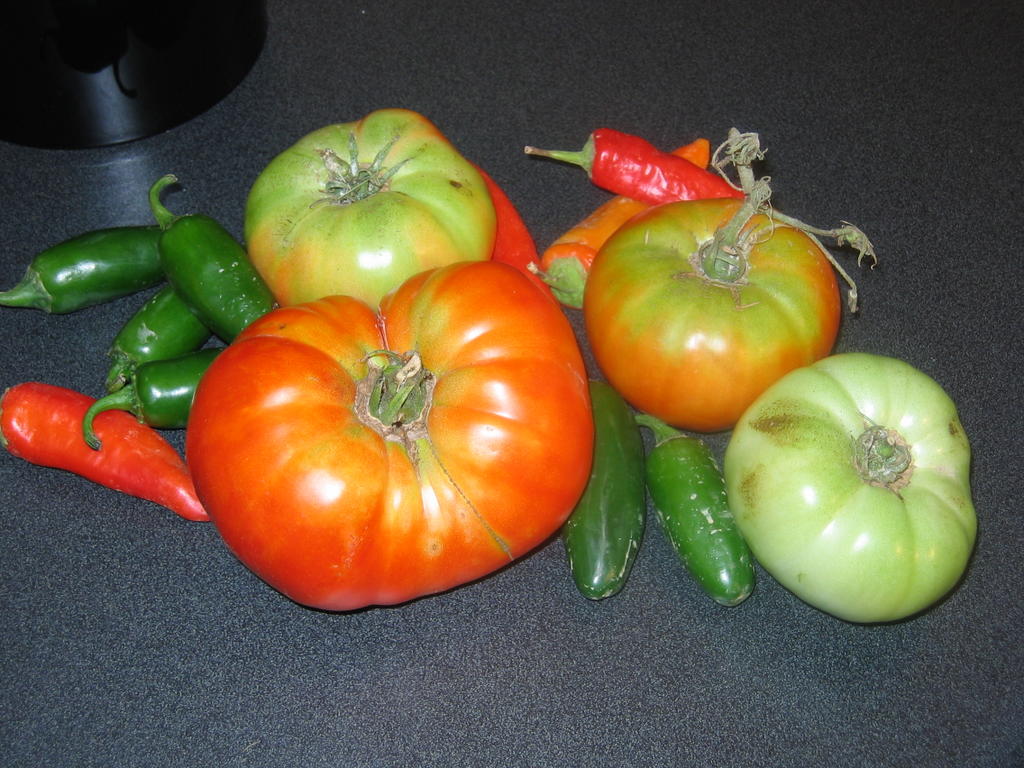
That is the greatest value in this book, which is certainly flawed. For instance, I was disturbed at the amount of landfill waste she generated in the remodelling of her home--that didn't seem very sustainable or organically minded to me. Her critique of veganism, while partially accurate, was still essentially flawed as well, but these minor issues do not change the fact that Gussow did what many of us food bloggers are setting out to do for a month, FOR YEARS, and not only did she survive, she thrived, and she tells us a fine and inspiring story about it, to boot.
While it isn't perfect, it is certainly worth a read, especially this month, as some of us strive to eat more locally produced foods. Her trials and tribulations and triumphs are all very soul-sustaining and amusing, and might help us all get through some of the rough spots as we work toward our goals of eating more of our calories from the local foodshed than we currently do.
The Path of Pie
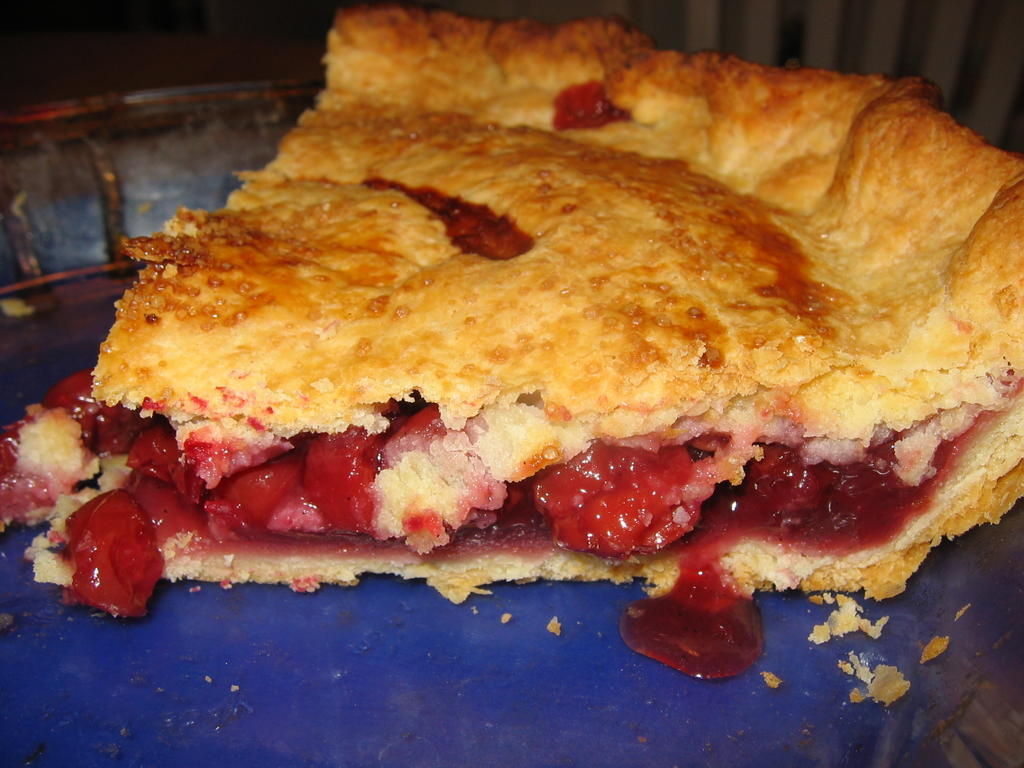 When you grow up among Appalachian folk, pie is important.
Cake, yeah, yeah, some people liked cake, but really, a woman was measured by the quality of her pies.
Pies were where it was at.
If a woman could bake a pie, she was the mistress of the kitchen, the queen of the hearth, the lady who ruled the roost, because, gosh darn it, everyone loves pie.
And both of my grandmothers were wonders with pie.
Gram made delicious pumpkin pies, and Grandma--well, there never was a pie that came out of her kitchen that wasn't delicious. And, as a farm wife with four kids, nine grandkids, fourteen great grandkids and numerous friends, fieldhands and neighbors just passing through, she made a whole passel of pies.
I hesitate to estimate how many pies my Grandma made in her life. I would not be surprised to think it over a thousand or so. That is a lot for a non-professional baker, working alone, making them by hand. (And what is even more amazing--by the time I was born, Grandma was a diabetic, and never ate any of the desserts I remember her baking so beautifully. She never even tasted them to see if they were seasoned correctly. She just knew.)
And really, I hesitate to even try and figure out how many -types- of pies she made over the course of her life. I will list a few, and probably bore everyone to death, but I am going to do it anyway, just out of my own sense of curiosity and adventure.
Apple, Dutch apple (that is apple with a struesel topping), apple-raisin, banana cream, blackberry, blackbottom, black raspberry, blueberry, blueberry-peach, caramel, cherry (sour), cherry (sweet), cherry chiffon, cherry-cheese (it was like a cherry-cheese danish in pie crust instead of sweet yeast dough), chess, chocolate creme, coconut cream, custard (plain and with any number of kinds of fruit), lemon chiffon, lemon chess, lemon meringue, mincemeat, peach, peanut butter, pecan, pumpkin, rhubarb, strawberry, strawberry chiffon, strawberry-rhubarb, sweet potato, and winter squash.
That is just what I can remember off the top of my head--I am sure if I asked my family to think about it, we could come up with another handful of pies that I forgot about. Also, those are only the dessert pies. She made savory pies, too--and quiches, but she called them pies, because a pie is Anglo-American (just like my Grandpa), and thus is good, hearty, stalwart food that can be trusted. Quiche is fancified French food and is not any good, nor to be trusted. But even if she called it pie, it was quiche, full of eggs and cheese and ham and asparagus and whatever else she felt like putting in it. She made a pie that was just her incomparable lard crust with sauteed onions, shredded sharp cheddar cheese and scallion tops baked to a bubbly browned perfection. Oh, that was good.
She even made something she called "succotash pie," which had the ubiquitous mixture of fresh corn cut from the cob and lima beans baked with onions, a bit of bacon and some egg custard in a pie shell, then topped with cheese. I remember loving it, though I think that Grandpa sniffed at it, because I only remember her making it once.
Gram--she is my Dad's mom--made lard crusts or lard and butter crusts. She had no use for Crisco or margarine. After having to use margarine during World War II, she swore off the stuff because she said, "There's just something wrong with it. It ain't natural to take something that is meant to be liquid and do something funny to it to make it solid. I bet you any old thing that it is worse for you to eat that then butter or lard."
I was happy she lived long enough to hear the first findings that artificially hydrogenated vegetable fats are worse for the body than naturally hydrogenated animal fats. I remember her grinning at me and saying, "I told you so."
Last night, while Dad was eating my blackberry-raspberry pie with the lard/butter crust, he said, "This crust has lard in it--I can tell--it is really flaky." When I said, "Yeah, it is half lard and butter," he nodded and said, "Your Gram used to make all lard crusts. In the summertime, when it was hot like now, she used to take a big bowl and fill it up with ice, and then set her mixing bowl down in it. She'd freeze the lard, and then put the flour in the bowl to chill down. Then, she'd cut the lard in in that really cold bowl, while the lard was still basically frozen. Then she'd add water and mix it together into dough, and chill it more before rolling it out."
I had never thought of putting the mixing bowl down in a bowl of ice, but considering how hot it has been, and the fact that lard melts basically at body temperature, I might give it a go. I've never read about it in any of my cookbooks, either, so I suspect that it was a Gram innovation--if it makes the lard/butter dough easier to manage--I will certainly report on it.
So, this summer, I decided I wanted to live up to the family legacy of being good pastry makers. I have been making pie--one a week or so--with whatever fruit is available. I have made three sour cherry pies, one sour cherry and blueberry pie, two blackberry pies, and one blackberry-raspberry pie, and I have come to some conclusions.
One--a combination of butter and lard make the best pie crusts. Lard is hard to get--but I buy home-rendered lard from the farmers I buy pork from--but it really does make the best, flakiest crust.
Two--lard makes the dough that much harder to handle, because it is so soft and apt to melt or become gooey, especially in summer, when all that delightful fruit is in season, begging to be made into pie. This is the time to put your marble slab in the freezer, and chill your dough and utensils and ingredients at every stage of the operation. Trying to rush a lard-based or partially lard-based dough is a huge, ugly mistake.
Three--using kitchen shears to cut the edges of the pie crust after the pie has been filled results in the most even and nice looking edge.
Four--lard or partially lard crusts will not hold a tall fluted edge; use a different finishing technique that isn't quite so showy. The tall flutes that will hold in an all butter crust, and harden, will droop in a partially lard crust.
Five--pie isn't so hard as all of that, if you are patient, breathe deeply, go slowly and just do it.
 Six--there are a whole arsenal of tricks and tools that can make rolling out the pie crust easier--I will outline them in a series of posts--do them. Try them. What works for me will probably work for anyone, because I was so utterly awful at making pie that if I can do it, anyone can do it.
Seven--fillings--use fresh or frozen fruit, never canned. Canned is gross. I am firmly of the belief that canned cherry pie filling is what convinced Dan that he hated cherry pie, which I know he doesn't because I have seen him gobble down my cherry pies with no fuss, and then ask for more. Also--do not be afraid to add a few little flavor enhancers to your fruit fillings. I use lemon zest and rosewater for blackberries and raspberries, and either almonds and almond extract or the contents of a vanilla bean in sour cherries.
Eight--have fun and be whimsical. The path of pie is a long and winding one, full of twists and turns and surprises behind every corner. Enjoy the process. The journey is as important as the result.
Nine--if you are going to eat your pies, take up an exercise program. Pie crusts are fattening, being as they are made of fat and flour. Walk an extra mile or two, or take up swimming. Or, do like I do and take a pie to every gathering of friends and family so you can have a piece and everyone else eats the rest. Give pies to the neighbors, take them to church, to school, everywhere. No one will refuse pie. You will make new friends and save your waistline at the same time, while still mastering the art of pie baking.
Ten--and this is just to make it an even number--never be afraid of pie crust. I was scared of it for years for no good reason, because really--it is fat and flour. If you screw it up a few times, so what? The world will not end. The sky will not fall. You will not have to slit your belly with your chef's knife from the dishonor. Loosen up, relax, go with the flow and just do it.
There is my pep talk on the subject of pie. Look for a couple more posts this week with recipes and step by step instructions on how to make the lard-butter crust that is, in my opinion, the best tasting and flakiest crust you can make, and then with instructions on what to fill that crust with once you have it all made and shaped.

I cannot help but think that my two grandmothers are somewhere or another in the afterlife, sitting on a creaky porch swing, smoking cigarrettes, and nodding.
"Well, Deana--looks like she got over herself and learned how to make pie," Gram would say with a toss of her white locks and a cackle.
Laughing, Grandma would nod her bandana-wrapped head. Exhaling a wreath of smoke from her nostrils she'd say, "Yep, Dolly, looks like she did. And she put a vanilla bean in with cherries. Have you ever seen the like?"
"Nope. But I bet it was good."
Tuesday, August 02, 2005
Calico Salsa: It is All About the Tomatoes
 I wait the entire year for summer tomatoes.
The rest of the year, I don't bother eating any fresh tomatoes. There is no point. The hothouse or hydroponic tomatoes in the grocery store do not even deserve the name, "tomato," they are so unlike the real article--they completely lack the flavor, texture and juice of a ripe tomato, even if they manage to be beautifully red.
Genetic engineering can do wonders with plastic fruit.
From July to September, when tomatoes are at their peak, I make gallons of fresh salsa, and have been known to eat it three times a day: with huevos rancheros for breakfast, on a quesadilla for lunch and on grilled fish for supper. Zak didn't used to really like salsa much, until I first ran into heirloom tomatoes and started making salsa with them. Before that time, he would eat the juice from the salsa, but would not consume the tomatoes--he hated the flavor and the texture.
I discovered heirloom tomatoes about seven years ago at the farmer's market in Columbia, Maryland, and was instantly enchanted. I bought probably ten pounds of them, in a mad array of colors, shapes and flavors. While lugging them home, I realized that there was no way I could eat all of them myself, so I plotted to make a salsa that used every color of the rainbow, and while it utilized chills, the wickedly hot peppers would carry the backbeat and let the tomatoes step up to the mic and sing lead, with onions, garlic and cilantro harmonizing. Lime juice, salt and a touch of cumin would finish out the rhythm section.
Because of all the colors, I named it, "Calico Salsa," and with its inception, I convinced Zak that he really did like fresh tomatoes.
Now, he waits all year for the first big bowl of Calico, and we eat it with everything, though he is most apt to eat large amounts of it with quesadillas.
Most salsas are either cooked or raw; this one is both. Some of the tomatoes I leave uncooked so as to show off their lovely colors and fresh flavors to maximum advantage; others I roast in order to bring out the sweetness and caramelize the juices, while breaking down the pulp into a thick paste, which gives body and depth to the salsa. I leave the small chiles raw, along with the onions; the thick-walled chills and any red or yellow bell peppers are roasted. If I can find purple or chocolate colored bell peppers, I leave them raw and cut them up finely in order to preserve their color. The red onions I use raw, and garlic is used raw, though I have used roasted garlic in the salsa to good effect.
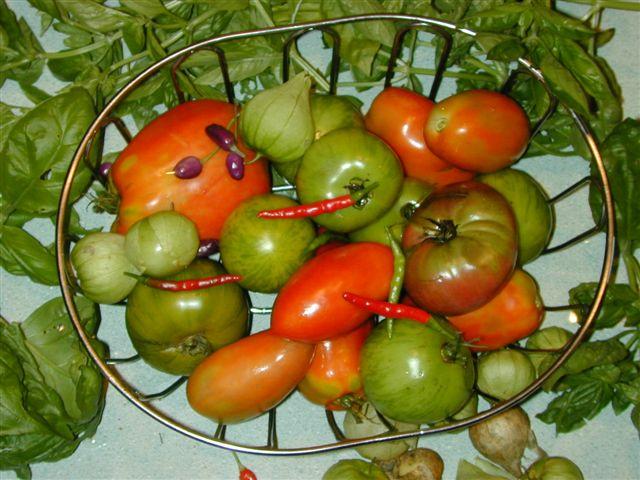 You can use any mixture of heirloom tomatoes to make the Calico, but there are a few things I will insist upon. One--I really highly suggest that if you can get Green Zebra tomatoes, that they go in the salsa. For one thing, they are gorgeous little fellows, as you can see from the photograph--kiwi green on the inside and lime green striped with yellow on the outside. Because they are so lovely, I do not cook them, but cut them up and add them to the salsa raw. In addition to being pretty, the Green Zebra has a spicy, tangy flavor that really rounds out the sweetness of the other tomatoes.
I also like to use yellow, orange or red Roma or paste tomatoes in this salsa, and these I roast. The reason is simple--first of all, roasting them deepens the flavor--it intensifies the sweetness of the tomato, and when you roast a Roma tomato, it makes the pulp break down into a thickening paste. I let the skins char and blacken completely, and then, after they are cool enough to handle, I squeeze them out of their skins and cut off the core. The rest, I mince up by hand--a few strokes of the chef's knife and the tomatoes fall into a thick pulp that adds body to the salsa.
 Other favorite tomatoes for this salsa include the Brandywine, Cherokee Purple and Green German and Hillbilly. Each one has a different color and the flavors are all quite interesting and unique. The Brandywine has a flavor that is very balanced between sweet and acidic, while the Cherokee Purple, which is a burgundy-plum color with green shoulders, has a musky note to it. The Green German is quite acidic and somewhat fruity tasting--like a plum almost, and the Hillbilly, which is a big yellow beefsteak with streaks of red running through the flesh is heavy, full of juice and very tangy, with a sugary finish.
I always add minced up lime zest and fresh cilantro for a floral, herbal top note and balance the acidity with a squeeze of lime juice.
Canning this salsa isn't a very good idea; it cooks it down as you process it in the hot water bath, and it completely changes the character of it, such that the myriad textures, colors and flavors are lost, and it becomes just another salsa. Freezing is equally fruitless, so this salsa is a summer tradition in our house. We know that the hottest days of summer have come when the first huge bowl of Calico appears in the fridge, and then feeding frenzies ensue.
Morganna's favorite way to eat them is with tortilla chips; in order to eat locally this month, we are buying only Jose Madrid Brand chips which are made in Zanesville, Ohio, along with some really fine bottled salsas. Jose Madrid salsas are what we have in the wintertime, when the voluptuous tomatoes of summer are but a dim memory, but our tastebuds long for an echo of their flavor. I first discovered their products at the North Market in Columbus, but was thrilled to find that they also sell at the Athens Farmer's Market.
I have no idea if the corn they use in making their tortilla chips is grown in Ohio; at least for the red and blue chips, I sincerely doubt it. Both of those varieties of corn, which were traditionally grown by different tribes of Native Americans, tend to be desert varieties with very specific cultural needs; one of my goals after we terrace our backyard and put in a garden is to try and grow some grinding corn so I can make my own tortillas and tamales, and while I would love to grow blue corn, I am not certain it would work out.
But, it is good to know that when we bring Morganna back to live with us, she can enjoy locally made tortilla chips with her favorite salsa in the world.
Needless to say, everything used in this salsa came from the farmer's market, except for the lime, the salt, pepper and adobo seasoning. Everything else is local and very, very fresh.
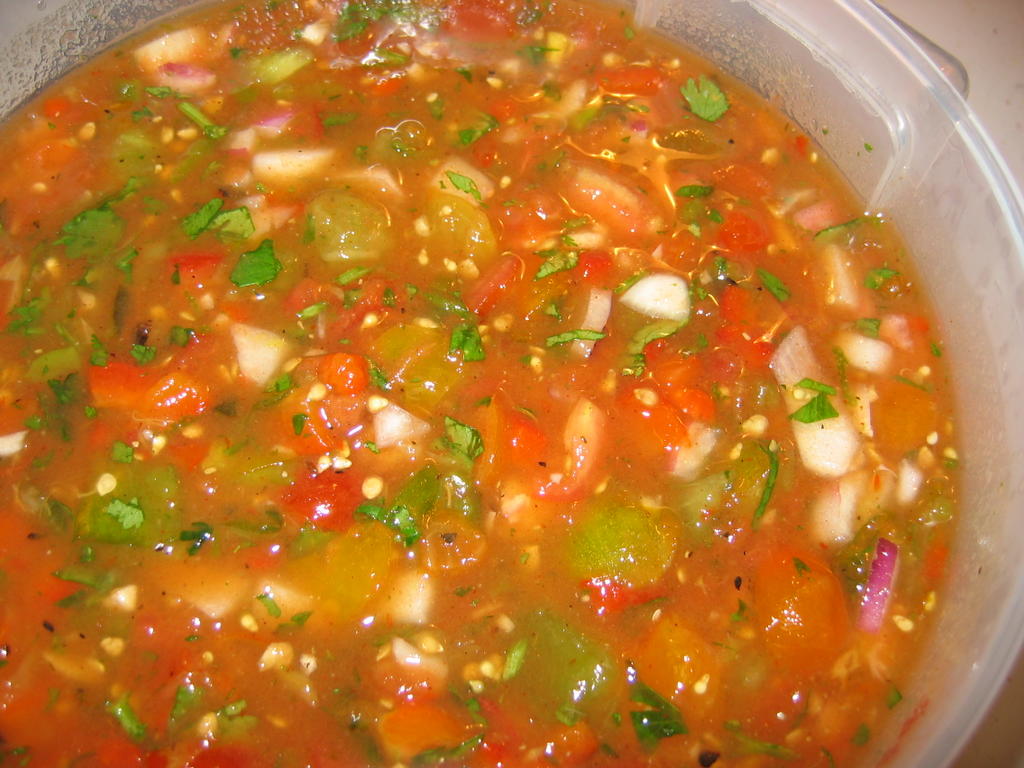 Calico Salsa
Ingredients:
3½ pounds multi-colored heirloom tomatoes
1 medium poblano chile
1 large jalapeno chile
1 small bell pepper (purple if you can get it, yellow, red or orange if not)
1 medium red onion
2 cloves really fresh garlic
1 serrano chile pepper to taste
juice of one lime
zest from one lime
large handful of fresh cilantro, minced
salt and pepper to taste
1/8-1/4 teaspoon Penzey's Adobo Seasoning (or use ground cumin and coriander to taste)
Method:
Wash tomatoes, peppers and chilis. For green and yellow striped tomatoes, and pale yellow tomatoes, roughly chop and place in a bowl, scraping into the bowl as much juice as is possible.
Roast other tomatoes, poblano and jalapeno (and bell pepper if it is red, yellow or orange). Set the broiler in your oven on high, put a rack up close to the heat, and set up a roasting pan with a V-shaped or flat rack, and place vegetables on this rack. Roast, turning once or twice, until the skins are charred and blackened, then remove from the broiler, and allow to cool. Reserve syrupy juice in the bottom of your roasting pan. These caramelized juices are filled with flavor.
While veggies roast, dice red onion and bell pepper (if you didn't roast it) into a fine dice (brunoise, for you culinary nerds out there), and mince serrano, garlic and lime zest. Add to chopped tomatoes.
Skin tomatoes,chillss and bell pepper. Mince poblano and jalapeno and roughly chop/mash roasted tomatoes. Dice the bell pepper finely. Add syrupy goodness from bottom of roasting pan to the bowl, along with poblanos, tomatoes and garlic.
Add cilantro, adobo seasoning or cumin, and salt and pepper. Add lime juice to taste, balancing the sweetness of the roasted vegetables with the acid of the lime.
Note:
This salsa is best served chilled--I like to allow it to chill at least five or six hours before serving in order to let the flavors settle in together and get friendly: overnight is even better, but I seldom can wait that long.
When it is just made, it is like a group of people, all singing different songs at their own paces and in different keys. You can tell it is music, but you are pretty sure it isn't very good. But once the flavors all settle in together, the salsa becomes a choir, every voice discernible and present, but all singing in close harmony.
Monday, August 01, 2005
Hello, August: Time for the Eat Local Challenge
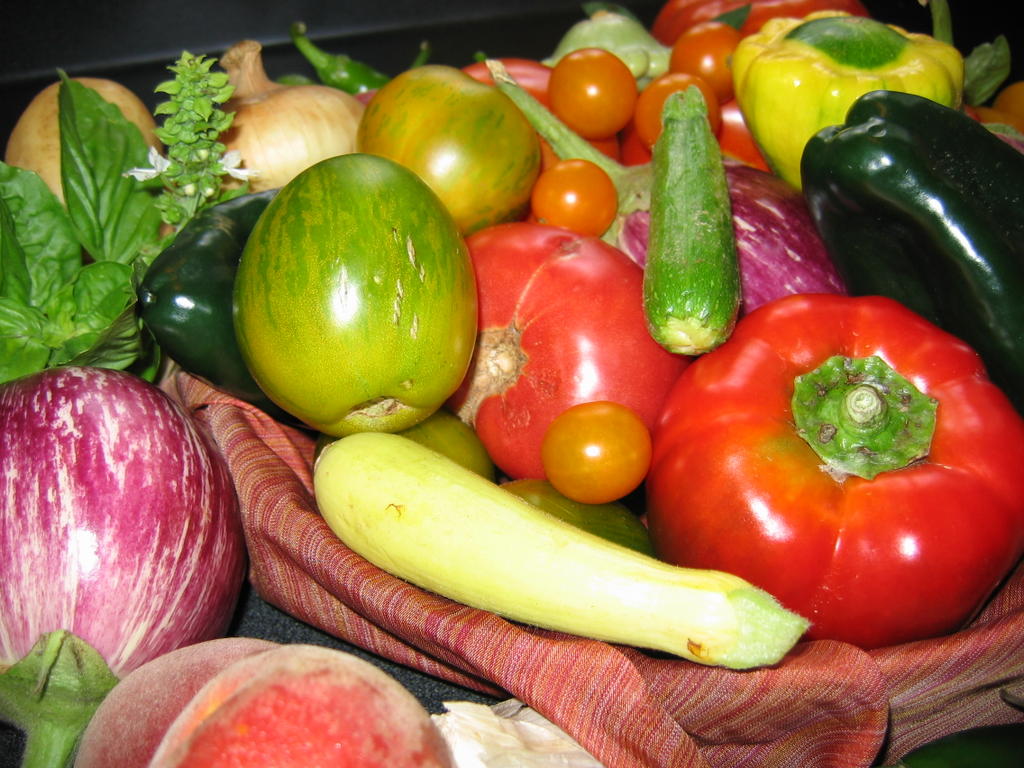 Hail and welcome, all of you regular (and irregular) readers of Tigers & Strawberries! It is the first day of August, and that means it is time for me to set out my parameters for my own personal August Eat Local Challenge. (Honestly, it is the 2nd of August, and I am recreating the post I wrote and posted yesterday that for some reason disappeared when I posted this morning about the salsa. I think Blogger farted or something, so here I am rewriting what I had already written. Yeesh.)
So, here are my ground rules, with commentary on what I am and am not likely to do while participating in this challenge, put on by the Locavores with much blogger-wrangling, cat-herding and organizations and promotion by the very passionate and committed Jen at Life Begins at 30.
Rule Number 1: I will try to have my household consume as many calories from local sources as possible by obtaining as much vegetables, fruits, meats, grain, eggs, fish and dairy products from local (Ohio) producers as possible. I will give preference to locally grown organic produce when I can, but if it is between locally grown conventional vegetables and organic, shipped in from who knows where vegetables, I will choose local every time. (And this is standard operating procedure in my shopping habits anyway.) I will also try and use as many Ohio-produced processed foods such as pastas, tortilla chips and bottled sauces as possible, but only if I would use the product in the first place. I won't start using jarred spaghetti sauces produced in Athens, for example, when I make even better sauces from scratch.
Rule Number 2: When it comes to sweeteners, I will use local honey and maple syrup where applicable, but I will not mess up my baking by randomly substituting liquid sweeteners for granulated raw sugars. This is something I am fussy with. Since I have worked so hard learning how to bake beautiful pies this summer, I am not going to give up on that endeavor or bugger it up by trying to substitute liquid sweeteners for granulated in my pastry crusts. Sugar cane was never native to Ohio, it is never going to be grown here, it has always been imported and so I will use it, though I will try to give precedence to local sweeteners when possible.
Rule Number 3: I am not giving up on coffee, tea, granulated cane sugar, rice, tofu, soy sauce, fish sauce, coconut milk, citrus fruits, vanilla, or chocolate. This sounds like I am not giving anything up, and that is because I am not. This is not Lent. This is not about removing foods from the diet, this is about adding foods and changing your shopping habits. This is about preferring items grown in Ohio to the same items that are grown elsewhere and shipped into Ohio. Coffee, tea, cane sugar, rice, tofu, soy sauce, fish sauce, coconut milk, citrus fruits, vanilla and chocolate have never been, nor ever will be grown or produced in Ohio, therefore, they do not count in this exercise.
Let me explain. Since I try to eat locally as much as possible anyway, I have a pretty-well developed philosophy on the matter, which can be summed up fairly simply:
What is grown, produced or created in Ohio, I will eat in preference to the same items shipped in from elsewhere. I do this for several reasons. One: the products grown locally are almost always fresher and better tasting. Two: local products are often cheaper. Three: eating locally supporst local farmers, with whom I hold familial, political and social solidarity. Four: eating local produce is better for the local economy and environment.
The other products, those which have never been and will never be grown or produced in Ohio, I will continue to eat, but I will buy as wisely as possible, by choosing organically grown, free-trade products that have been grown or produced with the welfare of the environment and farmers in mind. In other words, the vanilla beans I bought on ebay the other day are organically grown. The coffee we buy is fair-trade, shade grown organic from Mexico. The tofu I buy is made in California, from organically grown soybeans that may well have been grown in Ohio--soy is our second largest cash crop after corn.
 While I am discussing philosophy, let me point out that humans have been trading food items for as long as humans have been able to travel farther than they can walk in a day. Food commodities have always been big items in commerce; a good look at any ancient Chinese, Roman or Greek cookery text will illustrate this. Trade has always influenced and changed the diets of local human communities, often for the better.
With the discovery of the New World, these changes became global and irreversable as foods flowed back and forth across the oceans while cuisines evolved and adapted to the new foodstuffs. Tomatoes and cornmeal came to Italy, changing the cuisine forever; it is hard to imagine Italian food without marinara sauce or polenta. Chiles came to China and India, displacing the peppercorn as the sole source of heat in their fiery cuisines. Beef and dairy products came to Mexico, along with the pomegranate and various citrus fruits; can we imagine northern Mexican foods without crema, cheese or lime juice? Without pomegrantes, there would be no chiles en nogada, a classic dish of stuffed jalapenos sauced with walnuts and garnished with pomegranate seeds. Where would Switzerland, Holland or Belgium be without chocolate?
While I am a strong proponent of eating locally grown produce, I am also an unashamed globalist. I have studied Asian cuisines and make part of my living teaching the cookery of Thailand, China and India--how could I not have a global culinary worldview? The sharing of culture, in my opinion, is best accomplished through the sharing of food, so, even as I cook and eat locally, I am still cooking and eating globally.
So, there we have it: my own rules and regulations for the Eat Local Challenge.
May the local, global eating begin.
