Cook Local, Eat Global
The Path of Pie III: The Best Pastry Crust in the World
 As I have noted in previous posts in this short series, the thought of making pie crust used to give me fits of anxiety. I had convinced myself that not only did I lack the “touch” necessary to make good pies, but that such a touch was not a learned ability but some mystical inborn talent which had been gifted by the gods to some people and not others.
Since I have devoted this summer to learning how to make good pies, I have this to say about my former superstitious beliefs: utter balderdash and poppycock. As a rational human being I should be ashamed of myself for harboring such nonsense about the simple matter of making good pastry dough. It isn’t an inborn talent–it is a learned ability, and that is that. I am living proof of this fact, and I set before you the example of the blackberry pie I made for Morganna a couple of weeks ago as testament the fact that with a few months of focussed work and practice, I could indeed learn to make good pie.
And that means, dear reader, so can you. I offer here my recipe for a crust that combines the superior flakiness of lard and the delicious flavor and easier handling of butter, which, even in the summer, if one takes care and utilizes every trick at the baker’s disposal, will make a lovely and flavorful pie that will not cause too much in the way of weeping, wailing and gnashing of teeth in frustration.
One must simply pay attention, go slowly and be patient. This recipe makes enough dough for a double crust pie. If you are making a single crust pie, you have several options: you can simply halve the ingredients, or freeze half of the dough, or make two single crust pies with this recipe.
You will note that I am not giving food processor or mixer instructions on how to make this dough. That is because I have noticed that for every person who makes good pastry in the food processor, there is another person who mangles the same dough using the appliance. Yes, you tend to handle the dough less in the food processor with your nice warm hands, but at the same time, you also risk over processing the dough. I have also found that what makes really flaky pastry are non-uniform pieces of fat cut into the flour–some should be big, some should be crumbs. The food processor makes too uniform of a dough.
Having not had such good luck with making pie crust in the food processor, I resolved to make it by hand. It is neither an onerous or lengthy process, so I am firmly of the belief that it would harm no one to try learning how to make pie crust by hand. After you get the hang of it, it actually becomes pleasant and somewhat meditative, and might even lower one’s blood pressure.
Here is how it goes:
Barbara’s Lard-Butter Pie Crust
Ingredients:
2 3/4 cups all purpose flour
1 1/2 tablespoons raw sugar (you can leave this out–but I like it better left in)
1 teaspoon salt
1/2 cup (one stick) cold unsalted butter, cut into cubes
1/2 cup cold natural unhydrogenated lard, cut into pieces and then frozen until quite firm
6-9 tablespoons ice water
 Method:
First of all, chill your marble slab, mixing bowl and pastry cutter in the freezer. Go ahead and chill your silpat and rolling pin, too. Have several pieces of plastic wrap at the ready, as well as a couple of food storage bags. If it is really hot out, measure out your lard (I pack it into a dry measure, then level it, the displacement method gets too much liquid in the fat and is messy as hell), cut it into bits the size of your first finger joint of your index finger, more or less, and stick them in the freezer to firm up really well.
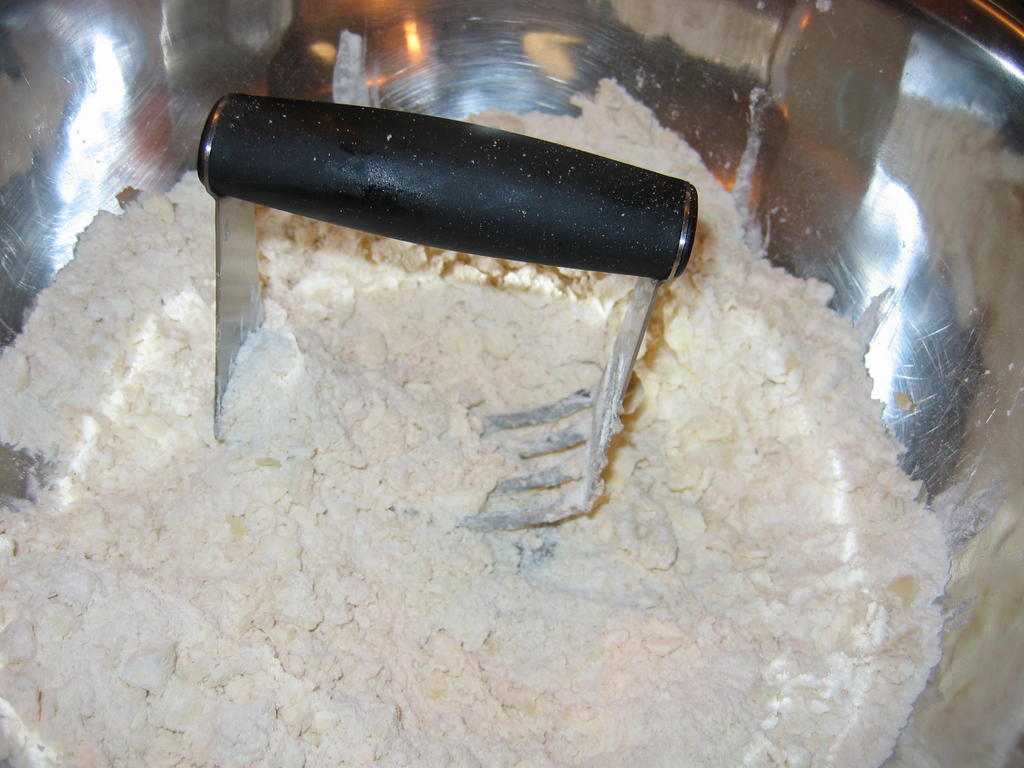
Take the mixing bowl out, wipe any condensation from its interior, and put all the dry ingredients into it, and mix thoroughly. Scatter butter cubes and lard pieces evenly over the flour and take up your pastry cutter and cut the fat into the flour using quick pouncing and rocking movements with the cutter. You will need the clear the blades with a table knife once or twice. Don’t use your fingers–you don’t want to melt the fat by playing with it with bare hands. keep up this pouncing, scraping, and rocking business until the fat and flour are mixed together in a bunch of uneven looking clumps. Some should be crumbs, some should be pea-sized and some should be bigger than peas–about the size of raggedy little lima beans. Scrape the blades of the pastry blender one more time, and if the room is really warm and the lard has started to soften a lot, put the bowl, fat and flour and all, back into the freezer to firm up a little.
If the fat is still firm, just continue onward: add the ice water to the fat and flour mixture by measuring it out tablespoon by tablespoonful, and sprinkling it evenly over the mixture. I usually start with six or seven tablespoons. After it is in there, go to the sink and rinse your hands in as cold water as you can stand, or stick them in a bowl of ice. Dry them off. Using your hands and working quickly, bring the mixture together into a smooth dough. Don’t knead it! Just try and squish it gently together into a ball. If it is still too crumbly, sprinkle another tablespoonful of water over and try again. Just add enough water to bring it together, and no more. After it clings to itself in a ball, carefully pat it down to a big disc and cut it in half–though not quite evenly. I cut it so that one piece is just a tiny bit bigger than the other, so that when you roll out the bottom crust, you actually have more dough to work with, because it needs to be slightly bigger to fit in the pan than the top crust.
Take the two disc halves, form them into discs, wrap them tightly in plastic wrap, stick them in storage bags, force out the air and stick them in the fridge for an hour or the freezer for fifteen minutes or so.
 Now, you need to take your marble slab, silpat and rolling pin from the freezer and start getting ready to roll out the dough.
Preheat your oven to 400 degrees F.
Set your marble slab onto the counter and, then lay down your silpat to cover it. Wipe down any condensation on the top of the silpat, but leave any that is on the marble, because it makes the silpat stick well to the stone. With your fingers or your flour wand, sprinkle an even layer of flour over the surface of the silpat–I use as little as possible, because one of my personal preferences in making pastry dough is to make a drier as opposed to wetter dough, as I find that with lard in the crust, drier dough handles more easily. So, you really won’t need a lot of flour to be added to the dough.
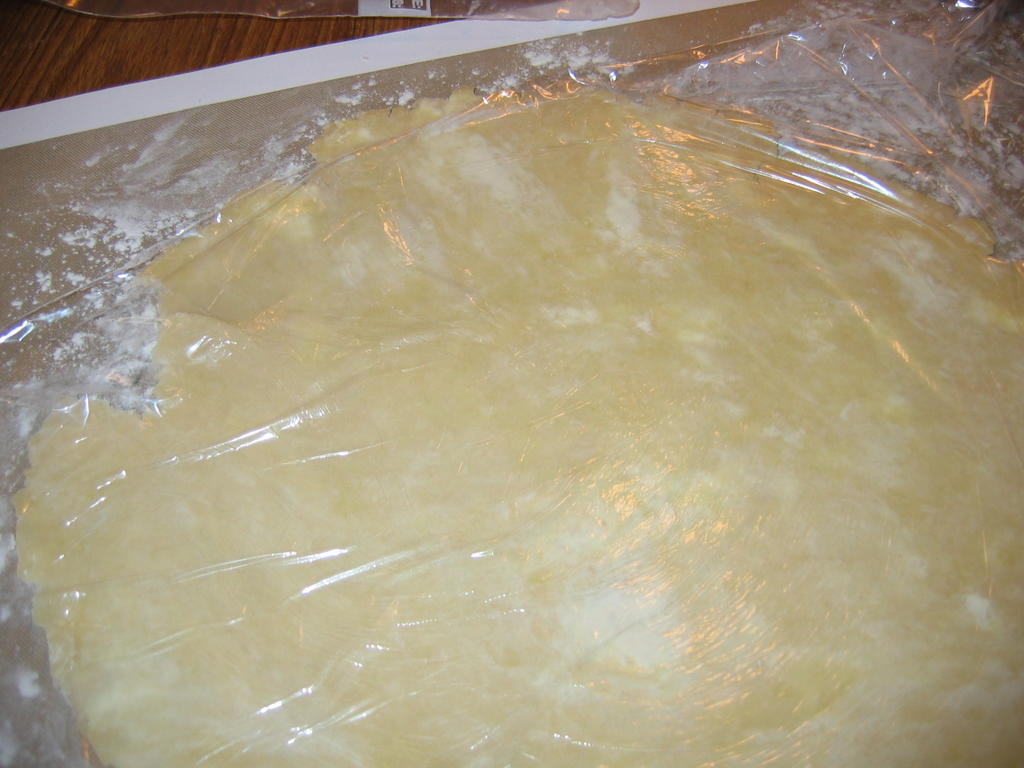
Bring out your larger dough disc, the one you intend to use for the bottom crust. Have your pie pan at the ready close by. Unwrap your dough disc, set it in the middle of the silpat, and sprinkle the top surface with a little more flour. Cut a fresh sheet of plastic wrap and lay it over the dough. (Even in cool weather, with the lard in the crust, I still use the plastic wrap to roll it out. Butter crusts I will roll out without it, but lard–nope. It is the magic of Saran Wrap that saves me every time.) Make sure you have a piece of wrap big enough to roll out a twelve inch diameter sheet of pastry. If not, use two pieces overlapped slightly.
Take up the rolling pin and start rolling. If the dough is too hard, let it warm up a little bit–no longer than five or so minutes, and try again. Julia Child whacked her dough with the rolling pin to soften it up–but that is a good way to break your cold marble slab, especially if you miss, so don’t go there. Just let it warm up a bit. After your first roll in a direction (forward is the natural way to go), I do the next roll in the opposing direction, which if forward is back. Then, I turn myself one quarter turn to the right(I turn myself to avoid turning the dough and thus handling it and risking breaking a hole in it or tearing it), I do the same forward, back roll. Then I turn the opposite way a half turn (one quarter turn to get me facing straight ahead again, one quarter turn to the left to be facing opposite of where I was facing and do the forward, back roll. Then, I pick up the stone and give it a 180 degree turn, and continue rolling. as above.
If you do this way, you will quickly have a pretty close to circular piece (though, if you make your dough as dry as mine, it will be ragged at the edges) of dough, and you will be ready to put it in the pan.
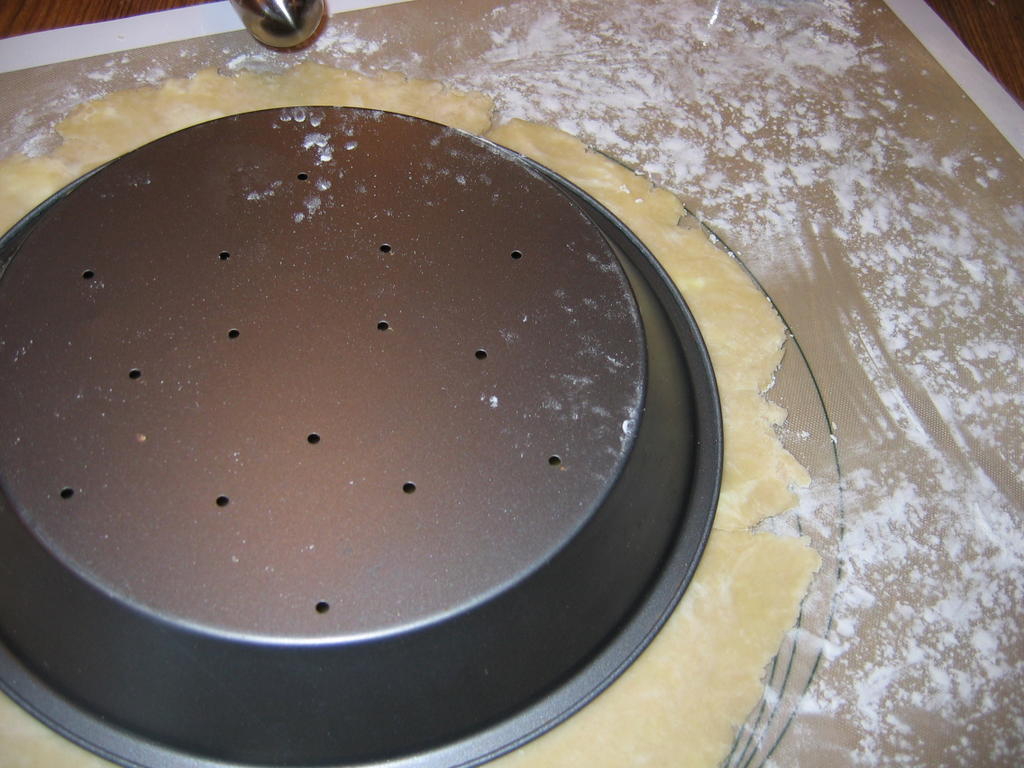 This is accomplished by peeling up the plastic wrap, and setting it aside for the next piece of dough, then laying the pan face down on the circle of dough, centered.
Then, peel up the edges of the silpat and wrap them over the bottom of the pan. (If my description is losing you, look at the pictures–it sounds more complicated than it is. Believe me, this is the simplest way to get the pastry into the pan–I have tried all the other ways of doing it, and have had very little success with them.)

Scoot your fingers under the edge of the silpat and under the edge of the pan, and gently grasp the bottom of the pan with your thumbs, while your fingers lightly cup the bottom of the pan and the pastry through the silpat.
Take a deep breath, center yourself and with a quick flip of the wrists, turn the whole kit and kaboodle over, and unroll the silpat so that the pan is sitting on the counter or marble slab and the silpat is laying flat on top of it.
Now, it is a simple matter of peeling the silpat up from the dough, and easing the dough down into the pan. Make sure to settle the dough evenly into the bottom of the pan, and rearrange gently as necessary to make everyone even and happen.
Using dedicated kitchen shears (please don’t use the same ones you cut chicken bones with–ick), trim the ragged edges of the pastry to a simple one-half inch overhang from the rim of the pan. Fill the bottom crust with your filling of choice (recipe to follow)–for a standard-sized nine inch pan I use around five cups or so of fruit.
Roll out your top crust following the same directions (they worked so well the first time, you need to do them again to make sure) and then, put the top crust on the pie. The easiest way to do this is to peel up the plastic wrap (unless you like plastic in your pie) and slide one hand under the silpat to the center of the dough. Spread your fingers wide, and use the other hand to gather the two edges of the silpat in a loose half fold. Pick up the dough, bring it to the pie pan, drop one edge of the silpat, and invert the top crust over the pie. Peel off the silpat.
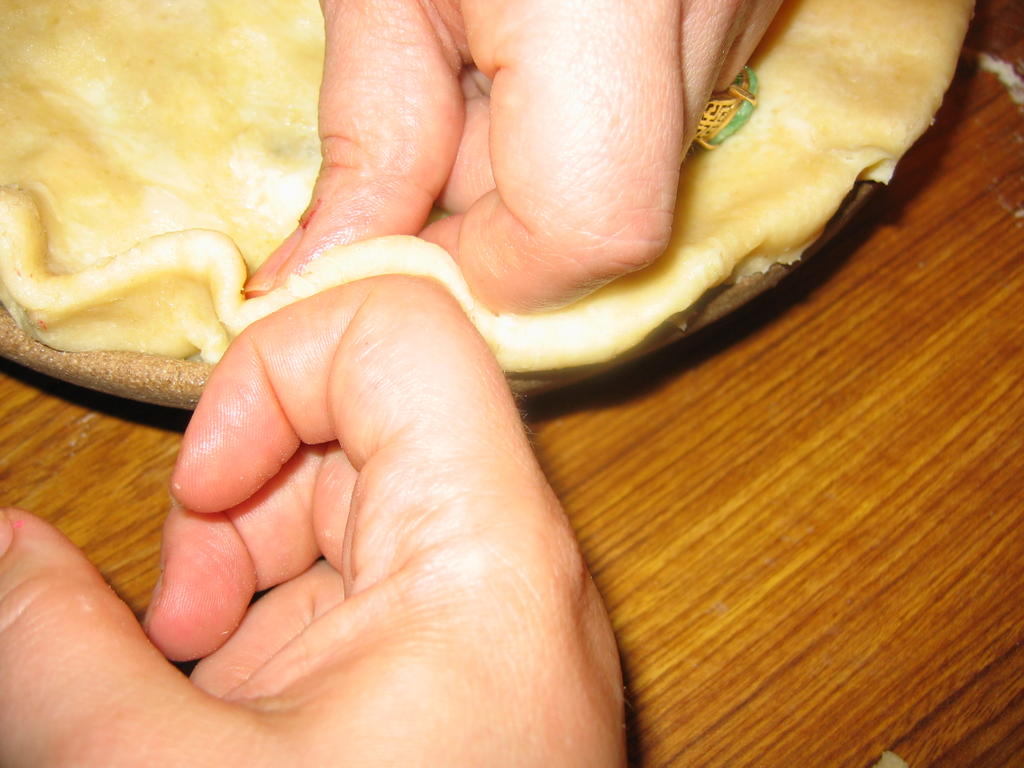 Center the top crust, trim the edges just a shade longer than the bottom crust, and turn the top crust edges under the bottom crust and pinch lightly to close.
Finish the edges as you like–I like to do flutes, but I warn you that high, dramatic flutes as pictured will droop in the oven, because lard crusts just are too soft for big flutes like that. You can trim the edges closer and thus make shorter flutes, or you can keep the big ones and not worry about how they look, because you like the crispy edges best, or you can press the edges decoratively with the tines of a fork. (I generally flute it and don’t worry if they droop, because I like the crusty edges.)
 Cut vents in the top of the pie for steam; I usually do a monogram. You can do a letter to represent the filling, or do as I did and use the first letter of the person’s name for whom you made the pie–in my case, it was an “M” for Morganna. Or you can cut flowers, little viney bits or other decorative designs using the tip of a sharp knife.
 You can brush the top of the crust with milk and sprinkle it with a scant teaspoon of raw sugar to make a nice sparkling brown finish on top that has a hint of crunchy sweetness.
Bake the pie in the four hundred degree oven for around thirty minutes. At that point, shield the edges of the pie with the chakram by placing it on top so that the flutes are covered and the rest is open(you know, it is really called a pie shield, but I so prefer chakram that I will always call it that from now on.) and lower the heat to 375 degrees F and rotate the pie 180 degrees if you have no convection fan (if you do have one, you don’t need to do the rotating thing). Bake for another 25-30 minutes, or until the top is nicely browned and the filling is bubbling thickly through the vents.
Take out and cool on a rack. It is best to let them cool almost all the way before cutting into them–when they are really hot, the texture of the crust is apt to suffer and the filling will be runnier and is likely to burn your mouth. So, be patient before cutting into it.
 Blackberry Filling
Ingredients:
2 1/2 quarts fresh blackberries
1/2 cup-1 cup raw sugar
zest of one lemon
1 teaspoon lemon juice
1-2 tablespoons rosewater
4 tablespoons cornstarch
Method:
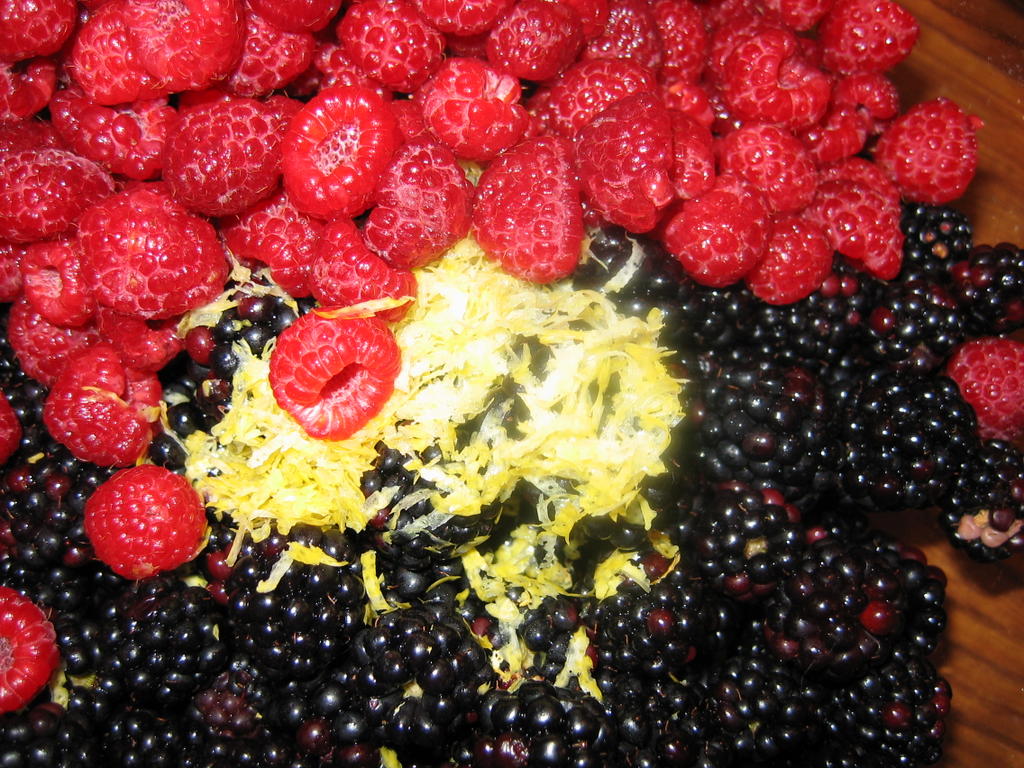
Pick over blackberries, and wash. Drain completely. Put into a bowl with sugar to taste, the lemon zest, lemon juice and rosewater. Allow to macerate for at least one hour. Add cornstarch and toss to incorporate, then fill pie and finish and bake as directed above.
Note:
You can substitute raspberries for blackberries–just use less sugar and more lemon juice. Or, as pictured above, you can use half blackberries and half raspberries. In that case, you still use a little less sugar, as raspberries are much, much sweeter by nature than blackberries.
5 Comments
RSS feed for comments on this post.
Sorry, the comment form is closed at this time.

Categories:
- Admin (rss) (55)
- Blogs and Blogging (rss) (81)
- Book Reviews: Cookbooks (rss) (43)
- Book Reviews: Non-Cookbook Food Books (rss) (38)
- Cats and Cat Blogging (rss) (47)
- Chinese Cooking Lessons (rss) (32)
- Culinary School Stories (rss) (18)
- Dairy Pruducts: Cultured and Barbaric (rss) (4)
- Documentary Filmmaking (rss) (1)
- Essays, Rants and Reflections (rss) (260)
- Fighting Hunger (rss) (12)
- Food and Kids (rss) (45)
- Food in the News (rss) (126)
- Food Media (rss) (98)
- Food Preservation (rss) (18)
- Food Safety (rss) (45)
- Gardening (rss) (30)
- Herbs and Herb Blogging (rss) (20)
- Holidays (rss) (50)
- Kat Blogging (rss) (22)
- Kitchen Science (rss) (36)
- Leftover Makeover (rss) (8)
- Life, the Universe and Everything (rss) (131)
- Local and Sustainable (rss) (227)
- Local Athens Food and Foodies (rss) (42)
- Meatless Mondays (rss) (32)
- Menu For Hope (rss) (5)
- Nutrition, Diet and Health (rss) (84)
- On The Farm (rss) (8)
- Recipes: Almost Vegetarian, Vegetarian and Vegan (rss) (294)
- Recipes: American Regional (rss) (37)
- Recipes: Appalachian Hillbilly (rss) (33)
- Recipes: Bread, Pasta, Grains (rss) (95)
- Recipes: Canning and Preserving (rss) (8)
- Recipes: Chinese (rss) (123)
- Recipes: Comfort Food (rss) (120)
- Recipes: Cookies (rss) (16)
- Recipes: Desserts (rss) (48)
- Recipes: French (rss) (25)
- Recipes: Fruits and Vegetables (rss) (302)
- Recipes: Greek, North African and Middle Eastern (rss) (31)
- Recipes: Indian (rss) (137)
- Recipes: Italian (rss) (42)
- Recipes: Japanese (rss) (7)
- Recipes: Jewish (rss) (4)
- Recipes: Korean (rss) (6)
- Recipes: Meat, Poultry and Fish (rss) (220)
- Recipes: Mexican/Native American/ Latin American/Caribb (rss) (27)
- Recipes: Original (rss) (108)
- Recipes: Thai (rss) (27)
- Recipes: Tofu (rss) (17)
- Recipes: US Regional (rss) (16)
- Recipes: Vietnamese (rss) (8)
- Restaurant Stories (rss) (28)
- Sewing, Quilting, Arts and Crafts (rss) (16)
- Simple Chinese Recipes (rss) (30)
- Slow Food and Heritage Foods (rss) (10)
- Spice Blogging (rss) (44)
- The Chinese Cookbook Project (rss) (14)
- The Chinese Pantry (rss) (39)
- The Documentary (rss) (2)
- The Kitchen Saga (rss) (17)
- The Locavore's Bookshelf (rss) (15)
- The Unsung Adventures of The Culinary Nerd (rss) (6)
- Tools and Toys (rss) (35)
- Uncategorized (rss) (10)
- With a Side of Politics (rss) (48)
Archives:
- August 2012 (9)
- July 2012 (12)
- September 2011 (3)
- August 2011 (7)
- July 2011 (8)
- June 2011 (16)
- May 2011 (17)
- April 2011 (11)
- December 2010 (9)
- November 2010 (5)
- February 2010 (1)
- December 2009 (5)
- November 2009 (7)
- October 2009 (10)
- September 2009 (16)
- August 2009 (14)
- July 2009 (14)
- June 2009 (7)
- May 2009 (17)
- April 2009 (10)
- March 2009 (25)
- February 2009 (13)
- January 2009 (10)
- December 2008 (5)
- November 2008 (5)
- October 2008 (6)
- September 2008 (13)
- August 2008 (8)
- July 2008 (11)
- June 2008 (18)
- May 2008 (13)
- April 2008 (14)
- March 2008 (16)
- February 2008 (17)
- January 2008 (19)
- December 2007 (25)
- November 2007 (18)
- October 2007 (24)
- September 2007 (16)
- August 2007 (15)
- July 2007 (15)
- June 2007 (10)
- May 2007 (14)
- April 2007 (16)
- March 2007 (17)
- February 2007 (20)
- January 2007 (13)
- November 2006 (1)
- October 2006 (8)
- September 2006 (14)
- August 2006 (25)
- July 2006 (30)
- June 2006 (28)
- May 2006 (34)
- April 2006 (29)
- March 2006 (24)
- February 2006 (30)
- January 2006 (38)
- December 2005 (40)
- November 2005 (37)
- October 2005 (32)
- September 2005 (25)
- August 2005 (30)
- July 2005 (28)
- June 2005 (21)
- May 2005 (8)
- April 2005 (22)
- March 2005 (17)
- February 2005 (29)
- January 2005 (10)
Search Site:
Links:
- Lily’s Wai Sek Hong
- 101 Cookbooks
- A cat in the kitchen
- A Veggie Venture
- Accidental Hedonist
- Cha Xiu Bao
- chez pim
- Chocolate & Zucchini
- Chopstick Cinema
- Chowhound.com
- Chubby Hubby
- Cook sister!
- Cooking with Amy
- da*xiang
- Eat Local Challenge
- Eating Liberally
- Ecocentric
- Eggbeater
- Epicurious
- Farmgirl Fare
- Fatfree Vegan
- Foodgoat
- ForkandBottle.com
- Green Olive Tree
- Hooked on Heat
- Jaden’s Steamy Kitchen
- Kalyn’s Kitchen
- Lucullian delights
- Mahanandi
- Matt Bites
- MeatHenge
- mmm-yoso!!!
- New York Times – Dining & Wine
- Pizza Goon
- Rasa Malaysia
- Ruhlman
- Sailu's Kitchen
- Serious Eats
- SF Gate: Food & Dining
- Simply Recipes
- Soul Fusion Kitchen
- Tastespotting
- The Amateur Gourmet
- The Cleaner Plate Club
- The Food Section
- The Grub Report
- thecookscottage
- U.S. Food Policy
- Wandering Chopsticks
- Washington Post Food and Dining
- Wasted Food
Meta:

Powered by WordPress. Graphics by Zak Kramer.
Design update by Daniel Trout.
Entries and comments feeds.
These directions are perfect! I think I am going to have to get over my instinctive revulsion of lard and try it. Wonder if it will work with rendered goose fat.
I make a goose every wear or thanksgivings and I have TONS of fat left over from the cooking process. I may just have to save it off and keep it.
I will post pictures of my pie crust in my journal when I try it.
Thank you!
Comment by Kitarra — August 8, 2005 #
You can use goose grease, I reckon. I haven’t done it, but I am sure it can be done. I suspect it will be even softer than lard, so it would be more imperative to chill everything well and possibly even freeze the fat to get it to work.
And you are welcome! I am glad you liked the series.
Comment by Barbara Fisher — August 9, 2005 #
I am searching for a source for unhydrogenated lard. Does anyone out there have one? My great aunt always used fresh lard for her pastry. There is nothing comparable
Comment by camille — December 29, 2006 #
THAT is what I’m talking about! That pie looks great!
Comment by Mr. Beer Belly — January 3, 2007 #
Thank you for putting into words what I can share with friends and saving me the work of writing out “directions.” You do almost exactly what I do for a great crust. Next time I am going to try your ratio of using more butter.
What I do differently: Use a marble rolling pin and a ratio of lard 5:1 with butter. I also brush egg white on the bottom crust before filling it, and it never gets soggy.
For decoration, I some times cut out small leaves or small hearts, etc. (like tiny cookies) and use them around the edge instead of making a flute.
I NEVER use a food processor. Even after many pie crusts, and knowing what texture I want, using it, produced a crust which was not as flaky, and sometimes downright “hard.”
I have several pie recipes…I would be happy to share them.
THANK YOU again…and BAKE on!
Sally
Comment by Sally — August 18, 2008 #