Cook Local, Eat Global
Flaky Pan-Fried Indian Flatbread: Methi Paratha
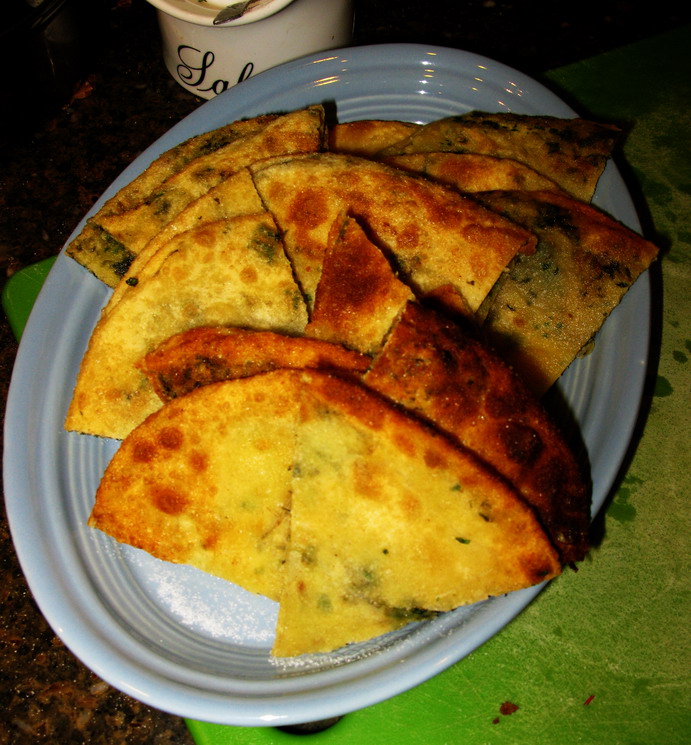
Paratha is a flaky sort of pan-fried round bread from India that is crispy on the outside and steamy-chewy on the inside. I was told by the father of one of my clients, who had been a civil servant in India and thus had to do much traveling around the country, that it is most popular in the northern states, but that it was eaten and made in many variations all over.
The first time I tasted it, I thought it was very much like Chinese scallion pancakes in both flavor and form, although I have since learned that the two breads are not always made the same way. While scallion pancakes are always rolled out flat, then rubbed with oil and sprinkled with scallions, then rolled up like a cigar, coiled into a cinnamon-bun shape, and then rolled back out flat again, many parathas are simply rolled out the one time, and then fried.
While I think that the simpler version is perfect for a quick evening meal, I have to admit that I like the flakiness that adding oil and then rolling up, coiling and then rolling out again produces. The oil separates the dough into tiny layers when treated this way, giving a different texture to the bread than it would otherwise have. And since I grew up eating lard pie crusts that were shatteringly flaky, you can imagine that I would like flaky, layered, fried bread!
Making paratha by this method isn’t as difficult as it seems, and the results are so tasty, I cannot imagine you would not think it was worth it, especially for a dinner for guests. You could also vary the filling–you could add cooked, curry-spiced gobi, or cauliflower, instead of the methi, or fenugreek greens. Or, you could just do cilantro. Or you could do garlic chives, scallions and cilantro. Any of these would be lovely additions.
Although I didn’t add them to this batch, I think that next time, I will use a few spices in my paratha dough. About 1/2 teaspoon of turmeric would give a pale golden color, while a teaspoon of whole, toasted cumin seeds would add crunch and a lovely, musky-sweet scent and flavor. (If you use spices, add them to the flour and salt before adding the water.) I have since found recipes that use yogurt instead of water to make the dough; I intend to try that out instead as well, because that seems like it would make an even more tender and flaky bread.
Oh, and one more thing–if you do not have chapati flour around, you could use half all purpose flour and half whole wheat flour for this recipe. It turns out quite good, and would save you from having to add yet another type of flour to your pantry!
Methi Paratha
Ingredients:
2 cups chapati flour (or 1 cup all purpose and one cup whole wheat flour)
1/2 teaspoon salt
3/4-1 cup water, as needed
1/2 cup dried fenugreek greens (methi), soaked in warm water until softened (or one cup fresh fenugreek, leaves picked off, stems discarded)
1/4 cup cilantro leaves, removed from stems
2 scallion tops, green part only, thinly sliced
Aleppo pepper flakes to taste (I used about 1/2 tablespoon)
1/8 teaspoon salt
2 tablespoons canola or peanut oil
canola or peanut oil as needed for shallow pan-frying the paratha
Method:
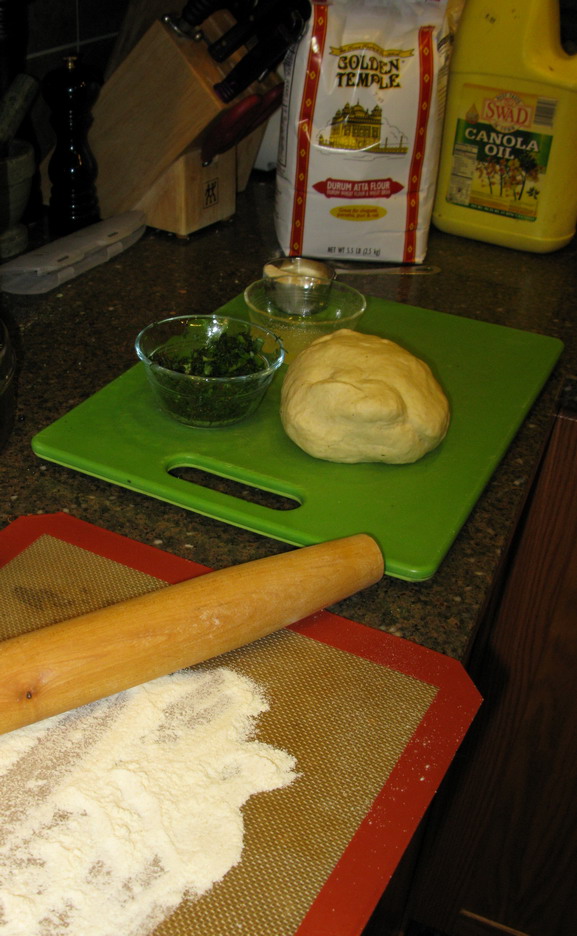
Mix together the flour and salt until well combined. Add water, starting with smaller amount, and adding more as needed to make a medium-soft dough. Knead by hand until smooth and somewhat elastic–about seven to eight minutes. Put in a bowl, cover with plastic wrap and allow to rest for thirty minutes.
Meanwhile, prepare the herb filling. After soaking the fenugreek greens until they are soft, remove them from water and squeeze the excess liquid out. Set on a cutting board with the cilantro and scallions, all put together in a pile. Mince these herbs together, until they are very fine. They will stick together somewhat because of the dampness of the methi, but eventually, they will stop clinging and become drier and more manageable. Mix them with the Aleppo pepper flakes and second measure of salt by hand. Put this mixture in a small bowl, and place it near wherever you plan on rolling out the dough and assembling the breads.
Pour the 2 tablespoons pf the canola or peanut oil into a small bowl and put it next to the methi mixture.
Roll the ball of dough out into a long rope and cut into six equal portions. Set aside all portions but the one you are working with at the time, and cover with plastic wrap.
Take each portion and roll into a ball with your hands. Sprinklle a bit of flour onto your rolling surface, and flatten ball into a disc. Roll out into a thin, round pancake shape.
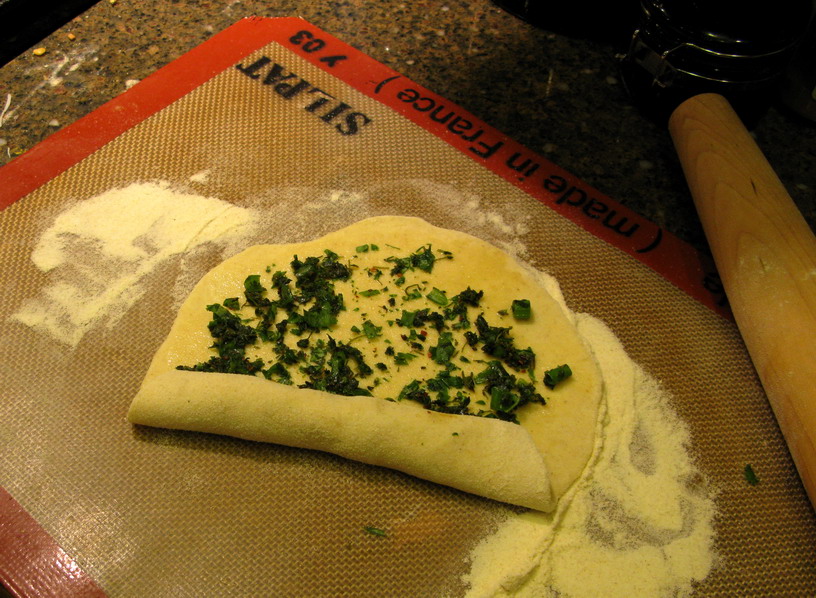
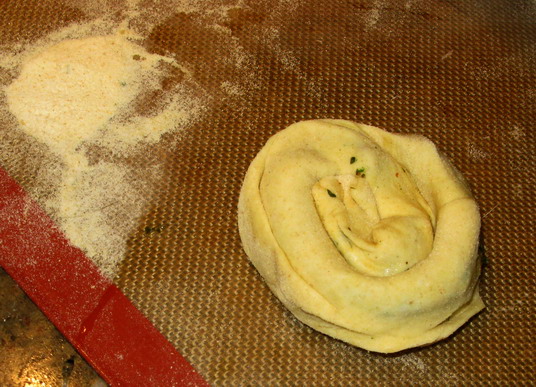
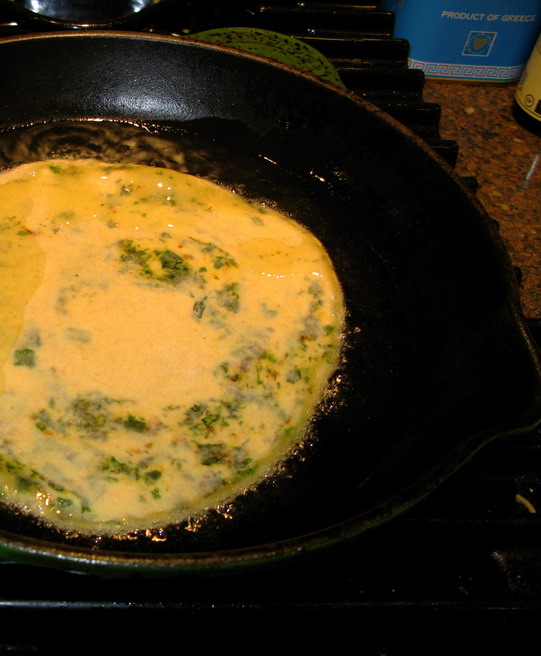
Taking up a bit of oil from the bowl with your fingertips, rub it completely over the surface of the pancake. Sprinkle enough of the methi mixture over the pancake to cover it in a scatter-shot fashion. Roll up like a cigar, and pinch the edges and ends closed with your fingers. Roll the cigar up tightly like a snail or cinnamon bun, and pinch the edges closed, as seen in the photograph above.
Making sure that there is a bit of flour on the rolling surface and some on the rolling pin, roll the pancake out again, and this time, set aside on wax paper and cover with another sheet of waxed paper.
Repeat with remaining five pieces.
Heat enough canoloa or peanut oil on medium high heat to cover the bottom of a pan large enough to fry the paratha.
Add paratha, one at a time to the pan, and allow to brown and puff on the bottom, before turning once. The oil should be hot enough to bubble and hiss immediately after the paratha is put in–if not, it is too cold. Remove the paratha and wait a while longer before frying–if you put it in while the oil heats up, it will absorb more oil and become leaden, soggy and greasy on the inside. You don’t want that.
After it is turned over allow it to cook for about another minute–it takes about a minute or so per side to cook. Remove with spatula and drain on paper towels, then cover to keep warm. Repeat with remaining breads.
Serve with raita, dal and pickles for a light supper or lunch.
10 Comments
RSS feed for comments on this post.
Sorry, the comment form is closed at this time.

Categories:
- Admin (rss) (55)
- Blogs and Blogging (rss) (81)
- Book Reviews: Cookbooks (rss) (43)
- Book Reviews: Non-Cookbook Food Books (rss) (38)
- Cats and Cat Blogging (rss) (47)
- Chinese Cooking Lessons (rss) (32)
- Culinary School Stories (rss) (18)
- Dairy Pruducts: Cultured and Barbaric (rss) (4)
- Documentary Filmmaking (rss) (1)
- Essays, Rants and Reflections (rss) (260)
- Fighting Hunger (rss) (12)
- Food and Kids (rss) (45)
- Food in the News (rss) (126)
- Food Media (rss) (98)
- Food Preservation (rss) (18)
- Food Safety (rss) (45)
- Gardening (rss) (30)
- Herbs and Herb Blogging (rss) (20)
- Holidays (rss) (50)
- Kat Blogging (rss) (22)
- Kitchen Science (rss) (36)
- Leftover Makeover (rss) (8)
- Life, the Universe and Everything (rss) (131)
- Local and Sustainable (rss) (227)
- Local Athens Food and Foodies (rss) (42)
- Meatless Mondays (rss) (32)
- Menu For Hope (rss) (5)
- Nutrition, Diet and Health (rss) (84)
- On The Farm (rss) (8)
- Recipes: Almost Vegetarian, Vegetarian and Vegan (rss) (294)
- Recipes: American Regional (rss) (37)
- Recipes: Appalachian Hillbilly (rss) (33)
- Recipes: Bread, Pasta, Grains (rss) (95)
- Recipes: Canning and Preserving (rss) (8)
- Recipes: Chinese (rss) (123)
- Recipes: Comfort Food (rss) (120)
- Recipes: Cookies (rss) (16)
- Recipes: Desserts (rss) (48)
- Recipes: French (rss) (25)
- Recipes: Fruits and Vegetables (rss) (302)
- Recipes: Greek, North African and Middle Eastern (rss) (31)
- Recipes: Indian (rss) (137)
- Recipes: Italian (rss) (42)
- Recipes: Japanese (rss) (7)
- Recipes: Jewish (rss) (4)
- Recipes: Korean (rss) (6)
- Recipes: Meat, Poultry and Fish (rss) (220)
- Recipes: Mexican/Native American/ Latin American/Caribb (rss) (27)
- Recipes: Original (rss) (108)
- Recipes: Thai (rss) (27)
- Recipes: Tofu (rss) (17)
- Recipes: US Regional (rss) (16)
- Recipes: Vietnamese (rss) (8)
- Restaurant Stories (rss) (28)
- Sewing, Quilting, Arts and Crafts (rss) (16)
- Simple Chinese Recipes (rss) (30)
- Slow Food and Heritage Foods (rss) (10)
- Spice Blogging (rss) (44)
- The Chinese Cookbook Project (rss) (14)
- The Chinese Pantry (rss) (39)
- The Documentary (rss) (2)
- The Kitchen Saga (rss) (17)
- The Locavore's Bookshelf (rss) (15)
- The Unsung Adventures of The Culinary Nerd (rss) (6)
- Tools and Toys (rss) (35)
- Uncategorized (rss) (10)
- With a Side of Politics (rss) (48)
Archives:
- August 2012 (9)
- July 2012 (12)
- September 2011 (3)
- August 2011 (7)
- July 2011 (8)
- June 2011 (16)
- May 2011 (17)
- April 2011 (11)
- December 2010 (9)
- November 2010 (5)
- February 2010 (1)
- December 2009 (5)
- November 2009 (7)
- October 2009 (10)
- September 2009 (16)
- August 2009 (14)
- July 2009 (14)
- June 2009 (7)
- May 2009 (17)
- April 2009 (10)
- March 2009 (25)
- February 2009 (13)
- January 2009 (10)
- December 2008 (5)
- November 2008 (5)
- October 2008 (6)
- September 2008 (13)
- August 2008 (8)
- July 2008 (11)
- June 2008 (18)
- May 2008 (13)
- April 2008 (14)
- March 2008 (16)
- February 2008 (17)
- January 2008 (19)
- December 2007 (25)
- November 2007 (18)
- October 2007 (24)
- September 2007 (16)
- August 2007 (15)
- July 2007 (15)
- June 2007 (10)
- May 2007 (14)
- April 2007 (16)
- March 2007 (17)
- February 2007 (20)
- January 2007 (13)
- November 2006 (1)
- October 2006 (8)
- September 2006 (14)
- August 2006 (25)
- July 2006 (30)
- June 2006 (28)
- May 2006 (34)
- April 2006 (29)
- March 2006 (24)
- February 2006 (30)
- January 2006 (38)
- December 2005 (40)
- November 2005 (37)
- October 2005 (32)
- September 2005 (25)
- August 2005 (30)
- July 2005 (28)
- June 2005 (21)
- May 2005 (8)
- April 2005 (22)
- March 2005 (17)
- February 2005 (29)
- January 2005 (10)
Search Site:
Links:
- Lily’s Wai Sek Hong
- 101 Cookbooks
- A cat in the kitchen
- A Veggie Venture
- Accidental Hedonist
- Cha Xiu Bao
- chez pim
- Chocolate & Zucchini
- Chopstick Cinema
- Chowhound.com
- Chubby Hubby
- Cook sister!
- Cooking with Amy
- da*xiang
- Eat Local Challenge
- Eating Liberally
- Ecocentric
- Eggbeater
- Epicurious
- Farmgirl Fare
- Fatfree Vegan
- Foodgoat
- ForkandBottle.com
- Green Olive Tree
- Hooked on Heat
- Jaden’s Steamy Kitchen
- Kalyn’s Kitchen
- Lucullian delights
- Mahanandi
- Matt Bites
- MeatHenge
- mmm-yoso!!!
- New York Times – Dining & Wine
- Pizza Goon
- Rasa Malaysia
- Ruhlman
- Sailu's Kitchen
- Serious Eats
- SF Gate: Food & Dining
- Simply Recipes
- Soul Fusion Kitchen
- Tastespotting
- The Amateur Gourmet
- The Cleaner Plate Club
- The Food Section
- The Grub Report
- thecookscottage
- U.S. Food Policy
- Wandering Chopsticks
- Washington Post Food and Dining
- Wasted Food
Meta:

Powered by WordPress. Graphics by Zak Kramer.
Design update by Daniel Trout.
Entries and comments feeds.
Thank you for this post, Barbara! I’ve wanted to learn how to make paratha for some time now!
Comment by maninas — March 4, 2008 #
Lovely recipe! One flavor in particular that I enjoy is carrot, daikon radish, green chilies, onion and spices.
Delish!
I buy methi seeds from the Indian grocer and they sprout to grow fresh methi beautifully.
Comment by moderndayhermit — March 4, 2008 #
Drool…I use the recipe from Julie Sahni’s Vegetarian Indian cooking but I am certainly going to try your’s as well. I love these crispy breads. I put all sorts of things in mine like chili flakes, sesame seeds, black mustard seeds, etc – just to add more flavor and crunch.
Comment by Nancy — March 4, 2008 #
I love Indian breads, though they don’t usually turn out quite so well for me as they do at our local Indian restaurant. But I’ve made layered parathas a couple times: I make the dough, roll it out thin, spread with oil and some herbs, fold it over, roll it out, spread with oil and herbs again, then fold it again and roll a little more. Then cook and eat. I shall have to try your way. Sounds lovely.
Comment by Christy — March 4, 2008 #
re the comment from ‘moderndayhermit’ — freshly sprouted methi?! don’t you think the restaurant needs this, barbara?
Comment by Hilarie — March 4, 2008 #
Ooooooohhhhh. I love paratha. I can do an OK methi paratha – and I use a version of your technique (many folds over). But my roti-making technique is bad. All that oil, and layering for parathas forgives a host of ills. Every summer I go on a self-imposed “roti boot camp” to try and improve my roti making, and indeed it has improved from consistently awful to “wildly inconsistent” – sometimes they are great and puff. Sometimes rock hard tortilla-like things. Parathas are so much easier. And tastier!
Comment by Diane — March 4, 2008 #
Hi,
I am a regular reader of your website, but never commented before. I am an Indian, and make paranthas a lot with different fillings. I just wanted to say that uaually, we do not put oil in the pan when the rolled parantha is put to cook.
Just heat the pan to moderate heat, and put the parantha. You will know when to flip, as the top somewhat changes color. Flip it and cook again. Flip again , and now apply butter generously.(clarified butter – ghee is preferable).It is ready to eat.
Comment by Rashmi — March 6, 2008 #
Hi
Am blogging your paratha as a model recipe in the 1001 Paratha cookbook at http://ramkicooks.blogspot.com/
/Thanks for the recipe
Comment by Ramki — March 21, 2008 #
I’ve made this twice, once with scallion and mint, and once with just scallion. They are awesome! It kind challenging to make them as part of dinner, especially when you might be cooking other “serve immediately” type dishes. But I can’t get over how delicious the layers are, and how easily they end up being made — by the rolling method. They remind me very much of a sopapilla, but deliciouser. A+
Comment by Jim — May 4, 2008 #
I like the rolling technique. But being Indian and having made parathas, I’d like to comment as well that you don’t normally need so much oil. I put the paratha on a dry non-stick pan, spray pam on one side. Turn it over, spray a little more pam on the other side, make sure both sides are cooked. I then serve with a small dab of butter.
Comment by seapot — August 25, 2008 #