Cook Local, Eat Global
A Sweet For Sour Cherry Season

I like simple, unfussy desserts like tea cakes or fruit crumbles in the summertime because I prefer to showcase the natural flavors of seasonal fruits than play with finicky torte layers or rich buttercreams when it is hot and sticky outside. When it is hot, I don’t really want to eat much in the first place, but it is a shame to not use fruit in its season when it is at the height of freshness. Sure, I eat plenty of berries and cherries out of hand in their natural state, but I also like to try showcase them in new and different baked goods each year.
This Sour Cherry Almond Tea Ring is an example of the kind of baked goodie I like in the summer–full of fresh fruit, and made simply without a bazillion futzy steps that would try my patience enough on a nice cold blustery winter day, but on a summer day become so onerous as to seem impossible.
You could serve this cake as a dessert, or have it as a breakfast sweet to accompany coffee or tea.
You could use any sort of summer berry or cherry you like for the filling and topping, and you could start with frozen instead of fresh. I like sour cherries myself, but you could use sweet cherries instead. I tend to use less sugar in my sour cherry sweets than most cooks–because I see no reason to take sour cherries and add so much sugar to them that they lose their character. If you are going to do that, use sweet cherries! (The recipes that I really don’t understand are the ones that start with sour cherries, add a gigantic amount of sugar to sweeten them, and then some lemon juice to bring out the acidity again. How about just using less sugar in the first damned place, or does that just make too much sense for some folks?)
The amount of sugar I used in the fruit filling/topping is variable. You might find the results with my measurement to be too tart for your palate, and that is fine–add more sugar. Or, if you are using blueberries instead, use less sugar because they are inherently sweeter. Blackberries might take the same amount of sugar as the cherries or a little more or less depending on their character.
You can also leave out the nuts entirely or use different ones to reflect your taste. Walnuts would be great with blueberries, while pistachios would be wonderful with raspberries.
Finally, you can use sour cream instead of Greek style yogurt for the cake batter. Either yogurt or sour cream will lend a tender, moist texture to the cake while giving a subtle tang to its flavor profile. I have found you can save some calories by using lower fat yogurt instead of the sour cream without sacrificing texture or flavor at all.
Anyway, without further ado, here is a recipe meant to help you start your week on a not-too-sweet but still delectable note.

Sour Cherry Almond Tea Ring
Ingredients for Streusel:
1/2 cup all-purpose flour
1/2 cup raw sugar
1/2 cup sliced almonds
1 /2 teaspoon ground cinnamon
1/4 teaspoon ground cardamom
6 tablespoons butter
Ingredients for Fruit Filling/Topping:
3 cups fresh sour cherries, pitted
1/2 cup raw sugar
1/2 teaspoon almond extract
1 1/2 tablespoons cornstarch dissolved in 2 tablespoons cold water
Ingredients For Cake:
1 cup raw sugar
1/2 cup softened butter
1 cup Greek yogurt or sour cream
2 eggs lightly beaten to combine yolks and whites
1 teaspoon vanilla extract (I used Penzey’s Double Strength)
1 1/2 teaspoons almond extract
zest from 1 lemon
1 tablespoon lemon juice
2 cups all-purpose flour
1 teaspoon ground cardamom
1 1/2 teaspoons baking powder
1/2 teaspoon baking soda
1/2 teaspoon salt
Method:
Preheat oven to 325 degrees F.
Prepare a tube shaped cake pan with butter and flour or oil and flour spray. Set aside.
Mix together dry ingredients for streusel topping. Cut in butter with pastry blender, fork or two knives until mixture resembles coarse crumbs. Set aside.
Mix together all ingredients for cherry filling/topping except the cornstarch. Allow to stand until the sugar pulls some juice from the fruit–about 20 minutes. Put into a pan on the stove and bring to a boil and cook for about five minutes. Pour in cornstarch mixture, and stirring constantly, cook until it is thickened and glossy–about three to five more minutes. Pour into a metal bowl and allow to cool until you can dip your finger comfortably into the fruit without burning yourself terribly.
Beat butter and sugar on high speed until the mixture is creamy. Add in the yogurt, eggs, extracts, and lemon zest and juice and beat until well combined. Mix together remaining dry ingredients until well combined, then add to batter mixture and beat on low speed until just combined. Do not overbeat.
Scrape 2/3 of the cake batter into the pan, and spread it to cover the bottom of the pan completely. (The batter is quite thick and doesn’t pour) Put 1 cup of the cherry filling over the cake by dropping it by spoonsfuls and spreading it gently. Dot the top of the cherries with the remaining third of the batter and spread it to mostly cover the cherries.
Crumble streusel over the top of the cake and put into the preheated oven. Bake for 45- 50 minutes (if you have a convection oven, bake for 35-40 minutes.)
Remove and cool on rack. Remove from pan while still lightly warm to the touch and pour remaining cherries over the top of the cake just before serving. (I like it best slightly warm from the oven.)
If you have extra sliced almonds, sprinkle them on top of the cherries as a garnish–I, alas, did not have any last night!
Vote For Your Favorite Farmer’s Market
And if you are in Athens, or have visited and love our market as much as we Athenians do, please vote for our market.
The winning market gets a $5,000 prize from Local Harvest to use to promote healthy, local, sustainable agriculture.
That much money would go a long way toward getting the Athens Farmer’s Market a permanent home–right now we meet in a parking lot of a local shopping center, but it would be better to have a place of our own.
Right now The Athens Farmer’s Market is in fifth place–that is pretty good considering the many great markets there are out there across the country.
And if you are not from Athens–vote for your local market!

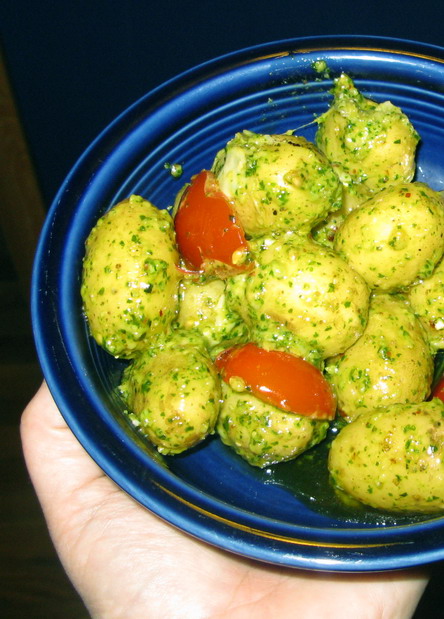
Why Didn’t I Think of This Before? New Potatoes and Fresh Tomatoes with Pesto
Have you ever decided to cook a couple of things together that turned out to taste so good that you wondered why you had never ever cooked them that way before?
That is what happened to me last night.
I had some delicious tiny new potatoes–the variety is called Carola, and if you can get some, you should try them. When they are tiny–about the size of quail eggs, like these–they boil or steam up creamy and sweet, with papery skins that have a delectable earthy aroma. When they are slightly bigger, they are great roasted–and frankly, I suspect that I could make a different version of this recipe by roasting the potatoes and cherry tomatoes and then tossing them with fresh pesto, and it would be equally amazing in a toasty kind of way rather than a creamy way.
Carola potatoes have become one of my favorite varieties of late–I have been buying them from Rich Tomsu, who also grows my favorite garlic in the world–Extra Hardy German–more on that in a moment. Carolas are also a variety developed in Germany and have a dependably consistently lightly sweet flavor and creamy texture, whether tiny or mature. I buy them throughout their season, from early June through the fall–and use them every which way I can–they are just that good!
As for the tomatoes–it is not really tomato season here in SE Ohio yet–but Star at Shade River Organic Farms starts her plants in greenhouses in the deep winter so she can have cherry tomatoes and slicers by early to mid-June, long before the other farmers here. And let me tell you–her tomatoes are amazing–full-flavored and very juicy–nothing like the crunchy hothouse balls of red styrofoam that masquerade as fresh tomatoes in the grocery store. I’ve been buying two quarts of cherry tomatoes per week for the past couple of weeks and using them in pasta, salads and in grilled cheese sandwiches. Mostly, though, I eat them right out of the bowl where I store them on the countertop–they are my snacks. (You should not ever keep your tomatoes in the fridge–it messes up their flavor. A lot.)
So, here we are–last night I wanted to make a vegetarian entree for myself for dinner–Kat wanted macaroni and cheese again, Zak was out of town and I did not want mac and cheese myself. What to do?
Well, I looked and saw that I had two lovely types of round vegetables roughly the same size–the potatoes and tomatoes (incidentally, these vegetables are related–they are both in the nightshade family–cool stuff, huh?) and ooh–leftover pesto from two days before carefully preserved in the fridge.

Ah, pesto–now we come to the discussion of the lovely garlic you see here. It is Rich Tomsu’s German Extra Hardy variety and look how huge the heads are! They are so pretty–the skins are pearly white with little brushstrokes of violet–Kat has been snagging them off the countertop and carrying them around the house, kissing them since I brought them home on Saturday. This variety of garlic is my favorite–hands down–because it is fragrant and oh, so zingy! The garlic flavor is strong and fiery without being the least bit bitter–in fact, it is quite sweet even before it is roasted. I have been buying Rich’s garlic since we came back to Athens to live and I would say that it is the one garlic I use exclusively in my cooking for about 3/4 of the year. I buy it until he and Ann run out of it, and then I wait with baited breath until their green garlic comes in the spring.
Anyway–if you can get your paws on some of this variety of garlic, preferably locally grown and extremely fresh–give it a try.
This particular batch of huge garlic cloves are so strongly flavored that I could make pesto using only two of the cloves for about three cups of fresh, locally grown basil leaves. That was pretty cool.
It all turned out to be a fantastic, if simple supper. I also made a plain spinach salad with homemade balsamic vinaigrette to go with the potatoes and tomatoes, and I was perfectly satisfied.
New Potatoes and Tomatoes with Pesto
Ingredients:
8 ounces tiny new potatoes, scrubbed well
5 or 6 large cherry tomatoes, quartered
1 tablespoon finely shredded Parmesan cheese
1/4 cup pesto
1/2 teaspoon Aleppo pepper flakes
kosher salt to taste
Method:
Boil the potatoes in lightly salted water until they pierce easily with a fork.
Drain and set pot back on stove on low heat. Add potatoes and shake pot to help evaporate all the water.
Add quartered tomatoes and sprinkle with the cheese. Cook, stirring, until the cheese melts and the tomato skins wrinkle slightly.
Stir in pesto and sprinkle with Aleppo pepper flakes and salt to taste. Toss to combine well and serve immediately.
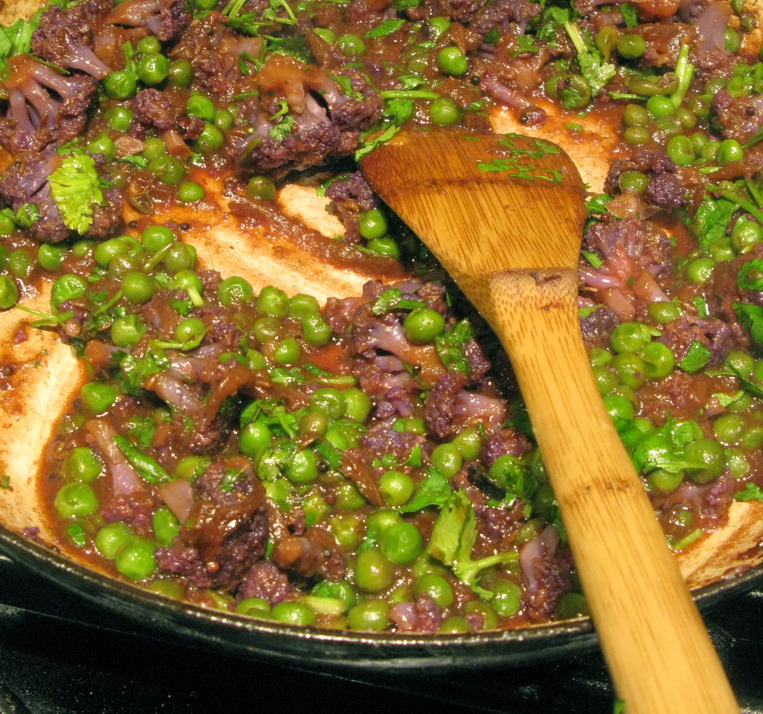
Gobi Mattar:Purple Cauliflower and Pea Curry
Now, you know, purple cauliflower has -got- to be better than plain old white cauliflower. I mean, it -is- purple. And purple makes everything better. Purple hair–better. Purple paint–better. Purple cauliflower–better.
Yeah, that is just my emotional, aesthetic sense talking. There is no reason to believe that purple cauliflower is actually better for you, right?
Well, it actually is slightly more healthy for you than plain old white cauliflower, thanks to the anthocyanins that give the vegetable its lovely violet hue. Anthocyanins, which are the compounds that give plants vibrant red, violet or blue colors, are powerful anti-oxidants and can act in the human body to help fight the formation of cancer and the development of heat disease.
Otherwise, nutritionally speaking, purple and white cauliflower are exactly the same–low in calories, high in fiber, no fat, with a nice amount of vitamin A, folate and vitamin K.
So, yeah, all cauliflower is good for you. Purple cauliflower just happens to be a -little- tiny bit better.
Though, I have to say, it is a whole lot prettier on the plate–don’t you think?
This curry is extremely simple to make, and easy to eat, too, thanks to the delightful contrast in colors, flavors and textures inherent in it.
I decided to mix the peas in to the cauliflower because I really love the color combination of bright green and brilliant purple–they are complementary colors and as such really pop when placed in close proximity to each other, whether you are making a quilt, painting a room or creating a curry.
Besides, peas are sweet and cauliflower is nutty and sweet, and so I figured that the combination would work wonders. In order to keep the flavors fairly simple, I decided to go with a fairly minimal spicing–caramelized onions, a little bit of garlic and ginger paste, whole mustard seeds, whole cumin seeds, and a little bit of a secret ingredient: Indira’s Magic Powder, also known as pappula podi. We call it Indira’s Magic Powder, because Indira of Mahanandi introduced me to this powder by very generously sending me a jar of it that she had made. Made of split, skinned and roasted chickpeas, chilies, cumin, garlic, coconut and salt, this powder magically makes everything taste better.
It gives a toasty, nutty savor to any vegetable curry, along with a rich hint of sweetness from the coconut and earthy spiciness from the chilies and cumin. It is awesome, and I highly suggest you try her recipe to make it out and then keep some hanging around in your kitchen. Every time you make a vegetable curry, add some–a tablespoon or so and I guarantee you, it will make your curry taste even better than before.
And–as a bonus, it acts as a natural thickener–making on its own a delicious sauce when added to liquid!
Great stuff!
In order to preserve the bright violet color, I cooked the cauliflower in minimal liquid–in fact, it was mostly sauteed in ghee, with just a little bit of water–about a half-cup added near the end of the cooking process just to steam the vegetable through and give the curry a bit of sauce. Using minimal liquid also concentrated the cauliflower’s flavor, giving it a bit of a roasty-toasty, flavor that is often lost if the vegetable is steamed or boiled. (For those who believe cauliflower is bland, I always suggest they roast, sautee or bake the vegetable. They are usually astounded at how much flavor it has when treated this way.)
One more note:there is no turmeric in this curry–I deliberately left it out because I did not want any yellow coloring to get in the way of the vibrant violet and green hues.
Gobi Mattar
Ingredients:
4 tablespoons ghee or canola oil
1 1/2 cups thinly sliced red or yellow onion
1 teaspoon salt
2 cups purple cauliflower florets cut into small bite-sized pieces
1 teaspoon black mustard seeds
1 teaspoon cumin seeds
1/2 teaspoon fresh ginger paste (about 1/2″ cube ginger peeled and pulverized into a paste)
1/2 teaspoon fresh garlic paste (1 clove garlic peeled and ground into a paste)
1/2 cup water
1 1/2 cups frozen peas, thawed
1 tablespoon pappula podi
1 tablespoon lemon juice
salt to taste
1/2 cup chopped cilantro leaves for garnish
Method:
Heat ghee or oil in a heavy-bottomed deep skillet over medium high heat.
Add onions, and sprinkle with salt and cook, stirring, until the water is cooked out of the onions and they are a deep golden color. Add cauliflower, mustard seeds and cumin seeds, and cook, stirring, for another couple of minutes. Add ginger and garlic pastes, and cook, stirring, until the onions are a deep reddish brown.
Add water, and cover skillet and turn heat down to low. Allow to simmer until the cauliflower can be pierced with a fork, but is not mushy.
Add peas, and if needed a little bit of water to make a curry sauce. Sprinkle pappula podi over the vegetables, and stir to thicken sauce. Add lemon juice, simmer for another minute and then taste for salt. If needed, add some–but you probably won’t need to.
Stir in chopped cilantro leaves and serve immediately.
Chicken Xacuti
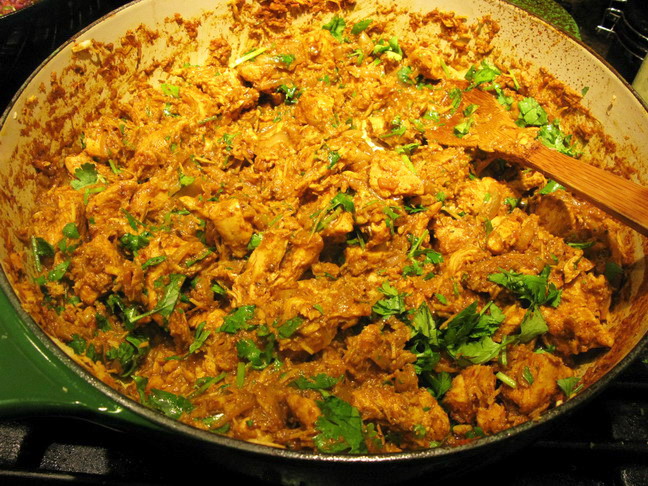
Xacuti–pronounced shakooti–is a Goan preparation of prawns or chicken cooked with roasted spices and toasted fresh coconut. There are browned onions, ginger and garlic in the dish as well–and all of this toasting, roasting and browning makes for a very warming, comforting, sweet and savory curry indeed.I have eaten several different versions of the dish and read many different recipes for it–my favorite versions are fairly dry, with the onions, spices and grated coconut bits clinging tightly to the chicken pieces, and leaving bits of browned goodness in the pan which are just waiting to be scraped up and mixed with steamed rice. There are other versions that have a gravy, which is fine–but as I said, I like the way I make it with all of the tasty nutty bits clinging to the chicken and the sides of the pan. It is just all so very tasty that way.
As with most Indian foods, I read about Xacuti long before I ever tasted it, but even from the description of it, I knew–I just knew–that I would love it. I read about it in my first ever Indian cookbook–Madhur Jaffrey’s Indian Cooking, put out by Barron’s. This is the cookbook I checked out from the library several consecutive times when I was first in college umpteen zillion years ago. I read it about five times before I got up the nerve to try to cook anything from it–and it wasn’t Xacuti. I could not convince Morganna’s father who lived with me at the time that coconut and chicken belonged anywhere near each other.
Oh, but in my heart, I knew he was wrong (and he was, about so many things, but I digress) and I knew that one day I would taste this delightful-sounding dish.
And I did–years and years later in Providence, Rhode Island, and later in Columbia, Maryland, at my beloved Akbar.
And finally, I got around to cooking it myself–and I have to say–it is even better at home.
The key to making this curry amazing is roasting the spices before they are ground. This gives them a special, delicate, almost floral, aroma that is very different from the scent you get when you cook ground spices in oil. It gives the curry a special sweet browned flavor that is only deepened when you carefully toast the grated fresh (or frozen–that is what I use–it comes already grated in a bag in the freezer section of your Indian or Asian grocery store) coconut just as you did the spices. And then, you brown the onions, and what happens is a delightful synergy between the three browned ingredients that makes Xacuti knock-your-socks-off wonderful.
It sounds like a lot of work, but really it isn’t that hard. I did it all in about an hour. If the work sounds too daunting, save Xacuti for a weekend meal.
But do cook it–it is really, really good.
Oh, and one more thing–most of the time, this recipe is made with skinned chicken pieces on the bone–which take longer to cook. I didn’t have any chicken on the bone, so I cut up boneless skinless breasts and the curry turned out just as tasty and moist as I could want. If you want to make it more traditionally, just add more water and cook the curry longer in order to get all of the meat done to the bone. (A note here–I think this curry tastes better with chicken on the bone–the bones add a lot of flavor–but it is also perfectly amazing without chicken on the bone. So, really, it is up to you.)
Chicken Xacuti
Ingredients:
1 bay leaf
1 tablespoon coriander seeds
2 teaspoons cumin seeds
a 1 1/2″ stick cinnamon broken into several bits
5 whole cloves
1/2 teaspoon black peppercorns
2-4 whole dried Indian chilies–depending on how hot you want it
1 bay leaf
2 cups grated fresh or frozen coconut
4 tablespoons canola oil or ghee
2 large onions, peeled and very thinly sliced
1 teaspoon salt
2 pounds skinless chicken–either on the bone in small pieces or cut off the bone and cut into 1″ cubes
8 large cloves garlic, peeled and ground into a paste
1 1/2″ cube fresh ginger, peeled and ground into a paste
1 teaspoon ground turmeric
1 1/2 tablespoons sweet paprika
water as needed
1 tablespoon tamarind concentrate (Or lemon juice if you have no tamarind)
salt to taste
roughly chopped cilantro for garnish
Method:
Put all the spices in a heavy-bottomed deep skillet and roast, shaking the pan constantly, over a medium-high flame. Cook until the seeds turn brown, and the chilies and bay leaf take on brown spots. Remove from heat immediately, and grind into a fine powder. Set aside.
Toast the coconut in the same pan–if using frozen coconut, cook it straight from the freezer. Put coconut into pan, and cook, stirring, until it is mostly colored a nice rich tan with flecks of white. If using frozen coconut, just break up the clumps as much as you can before you put it in the pan, and bash the rest of the clumps out with your stirring implement. When the coconut is brown, pour it into a bowl with the spices.
In the same pan, heat oil or ghee over medium high heat. Add the onions, sprinkle them with salt and cook, stirring, until they are a nice deep golden color. Add the chicken, and cook, stirring until the chicken is lightly browned with still some pink showing, and the onions are a nice reddish color. Add the spices and coconut, the ginger and garlic pastes, and the turmeric and paprika, and cook, stirring, for another couple of minutes.
Add enough water to come about halfway up the chicken. Add the tamarind or lemon juice. Stir well, turn the heat down and simmer briskly, uncovered, stirring as needed until the chicken is done and the sauce is mostly gone–all of the goodies should cling to the chicken bits and the sides and bottom of the pan without sticking.
Taste for salt and adjust as needed, then stir in roughly chopped cilantro and serve with steamed basmati rice.

Categories:
- Admin (rss) (55)
- Blogs and Blogging (rss) (81)
- Book Reviews: Cookbooks (rss) (43)
- Book Reviews: Non-Cookbook Food Books (rss) (38)
- Cats and Cat Blogging (rss) (47)
- Chinese Cooking Lessons (rss) (32)
- Culinary School Stories (rss) (18)
- Dairy Pruducts: Cultured and Barbaric (rss) (4)
- Documentary Filmmaking (rss) (1)
- Essays, Rants and Reflections (rss) (260)
- Fighting Hunger (rss) (12)
- Food and Kids (rss) (45)
- Food in the News (rss) (126)
- Food Media (rss) (98)
- Food Preservation (rss) (18)
- Food Safety (rss) (45)
- Gardening (rss) (30)
- Herbs and Herb Blogging (rss) (20)
- Holidays (rss) (50)
- Kat Blogging (rss) (22)
- Kitchen Science (rss) (36)
- Leftover Makeover (rss) (8)
- Life, the Universe and Everything (rss) (131)
- Local and Sustainable (rss) (227)
- Local Athens Food and Foodies (rss) (42)
- Meatless Mondays (rss) (32)
- Menu For Hope (rss) (5)
- Nutrition, Diet and Health (rss) (84)
- On The Farm (rss) (8)
- Recipes: Almost Vegetarian, Vegetarian and Vegan (rss) (294)
- Recipes: American Regional (rss) (37)
- Recipes: Appalachian Hillbilly (rss) (33)
- Recipes: Bread, Pasta, Grains (rss) (95)
- Recipes: Canning and Preserving (rss) (8)
- Recipes: Chinese (rss) (123)
- Recipes: Comfort Food (rss) (120)
- Recipes: Cookies (rss) (16)
- Recipes: Desserts (rss) (48)
- Recipes: French (rss) (25)
- Recipes: Fruits and Vegetables (rss) (302)
- Recipes: Greek, North African and Middle Eastern (rss) (31)
- Recipes: Indian (rss) (137)
- Recipes: Italian (rss) (42)
- Recipes: Japanese (rss) (7)
- Recipes: Jewish (rss) (4)
- Recipes: Korean (rss) (6)
- Recipes: Meat, Poultry and Fish (rss) (220)
- Recipes: Mexican/Native American/ Latin American/Caribb (rss) (27)
- Recipes: Original (rss) (108)
- Recipes: Thai (rss) (27)
- Recipes: Tofu (rss) (17)
- Recipes: US Regional (rss) (16)
- Recipes: Vietnamese (rss) (8)
- Restaurant Stories (rss) (28)
- Sewing, Quilting, Arts and Crafts (rss) (16)
- Simple Chinese Recipes (rss) (30)
- Slow Food and Heritage Foods (rss) (10)
- Spice Blogging (rss) (44)
- The Chinese Cookbook Project (rss) (14)
- The Chinese Pantry (rss) (39)
- The Documentary (rss) (2)
- The Kitchen Saga (rss) (17)
- The Locavore's Bookshelf (rss) (15)
- The Unsung Adventures of The Culinary Nerd (rss) (6)
- Tools and Toys (rss) (35)
- Uncategorized (rss) (10)
- With a Side of Politics (rss) (48)
Archives:
- August 2012 (9)
- July 2012 (12)
- September 2011 (3)
- August 2011 (7)
- July 2011 (8)
- June 2011 (16)
- May 2011 (17)
- April 2011 (11)
- December 2010 (9)
- November 2010 (5)
- February 2010 (1)
- December 2009 (5)
- November 2009 (7)
- October 2009 (10)
- September 2009 (16)
- August 2009 (14)
- July 2009 (14)
- June 2009 (7)
- May 2009 (17)
- April 2009 (10)
- March 2009 (25)
- February 2009 (13)
- January 2009 (10)
- December 2008 (5)
- November 2008 (5)
- October 2008 (6)
- September 2008 (13)
- August 2008 (8)
- July 2008 (11)
- June 2008 (18)
- May 2008 (13)
- April 2008 (14)
- March 2008 (16)
- February 2008 (17)
- January 2008 (19)
- December 2007 (25)
- November 2007 (18)
- October 2007 (24)
- September 2007 (16)
- August 2007 (15)
- July 2007 (15)
- June 2007 (10)
- May 2007 (14)
- April 2007 (16)
- March 2007 (17)
- February 2007 (20)
- January 2007 (13)
- November 2006 (1)
- October 2006 (8)
- September 2006 (14)
- August 2006 (25)
- July 2006 (30)
- June 2006 (28)
- May 2006 (34)
- April 2006 (29)
- March 2006 (24)
- February 2006 (30)
- January 2006 (38)
- December 2005 (40)
- November 2005 (37)
- October 2005 (32)
- September 2005 (25)
- August 2005 (30)
- July 2005 (28)
- June 2005 (21)
- May 2005 (8)
- April 2005 (22)
- March 2005 (17)
- February 2005 (29)
- January 2005 (10)
Search Site:
Links:
- Lily’s Wai Sek Hong
- 101 Cookbooks
- A cat in the kitchen
- A Veggie Venture
- Accidental Hedonist
- Cha Xiu Bao
- chez pim
- Chocolate & Zucchini
- Chopstick Cinema
- Chowhound.com
- Chubby Hubby
- Cook sister!
- Cooking with Amy
- da*xiang
- Eat Local Challenge
- Eating Liberally
- Ecocentric
- Eggbeater
- Epicurious
- Farmgirl Fare
- Fatfree Vegan
- Foodgoat
- ForkandBottle.com
- Green Olive Tree
- Hooked on Heat
- Jaden’s Steamy Kitchen
- Kalyn’s Kitchen
- Lucullian delights
- Mahanandi
- Matt Bites
- MeatHenge
- mmm-yoso!!!
- New York Times – Dining & Wine
- Pizza Goon
- Rasa Malaysia
- Ruhlman
- Sailu's Kitchen
- Serious Eats
- SF Gate: Food & Dining
- Simply Recipes
- Soul Fusion Kitchen
- Tastespotting
- The Amateur Gourmet
- The Cleaner Plate Club
- The Food Section
- The Grub Report
- thecookscottage
- U.S. Food Policy
- Wandering Chopsticks
- Washington Post Food and Dining
- Wasted Food
Meta:

Powered by WordPress. Graphics by Zak Kramer.
Design update by Daniel Trout.
Entries and comments feeds.