Cook Local, Eat Global
How To Braise A Rabbit: Braised Rabbit With Marsala Wine and Wild Mushrooms
I have to warn you: this post is quite lacking in photographs. This is because as I was braising the rabbit for the Toyota Farm to Table event, half the time I forgot to photograph every step, and the other half of the time when I did remember, I didn’t take as much time as I usually do to take great pictures, so they ended up to be rather unattractive.
So, when I describe the process of this dish: Rabbit Braised in Marsala with Wild Mushrooms, I am going to have to rely simply on my words alone to get the point across. We shall see how it goes, shall we?
The first part of this post is a description of how you would go about braising a rabbit so that you may end up with a tender, flavorful, juicy creature whose flesh is easily pierced with a fork and flaked. You can leave the meat on the bone after it is done, or you can easily pick and shred it as I do for the recipe that will follow this instructional essay.
Braising is a very simple cooking method whereby meats and/or vegetables are cooked in a liquid until they are fork tender. Fork-tender does not only mean that you can easily pierce the meat with the tines of a fork; it also means that it easily slides off of the fork. That means that with minimal effort, such as by shaking your hand, the meat will slide right off of the fork. Often, you will find that meat is easily enough pierced with a fork, but it still has enough toughness in the muscle fibers that it clings tightly to the fork. This means that it is not done–it is, instead, almost done. Keep cooking until the meat will let the fork slide out of it just as easily as it let it slide in.
Braising is similar to stewing, but in general, braised dishes are made with larger cuts of meat or whole vegetables, while stews are made with meats and vegetables cut into roughly bite-sized pieces. Braises also tend to use less liquid than stews; usually the meat is barely covered with liquid, and in fact, some bits of the meat may stick up out of the liquid. Both braising and stewing involve simmering the foods to be cooked in liquid slowly over low, even heat. This slow cooking process gives tougher cuts of meat a long time to become tender, and it allows the flavors of all of the ingredients to combine in the cooking liquid to make a truly delicious sauce.
Braising a rabbit is a little more involved than braising beef or lamb or even chicken, and it has a great deal to do with the fact that the meat of a rabbit has very little fat–it is the lowest in fat of any terrestrial domestic farm animal, and it is very high in protein. Because of this lack of fat, the meat can very easily become tough, and that is the last thing you want. The solution to this problem is quite simple, when it comes to braising rabbit meat–you must make certain that it never boils. It should instead, cook on a very low, constant simmer until it is truly fork tender.
I cannot emphasize enough how delicious and juicy the meat of a rabbit will be when cooked in this way. Cooked at a bare simmer–almost poached, really–rabbit retains all of its flavor and is so moist and tender that you cannot imagine a better meat. You want to make certain that you do not overcook the meat–that means you do not want it to cook until it falls off of the bone–at that point it is more cooked than you want, and the meat will lose some of its delectable texture and moist nature. Only cook it until a fork easily pierces it and then slides right back out of it; you test the rabbit by poking your fork into the thickest meat of the thigh. When it is done, you can remove it from the cooking juice if you like, so that you can reduce the liquid and turn it into a sauce, or you can serve the rabbit without a sauce.
As I mentioned before, you can leave braised rabbit meat on the bone, or, if you are going to make a sauce for pasta, which the following recipe is based upon, then you can pick it from the bones. The best way to remove the meat from teh bones is by hand–just let it cool until you can touch it and go at it, keeping in mind that rabbit bones are fine and thin and can easily hide themselves in the shreds of meat. That is why I use my fingers only when working with rabbit meat–that way I can feel for the bones as I go.
So, now, let me give you the procedure for braising a rabbit.
First, take your rabbit, which can be cut up into serving pieces or whole, and wash it well in cold running water. Take note of how well bled the carcass was–if there is a lot of blood in evidence on the rabbit carcass, you are going to have to do as the Chinese do when making stocks and blanch the meat. This is done quite simply. Put the rabbit into a pot with cold water just covering it. Bring to a gentle simmer and let it cook for about fifteen minutes. During this time, you will see all sorts of scummy bits and stringy matter coming out of the rabbit. This is the blood as well as some marrow coming from the bones and body tissues.
After fifteen minutes, pull the rabbit bits out with tongs and set them in a colander in your sink. Rinse them off well with cold water, scrubbing them gently with your fingers to get all of the scummy icky bits of old blood off of them. Set them aside, then pour the water out of the cooking pot and wash the pot well. Rinse it well, too, dry it, and -then- you are ready to start your braising process. (And when that rabbit is done braising, well, then Cinderella, you may go to the ball.)
Cut up your aromatic vegetables–carrots, celery and onion are usual, as is garlic–and saute them lightly in butter or olive oil. When they are cut as well as you like, you can, if you wish, brown the rabbit, although I tend not to. If you don’t wish to brown the rabbit, just put it in the pot over the vegetables, and immediately pour in the liquid you wish to cook it in. This can be wine, beer, fruit juice, tomatoes in their juice, stock, water or any combination thereof. What is important is that you just barely cover the rabbit with liquid. Season gently with salt and pepper, and add a bay leaf and whatever herbs you like.
Then, bring to a bare simmer, and once there are shimmery bubbles coming to the surface and breaking only now and again, turn the heat down carefully to maintain this heat.
Then, cook for only how long it takes for your rabbit to become fork tender. Generally, it takes around 1 1/2 to 2 hours until it is properly fork tender.
Now that you know how to braise rabbit, let me tell you how to make the dish I presented at the Toyota Farm to Table event on Saturday. It is based very much on one of my favorite Italian pasta dishes of all time: Pappardelle with Rabbit and Porcini Ragu. I had it once in a small restaurant in Boston’s Italian neighborhood and once up on Federal Hill in Providence, Rhode Island, and both times, I was smitten with the rich mushroomy fragrance of the sauce and the succulent rabbit meat, all wound around the wide ribbons of hand-made pasta.
My recipe is a very Frenchified version of that very traditional Italian dish. Because of the logistics of holding pasta which are complex and subject to failure, I chose to serve the braised, shredded rabbit over garlic mashed potatoes instead of noodles. The combination was fantastic, I must say, though my finished dish resembled the original only in the fact that both contained rabbit meat, wine and mushrooms.
I know that there are many steps in making the sauce–and for that, I refuse to apologize. The flavor of the finished dish is worth all of the work that goes into making the sauce. Besides, while you make this with one or two rabbits, imagine what I did, making this dish out of over twenty pounds of rabbit, eight pounds of mushrooms and around five pounds of vegetables with three bottles of Marsala wine. That might make you feel a bit better while you watch the rabbit stock reduce for what seems like hours, and simultaneously saute mushrooms and caramelize onions and make roux to finish the sauce.
Braised Rabbit With Marsala Wine and Wild Mushrooms
Ingredients:
3 tablespoons olive oil
1 cup diced onions
1 cup sliced celery
1 cup peeled and sliced carrots
1/3 cup peeled and sliced parsnips (optional, but it adds a lot of flavor to the stock)
3 cloves garlic peeled
2 rabbits, either whole or cut into serving pieces, blanched as described above if needed
2 cups Marsala wine
6 large dried shiitake mushrooms, also known as Chinese black mushrooms
1 bay leaf
1 tablespoon fresh thyme leaves
1 teaspoon salt
freshly ground black pepper to taste
4 tablespoons butter divided
8 ounces fresh shiitake mushrooms, stems removed and caps sliced thinly
2 tablespoons butter
2 cups thinly sliced onions
3 cloves garlic, finely minced
2 cups Marsala wine, divided
1 1/2 tablespoon tomato paste
Kitchen Bouquet or thick soy sauce as needed
roux brun made with 1/2 cup butter and 1/2 cup flour
2 tablespoons fresh thyme leaves
1 tablespoon fresh rosemary leaves, finely chopped
salt and freshly ground pepper to taste
Method:
Heat olive oil in the bottom of your stockpot or large dutch oven on medium heat. When it is hot, add the onions, celery, carrots, parsnips and garlic cloves, and cook, stirring until the onion is translucent and everything is fragrant.
Lay the rabbit down on top of the vegetables, and pour the first two cups of Marsala wine over everything. Add enough water to just barely cover the rabbits. Add the dried shiitake mushrooms, bay leaf, the first measure of thyme, the teaspoon of salt and the freshly ground pepper. Bring to a nice slow simmer. Do not allow to boil. Turn the heat down and allow to cook uncovered for 1 1/2 hours at the same slow simmer. Test the rabbit meat–if it is properly fork tender as described above, remove it from the pot, drizzling a bit of the cooking liquid over it to keep it moist as it cools.
Turn the heat up on the liquid in the pot and bring to a boil. Cook the stock down until it is reduced by half.
While the stock is reducing, melt the 1 tablespoon of the first measure of butter in a saute pan over medium high heat and allow to become foamy. Then, add 1/4 of the fresh shiitake mushrooms, and cook, stirring until they are lightly browned and tender and very fragrant and delicious. Set aside in a bowl. Repeat for the remaining mushrooms, using one tablespoon of butter and 1/4 of the mushrooms for each pan.
Take the second measure of butter and melt it in the same pan you cooked the mushrooms in. Add the onions, salt lightly and cook until they are a deep golden color. Add the garlic and keep cooking and stirring until the onions are a medium brown color and the garlic is golden and fragrant. Deglaze the pan with 1/2 cup of the second measure of Marsala wine. Add the onions and garlic to the mushrooms which are set aside.
The remaining 1 1/2 cups of Marsala wine goes into a small saucepan. Over medium heat, simmer until it reduces by half. Turn off heat and set aside.
When the stock has reduced by half, set a colander over a large bowl, and scoop all of the vegetables out of the stock. Squeeze out the dried mushrooms into the bowl, and then squish the cooked vegetables in the colander so that all of their juices run into the bowl. Discard the dried mushrooms and vegetables, rinse out the colander and line it with cheesecloth. Pour the remaining stock into the bowl, straining it into the cheesecloth lined colander. Wash out your pot and put it back on low heat. Add the strained stock, the reduced Marsala wine and bring to a boil.
Heat your roux up in a small saute pan until it is bubbling. Scrape the roux into the boiling stock and whisk like mad until it thickens nicely. Whisk in the tomato paste until it is completely combined. Stir in the sauteed mushrooms and caramelized onions. If the sauce is too pale, add a teaspoon or so of Kitchen Bouquet or thick soy sauce.
Remove the rabbit meat from the bones and add to the sauce, making certain to not accidentally slip any bones into the pot.
Stir the thyme and rosemary into the sauced rabbit, and season to taste with salt and pepper.
Serve over wide noodles or mashed potatoes–I prefer garlic mashed potatoes. (And yes, I will post a recipe for those next week. I promise.)
This should feed up to six or eight hungry adults.
Caramelized Tomato Confit
This isn’t really, truly a confit.
It’s almost a confit. It has both sugar syrup and olive oil in it, both of which can be used to cover and preserve the item in question, which in this case is caramelized tomatoes.
Technically, since I am not meaning for the sugar and the oil to preserve the caramelized tomatoes , I guess we should call this a relish, but really, I don’t much care what it is called, because this sweet, tart, rich and smooth tomato confit is really delicious.
It’s also really easy to make, too.
First, start off by caramelizing about five pounds of roma tomatoes. When you prepare them for caramelizing, only seed about half of the tomatoes, because you want them to release more juice for the confit. It is the juice, in fact, that contains most of the flavor for this dish.
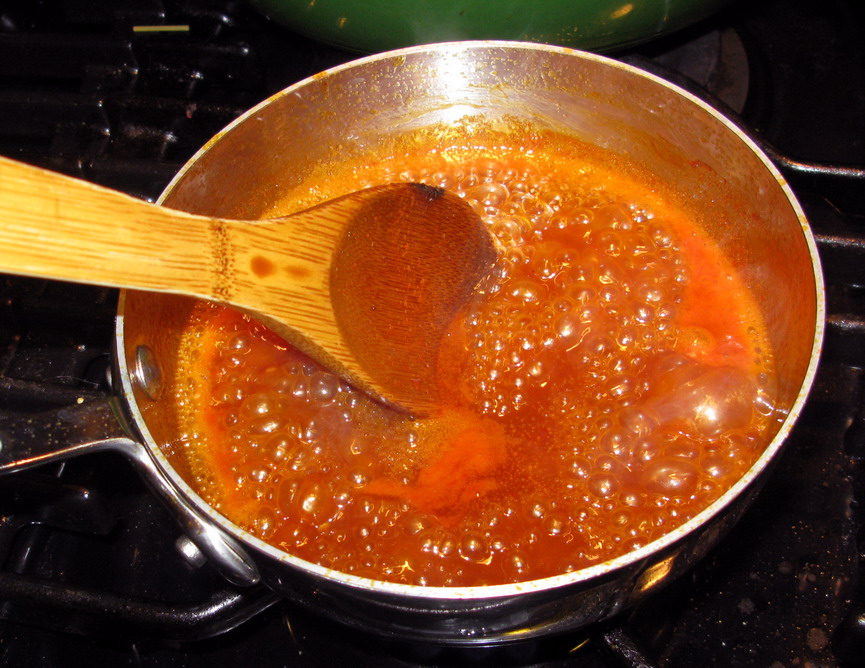
After the tomatoes are done, there should be plenty of juice on the baking sheets. Drain this into saucepan, and to that juice, you add 2 tablespoons sugar and about 1/2 cup dry red wine. Bring it to a boil. Turn the heat down and reduce the liquid by half.
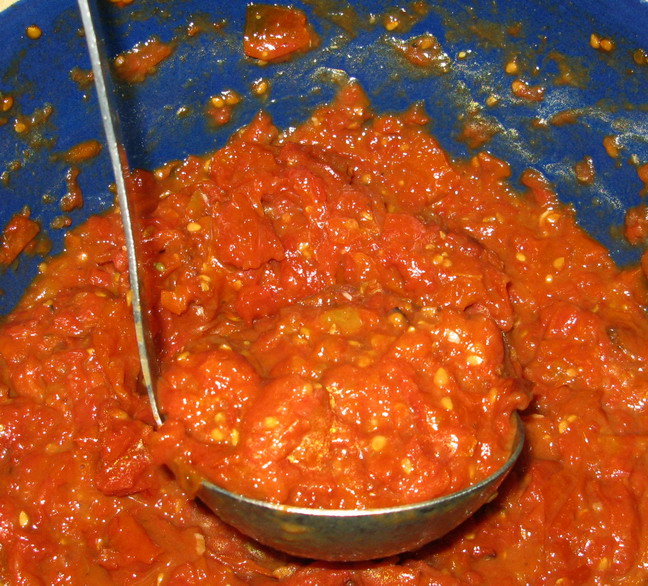
While this is going on, chop up your caramelized tomatoes roughly.
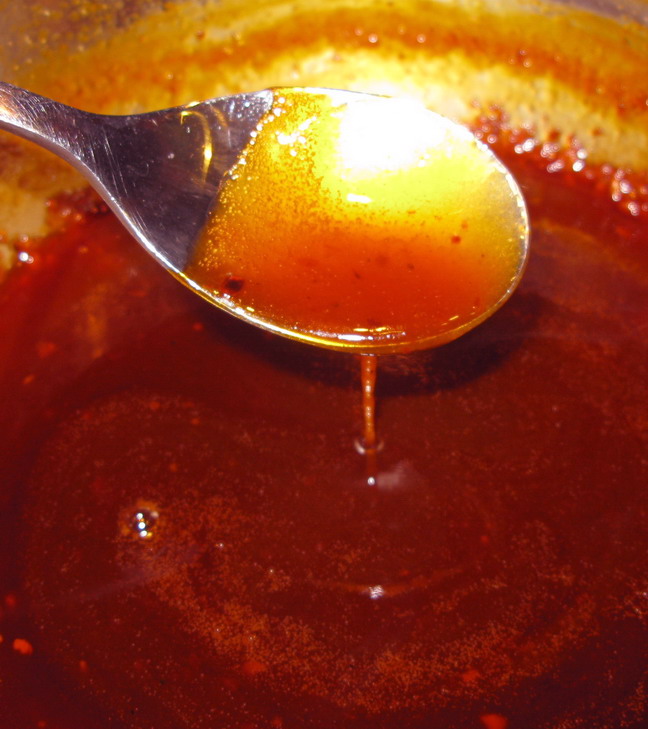
Once this is done, you should be left with a thick, deep burgundy-colored syrup that easily coats the back of a spoon. Add a tablespoon of balsamic vinegar and two tablespoons of olive oil, and you have the basis of your confit. Pour this over your tomatoes and stir well.
The rest is simple–add a couple of cloves of mashed roasted garlic and one cup of caramelized onions, (cook them in olive oil) and stir it all up well. Taste for salt and adjust as needed.
You can also add freshly ground pepper to taste or Aleppo pepper flakes, and just before serving, you can add finely chopped fresh herbs like basil, tarragon or oregano.
Now, what do you do with this tasty stuff?
I served mine alongside the Rabbit Braised in Marsala Wine with Wild Mushrooms and Garlic Mashed Potatoes. The tomatoes added a tangy-sweet note that cut through the richness of the braised rabbit.
But you could use it to top bruschetta, or as a basis for a dip or spread (mix it with some sour cream or cream cheese), or you could use it as is in place of ketchup on a really fancy bison burger with havarti cheese.
Or, you could use it warm as a sauce for grilled pork tenderloin.
Or, you could add some roasted chilies and use this as a barbecue sauce.
As you can see, this stuff is versatile. And if you keep it in a tightly sealed jar, it will keep in your fridge for a couple of weeks, which is less than a real confit, is still nothing to sneeze at.
Caramelized Tomatoes
Caramelized tomatoes are a way to take perfectly ripe, absolutely perfect tomatoes and make them even more amazingly delicious. Caramelizing them concentrates the natural flavors of the tomatoes, and the salt, olive oil, seasonings and the sugar you add at the very end just gently enhance their fragrance and taste. Texturally, caramelized tomatoes are soft and lightly chewy, with slightly wrinkled skins–sort of like sun-dried tomatoes but not so leathery and chewy.
And they are also amazingly versatile: you can use them to make a tangy-sweet pasta sauce, you can use them to top bruschetta, you can toss them in a salad, top a pizza with them, or you can just scarf them down as they are.
However, I must warn you that if you take the last approach and just gobble them down from the baking sheet–they are addictive. I have heard them described as being “like crack, only legal.”
Just be certain to make extra of these caramelized tomatoes if you are planning on using them for a certain dish, because once you taste one, you know, to make sure you got them right, you will find yourself dipping into them again and again. No really–they are that tasty.
They are also simplicity itself to make.
You can use any kind of tomato you want for these: lots of people use cherry or grape tomatoes for caramelization, but I prefer to use roma tomatoes. You could use any other kind you like, but if you use any large sized tomatoes like the beefsteak varieties, or even just average sized round ones, you will have to cut them into thick slices rather than just in longitudinal halves, as I do here.
In addition, you can leave out the crushed fennel seed I used as a seasoning, or you could add any other spice you liked. (I plan on making an Indian version of these with ground up panch phoron. I cannot help but think that would just kick this recipe up about ten notches and take the flavors over the moon.) You can also add fresh or dried herbs at the time you sprinkle the sugar on the tomatoes.
You don’t really need a recipe for this–you just need to learn the method.
So, here goes:
Caramelized Tomatoes
First, you need a quantity of tomatoes: I prefer roma, as I mentioned. (I don’t need to tell you to use ripe, homegrown, farmer’s market, local tomatoes, do I? You know that by now, don’t you? I thought so.)
Take your tomatoes, wash them and dry them thoroughly.
Preheat your oven to 350 degrees F.
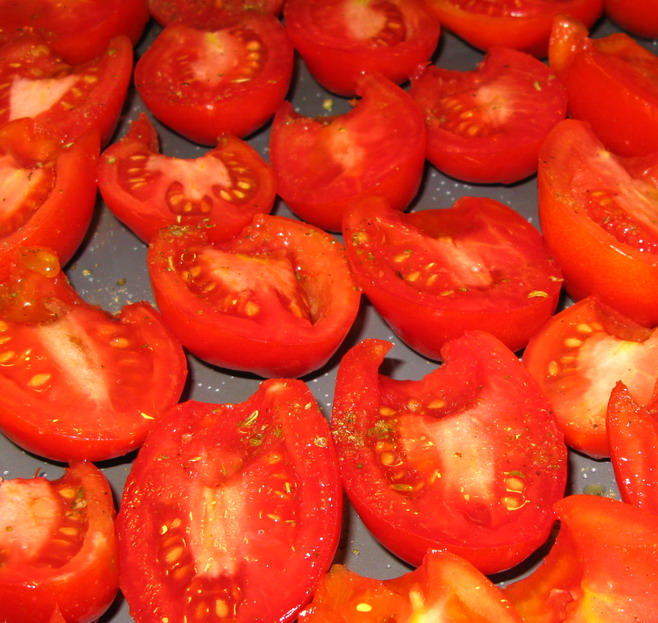
Core your tomatoes–I use a little gadget that is called a tomato shark to gouge the core and stem end out of the tomato quickly and cleanly. Then, slice them in half longitudinally. (Or, if you are using larger, round tomatoes, cut them into longitudinal slices, about 1/4-1/2 inch thick.)
After they are cored and cut in half, if you are not using cherry or grape tomatoes, seed them. Just reach your fingers in there and scrape the seeds and gel out.
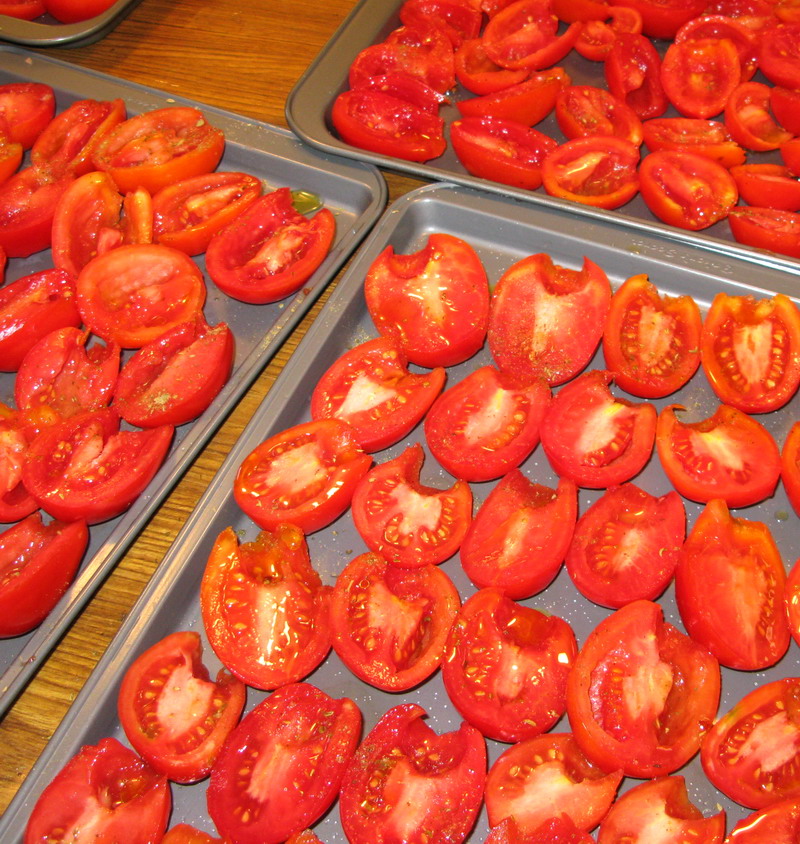
Lay all of your tomato halves or slices cut side up on the rimmed baking sheets. I used non-stick sheets lightly rubbed in olive oil. You could also line your pans with silpats or parchment sheets that you have rubbed with some olive oil.
Sprinkle the tomatoes lightly with salt–as much salt as you would use to season your tomatoes if you were going to eat them out of hand. Season them with pepper, if you like, and if you like my idea of using a bit of ground fennel seed, sprinkle a little bit of that, too. Then, drizzle with olive oil–about a tablespoon or so. Don’t drown them in oil, but you don’t want them to dry out, either.
Put them in the oven.
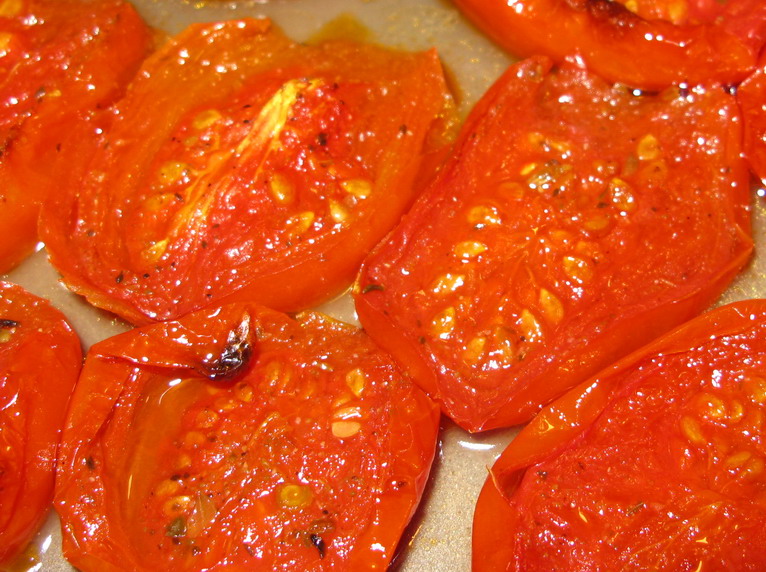
Leave them in the oven for thirty minutes–check them. If they are a bit shrunken and drying a bit with some toasty dark bits on the edges, they are ready for you to sprinkle on the sugar. If they still seem a bit too juicy and there is no darkening, give them another ten minutes in the oven.
But, if they are ready, then take them out of the oven. Take a couple of teaspoons of sugar–up to a tablespoon or so–and sprinkle it evenly over the tomatoes. At this time, if you want to add herbs, either fresh or dried, this is the time.
Put the tomatoes back into the oven and let them cook for another five to ten minutes or so.
Remove from the oven, and allow to cool until you can handle them–they should still be warm, but not blisteringly hot–and remove them from the baking sheets and set them on a tray or in a bowl, depending on how you want to use them.
Any syrupy juice that you have on the baking sheets, scrape out and drizzle over the tomatoes. (That is the good stuff–if it gets on your fingers, lick it off, for the love of God!)
There you are. Caramelized tomatoes. Easier than pie. Tastier than crack–and legal, to boot.
Athens Farmer’s Market Toyota Farm to Table Tour–It Sure Was Fun
It was a near-perfect day for a big event at the Athens Farmer’s Market: the late summer sun was bright, the morning air was crisp and the sky was a brilliant cerulean.
And when I drove up with my crew, which consisted of Morganna and Brittney, both well-trained (by me) line cooks who now have held jobs in various restaurants around Athens, we were all shocked at how BIG the crowd was. The parking lot was filled–I had to fight to find a place to park after I let the girls out with our huge stockpots filled with garlic mashed potatoes and the marsala-braised rabbit and wild mushrooms.
I finally had to park at the farthest end of the lot, and jog back to the tent where our tasting was to be held, while dressed in my all-black chef’s gear. (Chef’s jackets are not great workout gear. Just sayin’)
Once there, we waited while Chef Jana of Jana’s Soul Food Cafe wrapped up her tasting of potato leek soup with corn cakes, then with great alacrity and much help, we set up our gear, and within a handful of minutes, started passing out tastes of our food. The generous first tastes I nabbed and ran around to deliver to the farmers whose produce we used: rabbit from Rich at Harmony Hollow, mushrooms from Becky at Green Edge Gardens and garlic from Rich at Rich Organic Gardens. Once again, I must say, chef jackets and bistro aprons are crap workout gear, but I managed to deliver my plates without drowning in sweat, tripping over my clogs or running over anyone in the at times, shoulder-to-shoulder crowd.
When I got back, the girls were deep in plating and serving, so I slipped into the line and started garnishing and passing out plates. While I worked, I chatted up everyone, answered questions about the rabbit, told people that while I didn’t currently have a restaurant, I was planning on opening one in a couple of years after Kat goes to school, and made periodic announcements about the various farmers whose produce was used in my offerings.
Feedback was pretty instantaneous: folks asked for my card, demanded that I open a restaurant, and one self-proclaimed hillbilly scraped his plate clean and reached out and clapped a beefy hand on my shoulder declaring, “Darlin’ you did that rabbit proud.”
One could ask for no higher praise.
We ran out of food within forty-five minutes, and later, I found out that Rich’s rabbits and Becky’s mushrooms that I had used in my recipe were all sold out, and that they had both seen plenty of customers they had never seen before.
I consider that to be a very big success.
All of the chefs I spoke with, as well as the farmers, had a great time–it was fun, the farmers did very well that day and the crowd was filled with excitement to be tasting the creative offerings from the area’s restaurants. And, as one farmer said to me, “It is so fun and exciting to see all the chefs striding around the market in their uniforms, looking all official and wonderful!”
For those of you who were not there, my dear friends Dan Trout, Heather Irwin and I put together a video report of the event so that my readers could “get a taste” of the Farm to Table tour. The interviews you see here are unrehearsed and unplanned–Dan had been taping stuff while I was at work in the tent giving out food, and when I was done, he caught up with me and suggested that I do interviews for our video report. So, I doffed my hat (a black cowboy hat a la Lee Van Cleef because my black skullcap looked ratty and ugly), pulled my hair out of its ponytail and had at it. I used to be a journalist, so I am good at asking questions, although this was my first foray into video–I have always worked in print media before.
Expect to see more video reports in the future–Dan and I have big plans on the horizon for not only video blogging but also for another, more ambitious project.
And, look for a recipe for the Marsala Braised Rabbit with Wild Mushrooms later this week.
Anglo-Indian Curried Lamb Stew
Don’t worry–there isn’t any curry powder to be found in this stew.
Or curry.
Or whatever it is. You could call it either a stew or a curry, or heck, you could call it Marge if you want to, but the fact is, it is both a stew and a curry. It is a hybrid between the two, because I wanted something that had lots of vegetables in it like a stew, but I wanted it to have the delicious flavor and rich sauce of a curry. So, I figured I would make something that was probably cooked for some British folks during their occupation and colonization of India by an Indian household cook who was directed to make lamb stew by his or her employers.
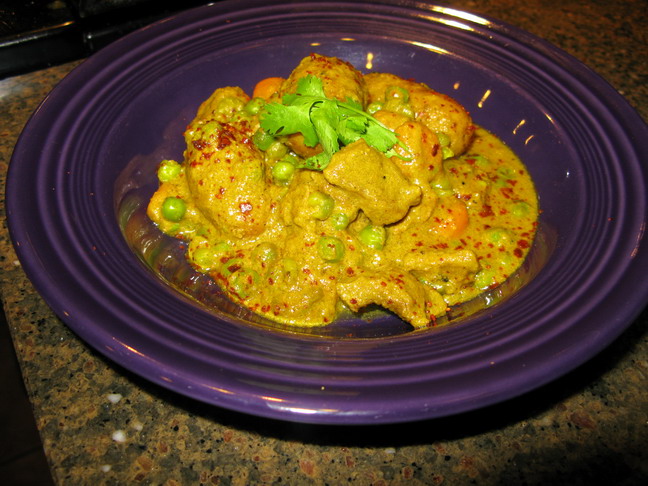
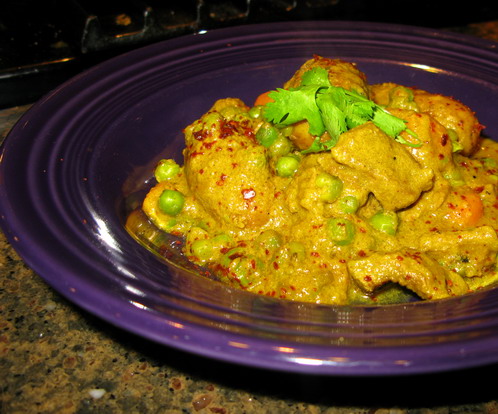
But of course, lamb stew is, to the Indian palate, somewhat bland and sad and flavorless, so I imagine that the cook in question might have felt the need to give it a little lift by using their own spices and curry-making techniques. Some turmeric for color, and some deeply caramelized onions for flavor, spices for fragrance and yogurt for a creamy, rich finish, and voila! A formerly rather plain stew of lamb cubes, tiny potatoes, carrots and peas becomes something delightful.
This isn’t a hard recipe, mind you–but it does take quite a few spices that I would prefer you grind yourself. I leaned heavily on some of the sweeter spices in this mixture: cardamom, fennel seed, cloves, cinnamon, and coriander seed, though there are smaller amounts of the musky, darker savors of cumin and fenugreek seeds. And to give it a tiny bit of tingle, there is black peppercorn and some chili pepper, though not nearly as much as I usually put in my curries.
The point of this mild curry is to be soothing, comforting and lip-smackingly delectable. It isn’t supposed to prove how butch you are because you can eat mouth-searingly hot chilies and sauces. This is a curry for kids, for in-laws and for those unfamiliar with Indian food who perhaps are intimidated by it to be eaten in the company of people who love Indian food, but who also understand that it can be just as delicate and subtle as it can be bodacious and bold. It is a happy curry, made to please as many people as possible.
Now, because this is based on the British/European idea of lamb stew, you can add or subtract the vegetables that go into this curry. Pearl onions would go splendidly in here as would baby turnips or mushrooms. Any vegetable that you like in your lamb stew can go in this curry, in fact, and you can add more or less of them as you like. (In point of fact, you could leave out the lamb altogether and just make this a delicious vegetable stew with fingerling potatoes, baby carrots, pearl onions, wild mushrooms, peas and baby turnips. I cannot imagine that it would taste anything less than uncommonly good. You’d also just have to leave out the beef and chicken broth or stock and replace them with vegetable stock or broth.)
Anglo-Indian Curried Lamb Stew
Ingredients:
3 tablespoons ghee, butter or canola oil
2 1/2 cups thinly sliced yellow onions
1 teaspoon salt
3 large cloves garlic, sliced
1 tablespoon cardamom pods
2 teaspoons fennel seeds
1 1/2 teaspoons coriander seeds
1 teaspoon cumin seeds
5 whole cloves
1/2 teaspoon ground cinnamon
2 teaspoons turmeric
1/2 teaspoon fenugreek seeds
1/2 teaspoon black peppercorns
1 fresh thai chili pepper
1 pound lamb leg meat, trimmed of fat and cut into 1″ cubes
1 pound lamb shoulder meat, trimmed of fat and cut into 1″ cubes
1 cup beef stock or broth
1 cup chicken stock or broth
1 bay leaf
1 cup thickly sliced carrots
1 pound whole, scrubbed fingerling potatoes
1 pound frozen peas
1 1/2 cups whole or 2% Greek yogurt
salt to taste
cilantro leaves for garnish
Aleppo pepper flakes for garnish
Method:
Heat ghee, butter or oil in a heavy-bottomed pan and when hot, add onions, and stir them into a nearly single layer. Sprinkle with salt and cook, stirring, until they turn a deep golden color.
While you are cooking the onions, grind the garlic, the spices and the chili pepper into a fine paste with a food grinder or use a food processor for the garlic and chili and a coffee grinder for the spices.
When the onions are deeply gold take your spice paste, and add it to the pan, and cook, stirring, until the onions turn a more reddish brown color and the spices are fragrant. Add the meat and brown.
Deglaze the pan with the broths or stock and add the bay leaf. Bring to a simmer, and either put the whole lot into a pressure cooker, bring to a boil, clap on the lid, lock it down and cook it at full pressure for twenty minutes, then let the pressure subside naturally, or put a lid on it and cook until the meat is halfway tender. At that point, add the potatoes and carrots. (If you used a pressure cooker, however, cook the potatoes and carrots in a separate pot until they are tender, then drain and hold them until the pressure is reduced and you open the pot. At that point, add in the vegetables and continue the recipe as written.
Once the meat, potatoes and carrots are cooked, uncover the pot and on fairly high heat, reduce the liquid by about 1/3. Add the yogurt and the frozen peas and cook, stirring as needed, until the sauce thickens enough to lightly coat the back of a spoon. Add salt to taste and serve with naan or roti and garnish with the cilantro and Aleppo pepper flakes.

Categories:
- Admin (rss) (55)
- Blogs and Blogging (rss) (81)
- Book Reviews: Cookbooks (rss) (43)
- Book Reviews: Non-Cookbook Food Books (rss) (38)
- Cats and Cat Blogging (rss) (47)
- Chinese Cooking Lessons (rss) (32)
- Culinary School Stories (rss) (18)
- Dairy Pruducts: Cultured and Barbaric (rss) (4)
- Documentary Filmmaking (rss) (1)
- Essays, Rants and Reflections (rss) (260)
- Fighting Hunger (rss) (12)
- Food and Kids (rss) (45)
- Food in the News (rss) (126)
- Food Media (rss) (98)
- Food Preservation (rss) (18)
- Food Safety (rss) (45)
- Gardening (rss) (30)
- Herbs and Herb Blogging (rss) (20)
- Holidays (rss) (50)
- Kat Blogging (rss) (22)
- Kitchen Science (rss) (36)
- Leftover Makeover (rss) (8)
- Life, the Universe and Everything (rss) (131)
- Local and Sustainable (rss) (227)
- Local Athens Food and Foodies (rss) (42)
- Meatless Mondays (rss) (32)
- Menu For Hope (rss) (5)
- Nutrition, Diet and Health (rss) (84)
- On The Farm (rss) (8)
- Recipes: Almost Vegetarian, Vegetarian and Vegan (rss) (294)
- Recipes: American Regional (rss) (37)
- Recipes: Appalachian Hillbilly (rss) (33)
- Recipes: Bread, Pasta, Grains (rss) (95)
- Recipes: Canning and Preserving (rss) (8)
- Recipes: Chinese (rss) (123)
- Recipes: Comfort Food (rss) (120)
- Recipes: Cookies (rss) (16)
- Recipes: Desserts (rss) (48)
- Recipes: French (rss) (25)
- Recipes: Fruits and Vegetables (rss) (302)
- Recipes: Greek, North African and Middle Eastern (rss) (31)
- Recipes: Indian (rss) (137)
- Recipes: Italian (rss) (42)
- Recipes: Japanese (rss) (7)
- Recipes: Jewish (rss) (4)
- Recipes: Korean (rss) (6)
- Recipes: Meat, Poultry and Fish (rss) (220)
- Recipes: Mexican/Native American/ Latin American/Caribb (rss) (27)
- Recipes: Original (rss) (108)
- Recipes: Thai (rss) (27)
- Recipes: Tofu (rss) (17)
- Recipes: US Regional (rss) (16)
- Recipes: Vietnamese (rss) (8)
- Restaurant Stories (rss) (28)
- Sewing, Quilting, Arts and Crafts (rss) (16)
- Simple Chinese Recipes (rss) (30)
- Slow Food and Heritage Foods (rss) (10)
- Spice Blogging (rss) (44)
- The Chinese Cookbook Project (rss) (14)
- The Chinese Pantry (rss) (39)
- The Documentary (rss) (2)
- The Kitchen Saga (rss) (17)
- The Locavore's Bookshelf (rss) (15)
- The Unsung Adventures of The Culinary Nerd (rss) (6)
- Tools and Toys (rss) (35)
- Uncategorized (rss) (10)
- With a Side of Politics (rss) (48)
Archives:
- August 2012 (9)
- July 2012 (12)
- September 2011 (3)
- August 2011 (7)
- July 2011 (8)
- June 2011 (16)
- May 2011 (17)
- April 2011 (11)
- December 2010 (9)
- November 2010 (5)
- February 2010 (1)
- December 2009 (5)
- November 2009 (7)
- October 2009 (10)
- September 2009 (16)
- August 2009 (14)
- July 2009 (14)
- June 2009 (7)
- May 2009 (17)
- April 2009 (10)
- March 2009 (25)
- February 2009 (13)
- January 2009 (10)
- December 2008 (5)
- November 2008 (5)
- October 2008 (6)
- September 2008 (13)
- August 2008 (8)
- July 2008 (11)
- June 2008 (18)
- May 2008 (13)
- April 2008 (14)
- March 2008 (16)
- February 2008 (17)
- January 2008 (19)
- December 2007 (25)
- November 2007 (18)
- October 2007 (24)
- September 2007 (16)
- August 2007 (15)
- July 2007 (15)
- June 2007 (10)
- May 2007 (14)
- April 2007 (16)
- March 2007 (17)
- February 2007 (20)
- January 2007 (13)
- November 2006 (1)
- October 2006 (8)
- September 2006 (14)
- August 2006 (25)
- July 2006 (30)
- June 2006 (28)
- May 2006 (34)
- April 2006 (29)
- March 2006 (24)
- February 2006 (30)
- January 2006 (38)
- December 2005 (40)
- November 2005 (37)
- October 2005 (32)
- September 2005 (25)
- August 2005 (30)
- July 2005 (28)
- June 2005 (21)
- May 2005 (8)
- April 2005 (22)
- March 2005 (17)
- February 2005 (29)
- January 2005 (10)
Search Site:
Links:
- Lily’s Wai Sek Hong
- 101 Cookbooks
- A cat in the kitchen
- A Veggie Venture
- Accidental Hedonist
- Cha Xiu Bao
- chez pim
- Chocolate & Zucchini
- Chopstick Cinema
- Chowhound.com
- Chubby Hubby
- Cook sister!
- Cooking with Amy
- da*xiang
- Eat Local Challenge
- Eating Liberally
- Ecocentric
- Eggbeater
- Epicurious
- Farmgirl Fare
- Fatfree Vegan
- Foodgoat
- ForkandBottle.com
- Green Olive Tree
- Hooked on Heat
- Jaden’s Steamy Kitchen
- Kalyn’s Kitchen
- Lucullian delights
- Mahanandi
- Matt Bites
- MeatHenge
- mmm-yoso!!!
- New York Times – Dining & Wine
- Pizza Goon
- Rasa Malaysia
- Ruhlman
- Sailu's Kitchen
- Serious Eats
- SF Gate: Food & Dining
- Simply Recipes
- Soul Fusion Kitchen
- Tastespotting
- The Amateur Gourmet
- The Cleaner Plate Club
- The Food Section
- The Grub Report
- thecookscottage
- U.S. Food Policy
- Wandering Chopsticks
- Washington Post Food and Dining
- Wasted Food
Meta:

Powered by WordPress. Graphics by Zak Kramer.
Design update by Daniel Trout.
Entries and comments feeds.