Cook Local, Eat Global
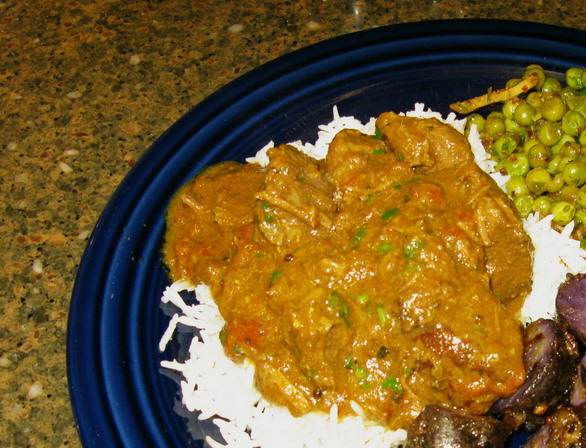
A Nice Beef Curry
As opposed to a naughty beef curry, I suppose….(I now feel the need to make a curry called Naughty Beef Curry, of course–just you wait and see.)
No, I am just paraphrasing the words of my friend Heather used to describe the curry I made for her birthday supper. She had a second helping of it and said, “This is a really nice curry.”
Meaning, it wasn’t too hot, nor too bland, nor too spiced, nor too creamy, nor too tomatoey.
It was just right.
I have to admit that I got the inspiration for it (but not the recipe–the recipe is my own) from an out of print (it is out of print in the US, but in print in India) Indian cookbook called Niru Gupta’s Everyday Indian. I like the book a great deal, in large part, because Niru Gupta, a lovely woman who looks just like someone’s auntie or amma, whom you would trust to give out good recipes, teaches simple recipes for delicious curries do not have huge lists of ingredients. She also organizes her book around menus for everyday suppers–not big feasts–that you might find on the family table in her home in Delhi. She, as an experienced cooking teacher, gives very good step-by-step instructions to help the beginning cook along, which is something that is quite necessary when you are learning a cuisine as complicated as the ones in India.
This appeals to me, because one criticism that many Westerns sometimes rightly make about Indian food is that it is too complicated to even attempt, that there are way too many ingredients and unfamiliar techniques to deal with when you are just trying to get dinner on the table quickly, and it is just hopeless to try.
Well, now, some dishes, like Shahjahani Biryani are indeed complex. But then, Indian home cooks only make that for festivals, feasts, weddings and holidays. The problem is that in the US, we go to Indian restaurants and eat the complex dishes which are easily made by professional chefs in restaurant kitchens and expect that all Indian food is made that way. So, we get books that contain recipes for our favorite restaurant meals, we read the instructions and nearly pass out from the overwhelming amount of work that is proposed by the author.
But Niru Gupta is an author who is not trying to get us to cook those dishes. She is just sharing her recipes for simple, every day foods that she and her family members cook in their homes for family meals.
Her recipes are for simple, homestyle meals that are filled with flavor and fragrance enough for any spice-lover, while providing relatively quick, delicious sustenance for a busy family on the go.
So, I was reading her book, and found ideas for all of the dishes I cooked for Heather, and everything turned out so well, I decided that I must peruse her book more often in the future.
Which is exactly what I will do, the next time I want a nice curry.
I guess that I am on my own when it comes to making up a naughty curry.
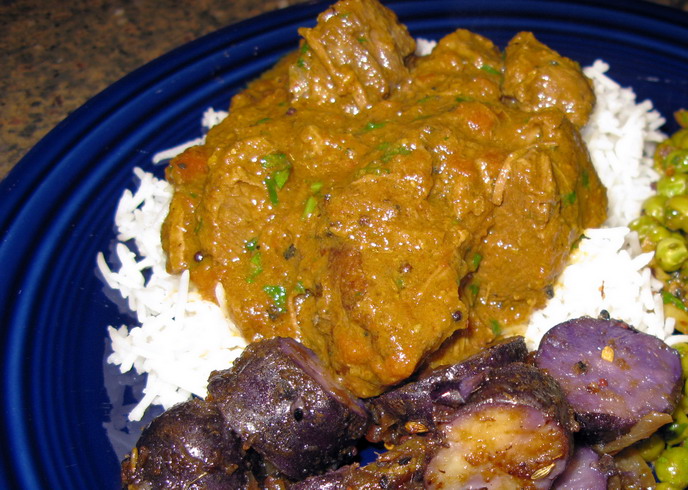
A Nice Beef Curry
Ingredients:
4 tablespoons canola oil
1 1/2 pounds onions, peeled and thinly sliced
1 teaspoon salt
2 tablespoons fresh peeled and minced ginger
4 cloves peeled and minced garlic
2 tablespoons coriander seeds
1/2 teaspoon fennel seeds
1/2 teaspoon fenugreek seeds
2 tablespoons ground turmeric
1 tablespoon ground paprika
pinch cinnamon
pinch cayenne pepper
1 1/2 teaspoons mustard seeds
2 teaspoons cumin seeds
1 whole dried chili pepper–I prefer Sanaam
3 pounds beef chuck, trimmed of excess fat and cut into 1″ cubes
1 14 ounce can diced tomatoes
2 cups whole milk yogurt, stirred
salt and garam masala to taste
1 cup roughly chopped fresh cilantro leaves
Method:
In in a heavy bottomed pot or pressure cooker, heat oil over high heat. Add onions, and sprinkle with salt. Cook, stirring, until the onions are medium brown. While the onions are cooking, grind the next ingredients up to and including the cayenne pepper, into a damp paste, and add them to the onions after they are medium brown. Keep cooking until the onions are a deep reddish brown.
Remove the onion and spice mixture from the pot and puree it to a smooth paste. (This is optional–if you want a smooth curry sauce, with a great deal of brown color, you must do this–if you don’t care about it–then don’t bother. I like it better smooth.) Set paste aside.
Add whole cumin and mustard seeds to the oil in the pot. Add beef on top, and cook, stirring, until the beef browns and the seeds are toasted and fragrant. Add whole chili pepper, and the onion-spice paste, and cook, stirring, for one minute or so more.
Add to the pot the tomatoes and yogurt, and stir to combine. If mixture is too thick to boil without sticking to the pot, add a bit of water to thin it slightly.
Bring to a boil, and if you have a pressure cooker, put lid on, bring to high pressure and cook for about 45 minutes. Bring pressure down naturally–do not quick release the pressure–it will toughen the meat back up. After pressure is released, open the lid and boil the curry until the sauce thickens slightly–about five minutes. Stir as needed.
If you do not have a pressure cooker, go out and get one. No, really, it will make your life easier. But, until then, cook this in a big, heavy bottomed Dutch oven or soup pot, and after you add the tomatoes and yogurt, bring to a boil, then turn down heat so that the curry simmers. Close lid and cook, stirring as needed until beef is tender–about two hours or so. Make sure it doesn’t burn or stick to the bottom, adding watter or yogurt as needed to keep this from happening.
Just before serving season to taste with salt and garam masala, and stir in the cilantro leaves.
You could add potatoes to this curry, or turnips. I’d have added turnips if I had them around the house. Mushrooms would be tasty also.
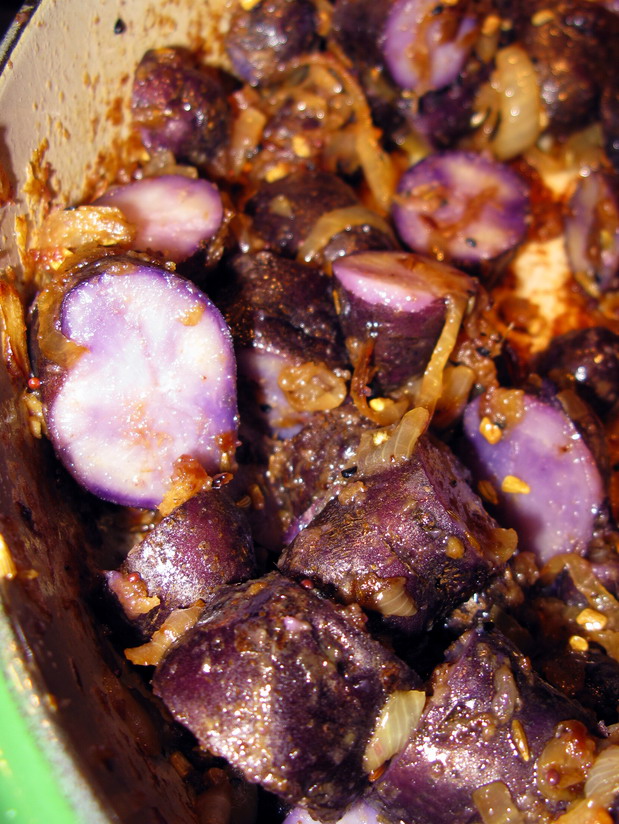
Baby Blue Potatoes with Panch Phoron and Ghee
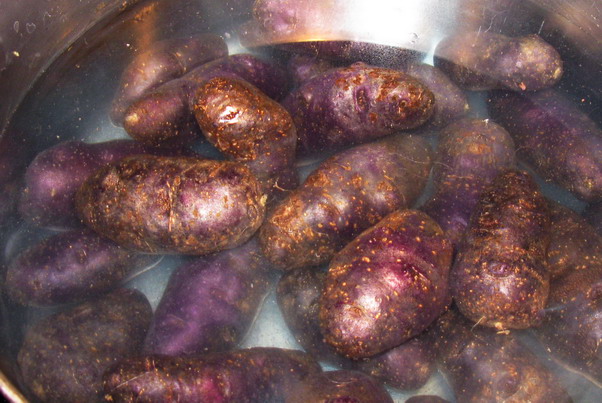
I absolutely adore little baby blue or purple potatoes. They are beautiful, with their deeply-hued skins and slightly paler to pastel flesh, and I like the barely sweet to nutty flavor they possess, which is more interesting than many other, plainer, potato varieties.
So, of course, I was thrilled two months ago, to find a small crop of them being sold by Art Gish, a local farmer here in Athens, at the Farmer’s Market. I bought several pounds of them, and ate some right away, and put the rest away in cool, dark storage, to save for another time.
I figured that the birthday feast of a dear friend was a festive enough supper for the baby blues to come out and play, so out of their storage crate they came, and were duly scrubbed and polished until their deep violet skins shone, and were popped into a big pot of water to boil whole until they were soft.
I’ve written about blue potatoes before, and I have mentioned anthocyanins –they are the chemicals which give the potatoes their deep, vibrant colors. (They are the same coloring agents involved in making beets, blueberries, purple cauliflower and purple asparagus vibrant violet to blue fruits and vegetables–and they are powerful anti-oxidants.)
Anthocyanins are both sensitive to heat and water-soluble, so in order to retain as much color as possible, I tend to cook my blue potatoes whole. I could have roasted them, which would have resulted in the least color loss, but I didn’t want the skins to become crispy. I wanted them to be soft and the interiors to be creamy, which meant that boiling them whole was the answer.
Once they were tender, then, I drained the potatoes, and after letting them cool enough to be handled, I cut them into thick crossways slices, which made them ready for the frying pan.
I really love cooking blue potatoes in Indian recipes. For one thing, their slight sweetness tastes fantastic with Indian spices, and for another thing, their brilliant and unusual colors contrast well with golden turmeric-laden curries, red tandoori meats or deep green spinach or pea dishes. The deep, vibrant hues of unusual vegetables like blue potatoes always bring to mind the peacock hues of the costumes chorus dancers wear in Bollywood films, or the colors that Indian artists have used for centuries to depict Krishna, the Hindu God who was once a cowherd, but is now a great deity.
This recipe is simpler than the recipe for blue potatoes I liked to above. All that is necessary is to heat plenty of ghee in a heavy-bottomed skillet, and cook a large onion until it is nice and brown and fragrant. Then, I added about a tablespoon each of finely ground ginger and garlic paste and two tablespoons of panch phoron, the delectable mixture of five whole spices (equal amounts of cumin, mustard, nigella, fennel and fenugreek) from Bengal. Once the ginger and garlic pastes are lightly browned and the spices begin to pop and sizzle, the drained, sliced potatoes are added and stirred. A sprinkle of salt is added, and the potatoes are stirred gently around and around–you don’t want them to break up so be careful–until they are lightly browned themselves, and coated in the delicious mixture of aromatics and spices.
Then, they are served forth, hot and steaming.
Though, to be honest, they are equally good at room temperature. I know, because there were a few left in the pan when I went to do up the dishes long after supper, and I popped one in my mouth. My teeth burst through the taut skin of the potato, and the creamy flesh melted; sweet browned onions danced with garlic, ginger and spices on my tongue, and the nutty aroma of ghee held everything together.
It is a dish well worth making. And, if you cannot find blue potatoes, it is fine to make it with any other small potato you like. I have done this with fingerling potatoes, too, and while they are not so pretty, they taste just as amazing cooked this way as their showier blue brethren.

Baby Blue Potatoes With Panch Phoron and Ghee< Ingredients:
2 pounds baby blue (or any other small) potatoes, scrubbed well
4 tablespoons ghee
1 large onion, thinly sliced
1/4 teaspoon salt
1 tablespoon finely ground fresh ginger–made into a paste
1 tablespoon finely ground fresh garlic, also made into a paste
2 tablespoons panch phoron
salt to taste
Method:
Put the potatoes into a large pot and cover with water. Bring to a boil, then turn down heat and simmer until fork-tender. Drain, and allow to cool until you can easily handle them. Then, cut them into 1/2 inch thick crosswise slices.
While the potatoes are cooking, heat the ghee up in a heavy-bottomed skillet or frying pan on medium high heat. Add the onions, and spread them out into as close to a single layer as you can manage, and sprinkle with salt. Cook, stirring constantly, until the onions are a deep reddish brown. Add the ginger and garlic pastes, and panch phoron, and lower heat slightly. Keep cooking for another couple of minutes–just until the garlic and ginger pastes take on color and the spices are sizzling hot.
Add the potatoes to the pan, and cook, stirring, for about four or five minutes, until they are well coated with the aromatics and spices, and are just beginning to brown in spots.
Add salt to taste and serve, either piping hot or at room temperature.
In order to make a vegan version of this dish, and yet retain the nutty flavor of the ghee–use walnut or cold pressed peanut oil instead.
Golly Gee, I Mean, Ghee
Usli ghee, or as it is more commonly known, ghee, is the Indian style of clarified butter. It is a rich, delicious, nutty-flavored pure butterfat product which not only has a higher smoking point, so it makes a good medium for frying, it adds an amazing depth of flavor to Indian foods. Many Indian vegetarians use ghee a great deal as a cooking oil, but also as a flavoring agent. In Ayeuvedic medicine, ghee is considered quite healthful and in Indian culture, it is considered among the purest and most sacred of foods.
You can buy ghee at the Indian market, but it is not hard to make at home and the end product has a fresher, more nutty flavor than the commercial product.
Making it just takes a bit of time and attention.
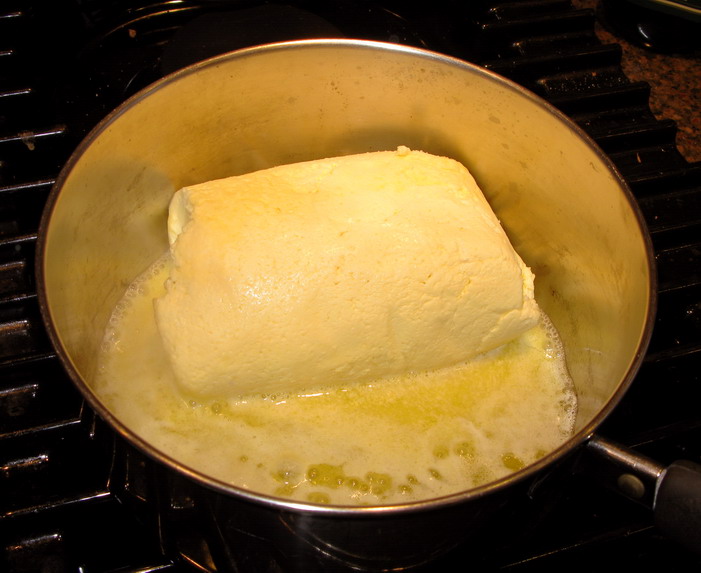
You start with a pound of butter–unsalted cultured butter is best for an authentic flavor. However, if you are unused to the flavor of cultured butter, which is made by allowing the cream to sit and be inoculated with a bacteria similar to the one which makes yogurt, then, I would say that you should make your first batch of ghee with sweet cream butter. The butter pictured here is from our new local creamery, and judging by the slightly cheesy aroma and tangy flavor, it is cultured butter.
All you have to do is put it in a pot, and melt it over medium low heat.
Don’t stir it. Once it is melted, turn the heat down to low, and watch, smell and listen.
What are you watching for?
You are watching the some of the milk solids float to the top in the form of foam–which you skim off and discard, and sink to the bottom, where they form a layer of ook on the bottom of your pot.
The goal is for that layer of ook to brown without burning while the butter bubbles along, boiling away the water that is inherent in butter.
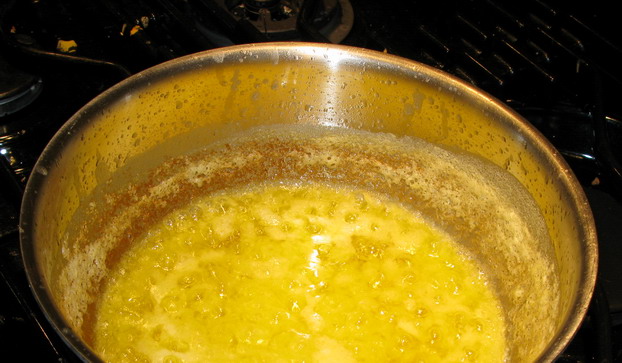
Your job is to keep turning the heat down so that your milk solids can brown slightly–which gives the finished ghee a delicious, nutty aroma and flavor, and to listen for the burbling sound of the water cooking off to stop. In the second photo, you can see how the milk solids have begun to brown, not burn. Burned milk solids will fill your house and your ghee with a bitter, acrid aroma, which is, to put it nicely, not desirable either in a comestible or a domicile.
Once the bubbling stops, and the milk solids are browned, the ghee is finished.
All you have to do is pour it through a fine mesh strainer or several layers of cheesecloth to catch any wayward milk solid bits which are either left floating on the surface of the ghee or which might detach themselves from the bottom of the pot and try and sneak into your container.
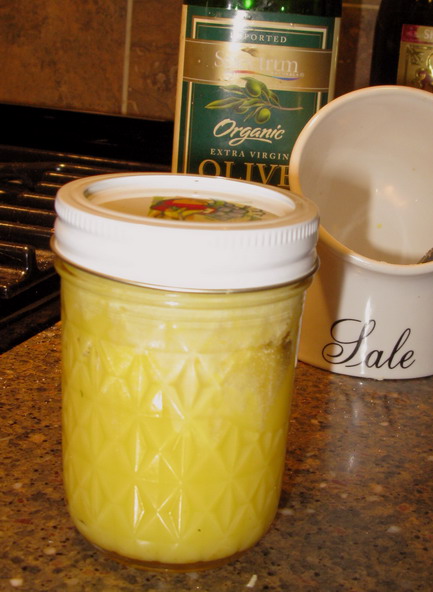
What is left is pure butterfat which will solidify at seventy degrees–or room temperature. I seal mine up in a canning jar and keep it at room temperature in a cabinet next to the stove. It doesn’t need to be refrigerated and if you do–it is harder to remove a specific amount from the jar. Chipping away at it with a table knife or spoon is tedious and results in bits of it flying from the jar and landing on your face, your hair, the countertop and possibly even your cat. And while your cat might not mind–especially since he or she would get a nice taste of ghee while they cleaned themselves up–you might mind your hard work going to waste. (Though if you get some on your face, rub it in. It makes a nice moisturizer. Though, if you fall asleep with it there, you may awaken to a cat’s raspy tongue licking it off.)
It lasts for months if you keep it tightly sealed and away from light and extreme heat. I would say three to six months, really.
All fats will go rancid if not handled properly–even vegetable fats. (Nuts are a big culprit for going rancid–ick!) If there is any doubt about your ghee–if it has an off scent, then taste it. If there is any bitterness to it, or an unpleasant–dark, dank smell and flavor–it has gone rancid. Throw it out.
You can keep it in the fridge to keep it longer, but, you have to remember to take it out long before you use it to soften it up so you can get it from the jar. Yes, you can microwave it to soften it, but repeated heating and cooling will make it not last as long, so you lose the benefit of keeping it in the fridge.
Now that you know how to make ghee, I can tell you very easily how to make clarified butter in the French fashion. Do the same stuff you do for ghee, except don’t let your milk solids brown on the bottom. The French don’t seem to care for that nutty flavor that I think makes ghee so special and delicious.
What do you do with ghee once you have it?
I love to use it in making tarkas to enrich the flavor of dals, but you can use it in any Indian recipe you like.
The possibilities are endless.
A Menu For Hope Continues…

A Menu For Hope continues on–and blog readers are giving generously to help out the school lunch program of Lesotho.
I know it is hard to choose among so many amazing prizes, but do give it a shot and buy a raffle ticket or two or three. They make great gifts for those hard to buy for folks who also happen to be inclined toward charitable works.
And if you win–or your gift recipient wins–that is just icing on the cake.
Here are some of my favorite prizes–meaning ones I am going to buy tickets for–which you might like too:

From Chez Pim— UW11 Lunch with Howard McGee: Harold is the original Culinary Nerd. And I mean that in the fondest sense possible–author of On Food and Cooking, which is one of my favorite reference books of all time. I would love to sit, eat and geek out about food with Harold. (I am sure that every other Culinary Nerd food blog reader in the world would also love to geek out with Harold! Who wouldn’t?)
From Becks And Posh: UW32The English Afternoon Tea Package, which includes a beautiful teapot, English preserves, Twining’s tea, handmade scones, and all sorts of other lovelies. I want to bid on it not only because I love tea, but because I want to know how Sam makes English style clotted cream here in the US. Sam is so clever–she is making sure that everyone who bids on her prize wins.
From Quick Indian Cooking: UK12 Indian Cooking Bible Published in India. Malinka says she will send a copy of National Indian Association of Women Cookbook, a book only available in India, anywhere in the world. She also says it has taught generations of Indian women how to cook–and that is a great endorsement. I -really- want to get my hands on a copy of it, so I’ll definitely be bidding on it.
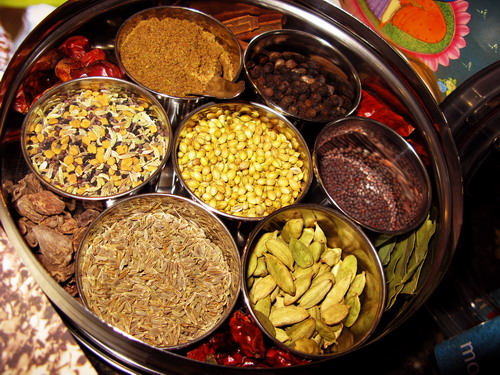
Those are my favorites so far–and of course, there is always the prize I am sponsoring–A Gift of Indian Spices.
The total raised so far this year is $30,850.00.
Let’s keep up the good work!
Chicken Jhalfrezi With Mangoes
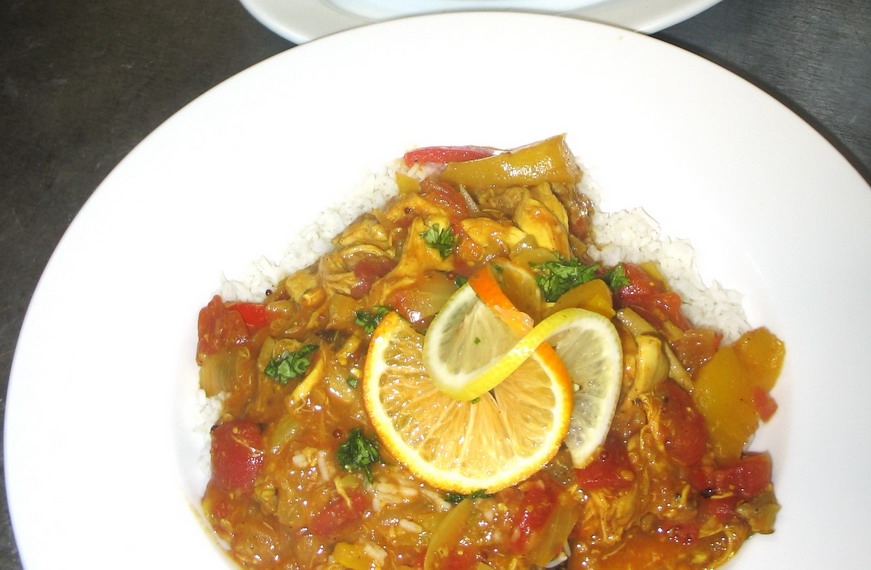
What is Chicken Jhalfrezi?
It is a curry dish from the northern Indian subcontinent which dates back to the time of the British Raj. It was developed as a way to use up leftover roasted meats; “jhal” means spicy–and this dish is traditionally quite hot with chilies and other spices. It is believed that this spiciness disguised any unpleasant flavor that might come from using leftover meats. The meaning of “frezi” is in dispute, however–some authors say it means “fried” while others say it is derived from the surname “Frasier.” I rather like the second explanation, so that is what I am going to go with. In that sense, it means, “The spicy dish of Colonel Frasier.”
I have never made jhalfrezi at home, because it tends to be made with lots of sweet bell peppers and tomatoes, and neither Morganna nor Zak much care for bell peppers, and Zak dislikes tomatoes. You can see why, even though I liked this curry, it would not appear on our table at home.
However, since we had a large number of both yellow and red bell peppers at Salaam which we needed to use quickly, I decided to make chicken jhalfrezi as a dinner special.
And, since we had mangoes which also needed to be used up, I thought they might go well with the peppers and tomatoes. There is precedent for using mangoes, though not in the form of fresh, ripe ones. Jhalfrezi is a fairly tart curry, and many recipes use amchoor powder to give it the characteristic sour flavor. Amchoor is made from sun-dried unripe mangoes which are then ground into a greyish tan powder. (Other recipes use tamarind, lemon juice or lime juice for the souring agent–I chose to use lemon juice added at the end of cooking because we always have lemons and I like the fresh tingling tartness it adds–it is very fruity and refreshing.)
As for the spices–I like using a combination of whole and ground spices in my curries, so I added whole cumin and mustard seeds along with finely minced garlic and ginger to the cookpot after the onions were about two-thirds of the way cooked to their final reddish-brown color. When the onions are a minute or two from being finished, I added a masala of freshly ground fenugreek, fennel and coriander seeds, along with a pinch of cinnamon and a pinch of cloves. For heat, which I scaled back on in deference to the prevaling tastes of Athens, I added a nice pinch of ground cayenne. You, of course, could make this with fresh chilies for more of a kick, or just add cayenne to taste to make this curry spicier.
I did use pre-cooked chicken here–poached chicken, to be exact, but you could use raw chicken and fry it in the oil with the onions instead. The browning onions would give boneless, skinless bits of chicken breast and thigh a great flavor.
I garnished this with a lot of roughly chopped cilantro and a lemon twist over an orange twist–it made a very pretty entry, and was fragrant with spices and full of flavors. The sweetness of the mango melded beautifully with the slightly bittersweet flavor of the peppers, while the tomato melted into the sauce and made everything come together into a harmonious whole.
I just wish that Zak and Morganna liked peppers more than they do….
Chicken Jhalfrezi with Mangoes
Ingredients:
3 tablespoons canola oil
2 1/2 cups yellow onions, peeled and sliced thinly
1/2 teaspoon salt
1 tablespoon cumin seeds
1/2 tablespoon mustard seeds
6 cloves garlic, peeled and minced finely
4 tablespoons minced fresh ginger
2 teaspoons fenugreek seeds, freshly ground
1/4 teaspoon black peppercorns, freshly ground
1/2 teaspoon fennel seeds, freshly ground
1/8 teaspoon ground cinnamon
1/2 teaspoon curry powder (a nod to the Anglo-Indian origin of this dish)
pinch ground cloves, or one whole clove, freshly ground
ground cayenne to taste
2 red bell peppers, cleaned and cut into thin strips
1 yellow bell pepper, cleaned and cut into thin strips
2 mangoes, peeled, pitted and cut into thin slices longitudinally
2 14 ounce cans diced tomatoes
1 1/2 cups water or chicken broth
poached chicken bits (This would be a good way to use chicken meat from a batch of soup stock–just pull it off the bones and use it that way.)
1/4 cup freshly squeezed lemon juice
slurry made from 1/4 cup flour and 1/2 cup cold water
1/2 cup roughly chopped cilantro leaves
salt and pepper to taste
Method:
In a heavy-bottomed Dutch oven or braising pan, heat oil over medium heat. Add onions, and spread out into a thin layer of the bottom of the pan. Sprinkle with salt and cook stirring, until the onions just pass the golden brown stage. Add cumin and mustard seeds, and minced garlic and ginger, and continue cooking and stirring until the onions are a medium reddish brown. At that point, add al of the rest of the spices, and keep cooking and stirring until the onions are a deep reddish brown. . Add the bell peppers and mangoes, and cook for a minute or two so they will infuse the oil with their flavor. Add tomatoes, water or chicken broth, and bring to a boil.
Turn heat down to low so the liquid simmers, and add the chicken to the pot. Pour in 1//2 of the lemon juice and cook until much of the liquid is gone. Add the rest of the lemon juice and thicken the sauce with the slurry–but only use as much slurry poured into the boiling liquid to make it thicken such that it will coat the back of a spoon.
Remove from heat once the dish is thickened, stir in the cilantro leaves and check for seasoning. Add salt or pepper as needed.
Serve over steamed basmati rice.

Categories:
- Admin (rss) (55)
- Blogs and Blogging (rss) (81)
- Book Reviews: Cookbooks (rss) (43)
- Book Reviews: Non-Cookbook Food Books (rss) (38)
- Cats and Cat Blogging (rss) (47)
- Chinese Cooking Lessons (rss) (32)
- Culinary School Stories (rss) (18)
- Dairy Pruducts: Cultured and Barbaric (rss) (4)
- Documentary Filmmaking (rss) (1)
- Essays, Rants and Reflections (rss) (260)
- Fighting Hunger (rss) (12)
- Food and Kids (rss) (45)
- Food in the News (rss) (126)
- Food Media (rss) (98)
- Food Preservation (rss) (18)
- Food Safety (rss) (45)
- Gardening (rss) (30)
- Herbs and Herb Blogging (rss) (20)
- Holidays (rss) (50)
- Kat Blogging (rss) (22)
- Kitchen Science (rss) (36)
- Leftover Makeover (rss) (8)
- Life, the Universe and Everything (rss) (131)
- Local and Sustainable (rss) (227)
- Local Athens Food and Foodies (rss) (42)
- Meatless Mondays (rss) (32)
- Menu For Hope (rss) (5)
- Nutrition, Diet and Health (rss) (84)
- On The Farm (rss) (8)
- Recipes: Almost Vegetarian, Vegetarian and Vegan (rss) (294)
- Recipes: American Regional (rss) (37)
- Recipes: Appalachian Hillbilly (rss) (33)
- Recipes: Bread, Pasta, Grains (rss) (95)
- Recipes: Canning and Preserving (rss) (8)
- Recipes: Chinese (rss) (123)
- Recipes: Comfort Food (rss) (120)
- Recipes: Cookies (rss) (16)
- Recipes: Desserts (rss) (48)
- Recipes: French (rss) (25)
- Recipes: Fruits and Vegetables (rss) (302)
- Recipes: Greek, North African and Middle Eastern (rss) (31)
- Recipes: Indian (rss) (137)
- Recipes: Italian (rss) (42)
- Recipes: Japanese (rss) (7)
- Recipes: Jewish (rss) (4)
- Recipes: Korean (rss) (6)
- Recipes: Meat, Poultry and Fish (rss) (220)
- Recipes: Mexican/Native American/ Latin American/Caribb (rss) (27)
- Recipes: Original (rss) (108)
- Recipes: Thai (rss) (27)
- Recipes: Tofu (rss) (17)
- Recipes: US Regional (rss) (16)
- Recipes: Vietnamese (rss) (8)
- Restaurant Stories (rss) (28)
- Sewing, Quilting, Arts and Crafts (rss) (16)
- Simple Chinese Recipes (rss) (30)
- Slow Food and Heritage Foods (rss) (10)
- Spice Blogging (rss) (44)
- The Chinese Cookbook Project (rss) (14)
- The Chinese Pantry (rss) (39)
- The Documentary (rss) (2)
- The Kitchen Saga (rss) (17)
- The Locavore's Bookshelf (rss) (15)
- The Unsung Adventures of The Culinary Nerd (rss) (6)
- Tools and Toys (rss) (35)
- Uncategorized (rss) (10)
- With a Side of Politics (rss) (48)
Archives:
- August 2012 (9)
- July 2012 (12)
- September 2011 (3)
- August 2011 (7)
- July 2011 (8)
- June 2011 (16)
- May 2011 (17)
- April 2011 (11)
- December 2010 (9)
- November 2010 (5)
- February 2010 (1)
- December 2009 (5)
- November 2009 (7)
- October 2009 (10)
- September 2009 (16)
- August 2009 (14)
- July 2009 (14)
- June 2009 (7)
- May 2009 (17)
- April 2009 (10)
- March 2009 (25)
- February 2009 (13)
- January 2009 (10)
- December 2008 (5)
- November 2008 (5)
- October 2008 (6)
- September 2008 (13)
- August 2008 (8)
- July 2008 (11)
- June 2008 (18)
- May 2008 (13)
- April 2008 (14)
- March 2008 (16)
- February 2008 (17)
- January 2008 (19)
- December 2007 (25)
- November 2007 (18)
- October 2007 (24)
- September 2007 (16)
- August 2007 (15)
- July 2007 (15)
- June 2007 (10)
- May 2007 (14)
- April 2007 (16)
- March 2007 (17)
- February 2007 (20)
- January 2007 (13)
- November 2006 (1)
- October 2006 (8)
- September 2006 (14)
- August 2006 (25)
- July 2006 (30)
- June 2006 (28)
- May 2006 (34)
- April 2006 (29)
- March 2006 (24)
- February 2006 (30)
- January 2006 (38)
- December 2005 (40)
- November 2005 (37)
- October 2005 (32)
- September 2005 (25)
- August 2005 (30)
- July 2005 (28)
- June 2005 (21)
- May 2005 (8)
- April 2005 (22)
- March 2005 (17)
- February 2005 (29)
- January 2005 (10)
Search Site:
Links:
- Lily’s Wai Sek Hong
- 101 Cookbooks
- A cat in the kitchen
- A Veggie Venture
- Accidental Hedonist
- Cha Xiu Bao
- chez pim
- Chocolate & Zucchini
- Chopstick Cinema
- Chowhound.com
- Chubby Hubby
- Cook sister!
- Cooking with Amy
- da*xiang
- Eat Local Challenge
- Eating Liberally
- Ecocentric
- Eggbeater
- Epicurious
- Farmgirl Fare
- Fatfree Vegan
- Foodgoat
- ForkandBottle.com
- Green Olive Tree
- Hooked on Heat
- Jaden’s Steamy Kitchen
- Kalyn’s Kitchen
- Lucullian delights
- Mahanandi
- Matt Bites
- MeatHenge
- mmm-yoso!!!
- New York Times – Dining & Wine
- Pizza Goon
- Rasa Malaysia
- Ruhlman
- Sailu's Kitchen
- Serious Eats
- SF Gate: Food & Dining
- Simply Recipes
- Soul Fusion Kitchen
- Tastespotting
- The Amateur Gourmet
- The Cleaner Plate Club
- The Food Section
- The Grub Report
- thecookscottage
- U.S. Food Policy
- Wandering Chopsticks
- Washington Post Food and Dining
- Wasted Food
Meta:

Powered by WordPress. Graphics by Zak Kramer.
Design update by Daniel Trout.
Entries and comments feeds.