Cook Local, Eat Global
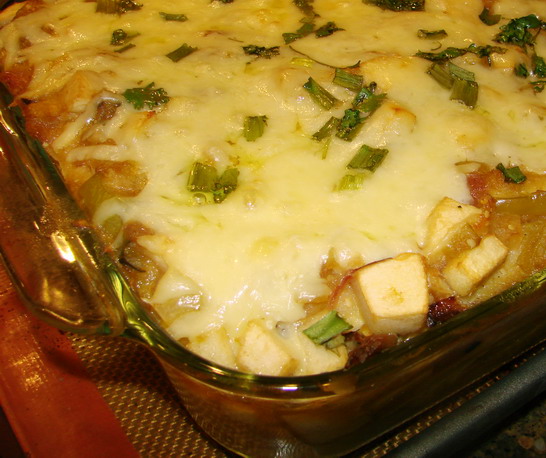
Pork and Apple Enchiladas Verde Casserole
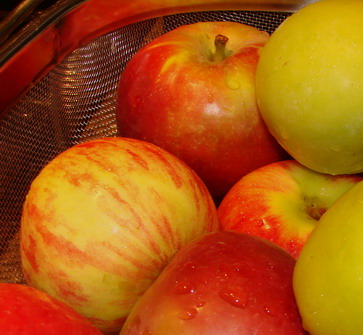
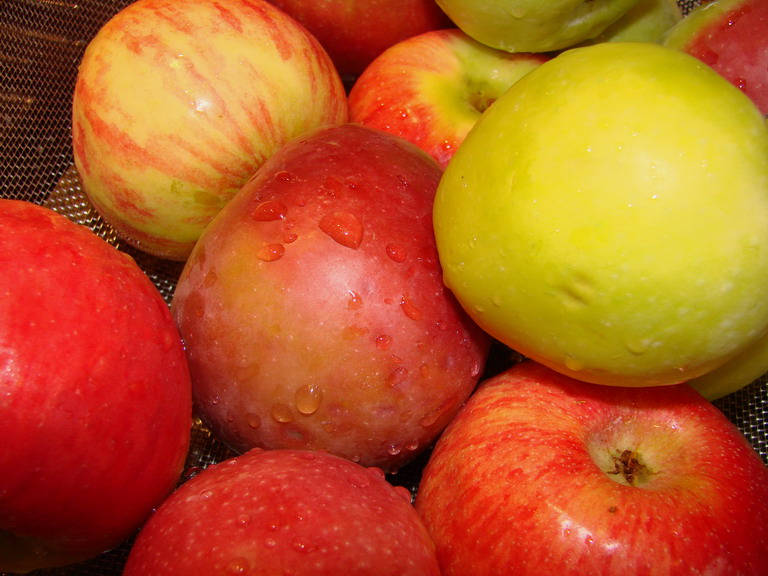
Apples are gloriously in season this month; at our farmers market, a double handful of varieties are currently available, including two of my favorites, MacIntosh and Jonathan. MacIntosh apples, in fact, were the first apples I introduced Zak to in order to convince him that he really liked apples. He was convinced for years that he hated them, because the only apples he had ever tasted were the insipid, mealy Red Delicious apples available in every grocery store in the country. When I finally got him to taste a MacIntosh, fresh from the orchard down the road from our house, his eyes rolled back in his head and he muttered through his mouthful–“God! It’s juicy! And it tastes flowery–and sour and sweet and wow! This is really good!”
Now Zak is a big fan of apples, and every year, the number of dishes I make with apples increases, since everyone in our household are fervent fans of the pommes.
This dish was inspired by one of the new seasonal salsas at Casa Nueva. The folks at Casa change their menu seasonally to reflect the local bounty available to them from our area’s many farmers. They choose a cheese and several vegetables or fruits, and use them as the basis for seasonal menu items which showcase the flavors, textures and aromas of their chosen ingredients.
Apples and cayenne chilies feature prominently in the Autumn 2007 menu, and are used to splendid effect in a large number of recipes, including an Apple Salsa Verde that is fantastic. It is a very spicy (from the cayennes) verde salsa which features tart apples to add a crisp note to the primarily soft, cooked fruits in the salsa. It is wonderful–very fresh, and very shimmery on the tongue–like the way that the first truly cold, snapping crisp sunlit autumn day feels after a long, hot, dusty summer.
The cayenne chilies add heat, of course, but the problem is that all of the chilies grown in Athens this year are very hot–hotter than usual for Ohio. This is because we had drought conditions here for most of the summer. The drier the weather, the hotter the chilies–it has to do with having less moisture in the cells of the pods, which concentrates the oils which make the flavor hotter.
So, depending on who makes the salsa on a given day at Casa, the apple verde salsa can be a great balance of flavors and textures, or searingly, tongue-torchingly hot. And this is coming from me–the Queen of Heat. I can eat hot things–very hot things, in fact, but with some dishes, heat can completely overwhelm the other flavors the way a brushfire can get out of control and destroy an entire forest.
The other day, Zak had gotten some enchiladas verde with shredded pork and the apple verde salsa, and he couldn’t really stand the heat of the cayennes. There were a lot of them in there, added uncooked, as near as I could tell, and it was beyond tingly into torturous to eat. I ate as much of them as I could and gave him what I had ordered, but he was sad because he had really wanted that particular set of flavors.
So, I asked him if he wanted me to make something akin to his lunch for dinner, only not so hot.
Which is what I did.
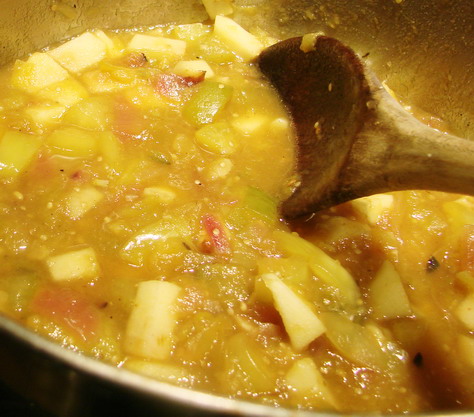
The salsa itself was simple–I made my usual salsa verde, but added MacIntosh apples to the onions as they browned and let them cook down to thicken the sauce, and then at the end, I added some diced Jonathan apples and let them barely cook in order to add another layer of tartness as well as a bit of crunch.
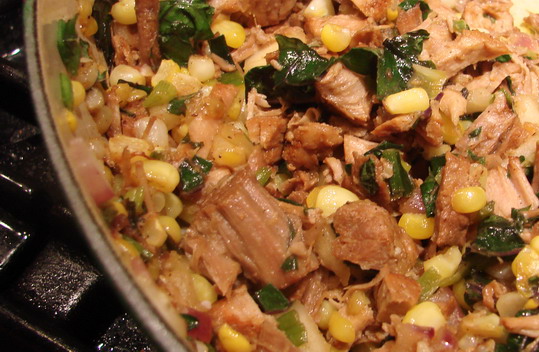
The filling was two-fold. I made a shredded pork filling by braising bits of locally produced pork butt roast in beer, chilies, onions, garlic and some vegetable broth. This I sauteed with onions, garlic, corn kernels, shredded kale and sliced apples. The second filling was a mixture of softened tangy chevre, cream cheese, shredded sharp cheddar cheese, cilantro and thinly sliced green onion tops.
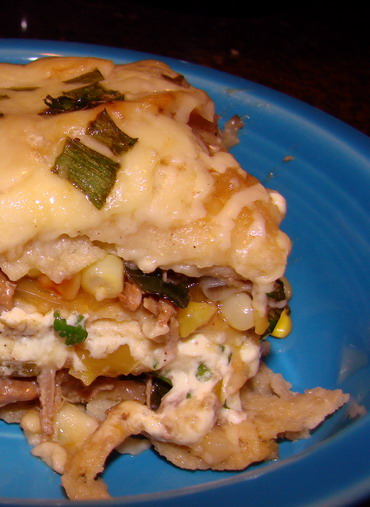
My Mom calls these layered enchiladaesque casseroles I make “Mexican Lasagne,” and there is some truth to that comparison. Instead of noodles, I use corn tortillas, usually fresh, although this time around I used some tortillas made in a tortilla factory in Columbus, Ohio, which is pretty close to here. (And, I have to say–the freshness of these corn tortillas was excellent–they tasted almost as good as the ones I make, and they were heavy with corn fragrance, which is what I love most abot fresh tortillas.) Then there is usually a meat or vegetable based filling and a creamy, cheesey filling taking place of my ricotta, pesto and spinach creamy filling for lasagne. And then, there is the salsa in betwen the layers and shredded cheese melted into a gooey, crisped layer on top.
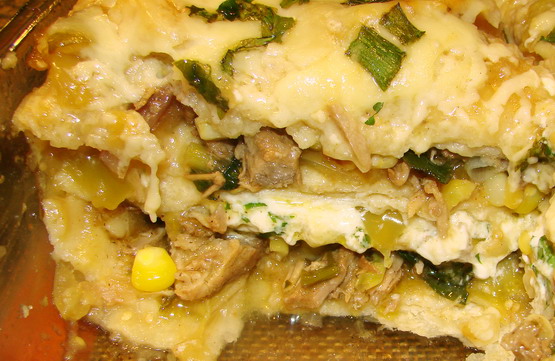
Actually, it is quite an apt analogy. This enchilada casserole is like lasagne in that you can come up with nearly endless variations by being creative with the fillings, cheeses, salsas, and garnishes. It is a wonderful, comforting food that seems to make everyone quite happy–and the layers, when cut into, are fun to peer at as well as eat.
Once the components are all made, it is a cinch to put together–just start with a 9″X9″ pan, oil it lightly with olive oil, then pour in a scant 1/4 cup of salsa, spreading it across the bottom. Then, cover the bottom completely with a single layer of corn tortillas–tearing some in half if you need to, then cover those with a thin layer of salsa. Add filling and a sprinkle of shredded cheese, then repeat the layers until you come to the top. Finish with a generous amount of salsa and cheese, with a sprinkle of cilantro and some thinly sliced green onion tops for a garnish. Put it in the oven at 375 degrees F for about fifteen to twenty minutes and then, before you slice it let it rest for about five minutes.
Dinner is then, thus, served.
This makes enough for three to five people, depending on how hungry they are and what side dishes you offer.The flavors of this version are great, a very autumnal mixture. The salsa is both sweet and tart, with a warm, comforting chile heat, not a searing one. The pork, corn, kale and apple filling is the essence of autumn–the corn and caramelized onions and apples complement the rich pork perfectly, while the bittersweet kale adds another layer of complexity to the dish. The cheese filling, if you use more goat cheese than cream cheese, is tangy, creamy and rich without being too gooey, and the corn tortillas, along with the salsa, tie everything together into a harmonious whole.
Autumn Mexican Lasagne: Pork, Corn and Kale Enchilada Casserole with Apple Verde Salsa
Ingredients:
2 tablespoons olive oil
1 cup thinly sliced onions
1/4 teaspoon salt
2 cloves garlic, peeled and minced
2 cups shredded pork
1/4 teaspoon ground cumin
1/2 teaspoon ground coriander
1/4 cup apple cider, sweet or hard
1 1/2 cups fresh or frozen corn kernels
1 tart, firm apple, peeled and diced finely
1 cup shredded fresh kale leaves (remove the large veins before shredded)
4 ounces cream cheese
6 ounces chevre
1/4 cup sharp cheddar
1/4 cup fresh, roughly chopped cilantro leaves
1/2 cup thinly sliced green onions
3 cups verde salsa with one finely shredded, peeled apple added with the onions, and one finely diced tart apple added near the end of cooking, so it stays somewhat firm and crisp (you could also use jarred salsa verde with your own apple added to it in order to save time, or if you have no access to fresh tomatillos)
1 dozen freshly made or packaged corn tortillas
1 1/2 cups shredded sharp cheddar cheese
cilantro leaves and/or thinly sliced green onion tops for garnish
Method:
Preheat oven to 375 degrees F.
In a heavy bottomed skillet, heat olive oil over medium heat. Add onions and sprinkle with salt, then cook, stirring, until the onions turn golden. Add garlic and shredded pork, and the spices, and continue cooking, stirring until the onions begin to brown well. Add cider and deglaze any brown juices stuck to pan. Add corn and apple and keep cooking until both have a bit of brown color on them. Add kale, and allow to wilt and deepen in color. Remove from heat and set aside.
Allow cheeses to come to room temperature. Using your hands or an immersion blender, mix together cream cheese, chevre, and 1/4 cup of sharp cheddar cheese, then mix in cilantro and sliced green onions until well blended. Set aside.
Lightly oil inside of a 9″X9″ square baking pan. Put a scant 1/4 cup of salsa in bottom of pan and spread to cover bottom in a thin layer. Cover bottom of pan with three tortillas–one cut in half in order to fill in corners. Add a 1/4 cup layer of salsa over the tortillas, then layer half of the meat and vegetable filling over, then add another bit of salsa, and a sprinkle of the shredded cheddar cheese. Top with another layer of tortillas, then a 1/4 cup of salsa, then the cream cheese and chevre filling (all of it) and then more salsa, and another layer of tortillas. Then, salsa, the other half of the meat/veggie filling, then salsa, then cheese, then tortillas. Press layers down with your hands to firm them up, then pour the rest of the salsa over the top, and sprinkle with the rest of the shredded cheese, and garnish with cilantro and green onion tops.
Bake in preheated oven for 15 to 20 minutes, or until filling is bubbly and the cheese on top is melted and browned in spots.
Allow to rest five minutes before cutting in order to keep the pieces intact and thus attractive–if you cut it too soon, it will fall apart as you serve it.
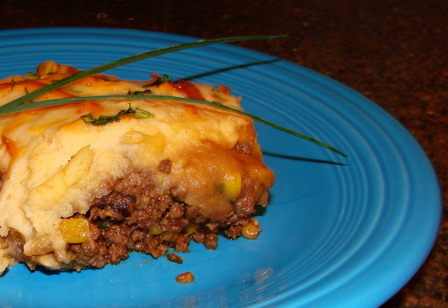
Cowboy’s Pie–A Tex-Mex Take on a British Classic
I made an offhanded comment in my last post about how the chipotle-chevre mashed potatoes would make an excellent topping for a Tex-Mex version of the British standard casserole Shepherd’s Pie. The more I thought about it, the better of an idea it became. And I did have a goodly bit of mashed potatoes left over which I absolutely did not want to waste.
So when Zak asked me what I was going to make for dinner, I said, “Well, I was thinking…” and then pitched the idea of a Tex-Mex version of Shepherd’s Pie, with a beef, corn, black bean and kale filling flavored with beer, salsa, cumin, coriander, cilantro, onions and garlic, then topped with the chipotle-chevre mashed potatoes, which would then be sprinkled with sharp cheddar cheese and baked.
He nodded and said, “That sounds really good…you are going to make it now that you have told me about it, right?”
This made me happy, because when I first came up with the idea for the Anglo-Indian Shepherd’s Pie, he wasn’t too positive about it. That is, until he tasted it–once he had a bite, he became a believer, but until then, he was quite agnostic on the entire idea.

So, I set myself to work making the filling and boiling up an extra couple of potatoes to add to the leftovers, in order to ensure I had enough to cover the filling generously.
I wanted to get lots of caramelized flavors out of the vegetables, so I started by sauteeing the onions in a heavy bottomed skillet, cooking them until they were a medium golden brown. Then, I added the sweet bell pepper and the corn, and I kept cooking and stirring. Then, I added the black beans and the garlic and kept stirring. At this point, I added the spices, and noted that I had a nice layer of browned vegetable sugars on the bottom of the pot, so I deglazed the pan with about a cup of beer, then added the beef. (If you want to make a vegetarian version of this dish–leave out the step with the beef.
I just kept stirring and stirring until the beef was fully browned, then, I added the kale, which had been cut into a rough mince. More seasonings went in, about a cup of medium-hot salsa went in along with a bit of broth and some salt and pepper to taste.
At that point, all I had to do was simmer the filling mixture until the juices reduced and thickened slightly.
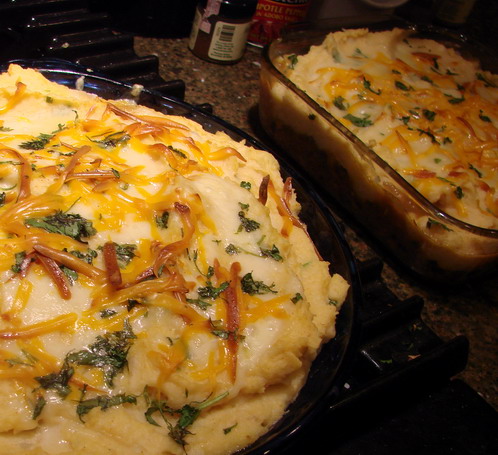
Once the mashed potatoes were done, Cowboy’s Pie was a cinch to put together: all you have to do is lightly oil a casserole dish or pie pan–I used one of each–and carefully pour the filling into the prepared pans. I usually tamp the filling down a bit with the back of a ladle, before I spread the warm mashed potatoes over the filling. Then, I topped the potatoes off with a thin layer of shredded cheese (I used aged sharp cheddar and a little bit of smoked cheddar–I liked the way that it echoed the inherent smoky flavor of the chipotle in the potatoes) and a sprinkling of chopped cilantro before popping it into the oven.
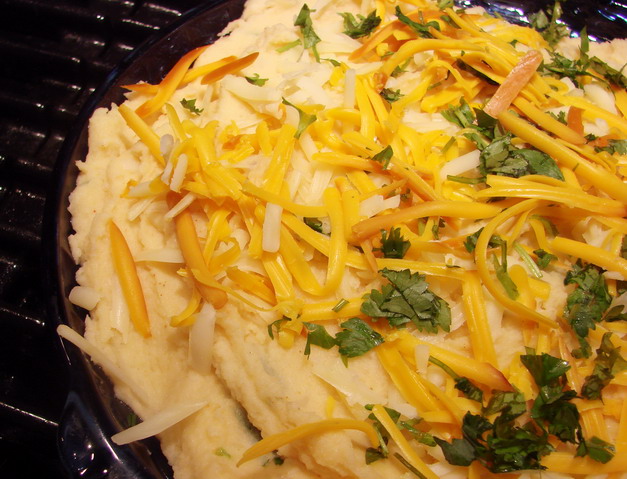
Then into the oven the pie goes for a short baking period, and voila–out comes Cowboy’s Pie. (Morganna says I should call it Torta del Vaquero–which is Spanish for :”Cowboy Pie,” but since I am not certain of the proper construction of the name, we will have to hold off on that. I never took Spanish–so, translation can be a total pain.)
I also realized as I was cooking it that it would be simple to make a vegetarian version of this–substitute TVP, GimmeLean or another pound of cooked black beans for the meat. It would be quite tasty, I am certain–I know, because I tasted the filling in various stages of its completion.
My tasting panel of two teenagers (Morganna and James), a hungry husband (Zak–duh) and a starving one yar old, were blown away by the dish.
So, without further ado–here it is.
Torta del Vaquero, or Cowboy’s Pie.
Ingredients:
2 tablespoons olive oil
1 1/2 cups thinly sliced onions (1 large onion)
1 teaspoon salt
1/2 cup sweet red bell pepper, diced finely
1/2 cup poblano chile, diced finely
1 head garlic, minced
1 bottle beer, divided
1 1/2 cups corn kernels, either fresh or frozen
1 1/2 cups cooked black beans (you can use canned–just drain and rinse them well) drained well
2 1/2 teaspoons ground cumin
2 teaspoons ancho chile powder
1 1/2 teaspoons smoked Spanish paprika
1 teaspoon ground coriander
1 pound very lean ground beef (grassfed has a great flavor for this–or you can use bison, or chorizo sausage)
1 cup tomato-based salsa of your choice
1/2 cup roughly chopped fresh cilantro leaves
1 cup finely chopped fresh kale (make sure and remove any large veins before chopping)
salt and pepper to taste
5 cups chipotle-chevre mashed potatoes
1 tablespoon smoked Spanish paprika
3/4 cup shredded sharp cheddar cheese
1/4 cup shredded smoked cheddar cheese
small handful roughly chopped cilantro leaves as garnish
Method:
Heat oil on medium heat in a heavy bottomed skillet that will hold all the filling ingredients. Add onion, and sprinkle with a teaspoon of salt. Stir and cook until onion is a light gold color. Add peppers and garlic, and cook, stirring, until the onions are medium brown, and everything is fragrant. At this point, there should be some brown-colored juices stuck to the bottom of the pan. Deglaze these by pouring a scant 1/4 bottle of the beer into the pan, and stirring, scraping the bottom as you go.
After the alcohol and most of the beer has boiled away, add the corn kernels and the beans. Cook, stirring, until the corn kernels turn a darker brownish yellow with a few obviously browned spots. At this point there should be a great deal of browned matter on the bottom of the pan…add the spices and continue cooking for another minute. Add meat, and spread it through the vegetable mixture, then add the remaining beer to the pan, and scrape up all the browned stuff off the bottom and sides of the pan. Work hard–the starches and sugars from the vegetables have browned and stuck there and will make a lot of good flavors if you can get them mixed in with everything else.
The meat will brown in the beer–just keep stirring and cooking. When it is brown, stir in the salsa, cilantro and kale, and cook down until a fairly damp, but not liquid-laden filling is made. (If it dries out too much, add some chicken, beef or vegetable broth or stock–or some more salsa or beer.) Taste and adjust seasoning, adding more spices if you think it needs it, and adding salt and pepper to taste.
Now you are ready to assemble the pies.
Take two deep dish 9″ pie pans or two 9″ square pans, or some combination thereof and lightly coat the interiors with olive oil.
Spread half the filling in one pan, and half in the other, packing it down firmly as you go.
Mix the second measure of Spanish paprika into the potatoes, and spread half of them on one pie, and half on the other. You can make decorative swoops and swirls with the potatoes as you see fit.
Sprinkle a sparing amount of sharp cheddar cheese on each pie, then follow with a similar amount of smoked cheddar. Then, sprinkle with cilantro.
Bake in a 375 degrees F oven for about twenty minutes, or until the filling is bubbly (if you use glass pans, this is easy to see), and the cheese is melted and browned in places.
Saturday Dinner: Sort-Of, But Not Quite Pork Chops, Applesauce and Mashed Potatoes
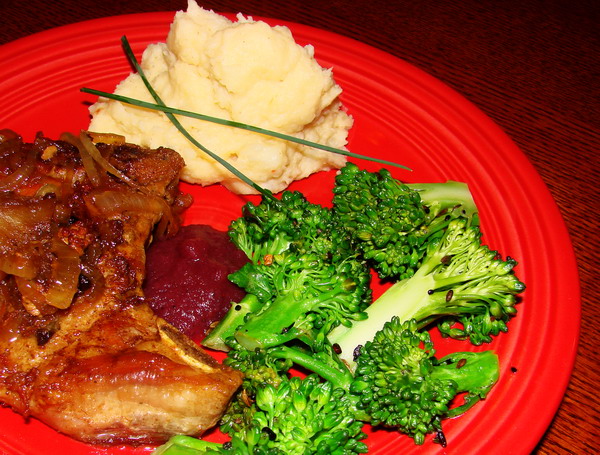
I didn’t really know what to call this post, really, because the dinner came out of improvisation on the theme of a many a childhood dinner in West Virginia: pan-fried pork chops served with applesauce on the side, with mashed potatoes and some sort of green vegetable (usually cooked from a vibrant verdant beauty into a dull shadow of olive drabness).
It all came about because one of the jars of my Spiced Blueberry Applesauce failed to seal, so we had to use it right away. I figured I could revisit a classic dinner of my childhood, but just kick it up a notch. Or two. Or three.
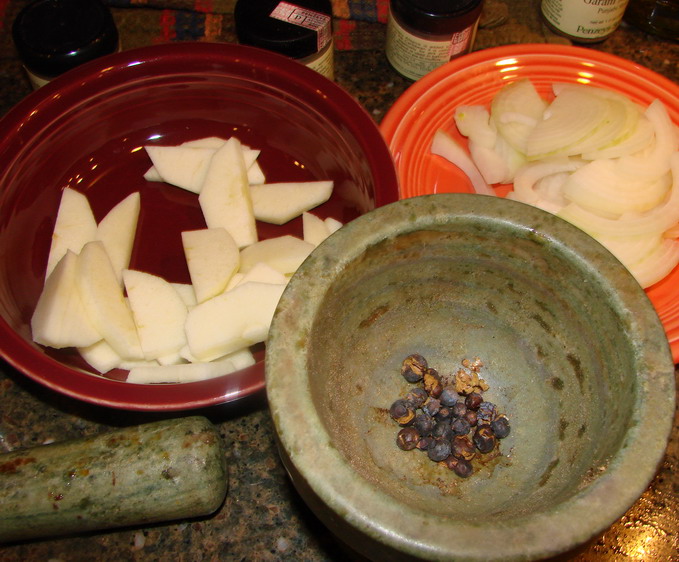
I think that most pan-fried pork chops can be rather dry and dull, so I decided to smother mine. Onions are classic, but then, so are apples. Undaunted by the fact that I was serving some blueberry applesauce with this dinner, I decided to add some sliced fresh Jonathan apples to the pan with the onions and pork. Juniper berries are a traditional addition to this mixture, so after crushing a few of them lightly with the mortar and pestle, they went in, too. The seasoning for the chops themselves was an odd twist, but it worked admirably–and it was inspired by the vaguely Indian sort of flavor the blueberry applesauce has thanks to the subtle spices I added to it.
I rubbed with garam masala before browning them in the pan with olive oil, and before the onions and apples were added. The heady, spicy-sweet fragrance of the garam masala lightened up the rich scent of the pork, and blended perfectly with the apples and onions.
To deglaze the pan and create a luscious pan sauce, because I had no apple cider or brandy, I used Marsala wine.
The results were fantastic–amazingly flavorful–sweet, tangy and fragrantly spicy all at once.
My typical garlic mashed potatoes seemed too pain to go with these pork chops, so instead, I decided to implement an idea Morganna’s boyfriend James had the last time he came for dinner. I decided to make my usual mashed potatoes: potatoes with lots of garlic cloves boiled with them, then drained and mashed. Instead of the usual butter and sour cream, I added some fresh chevre–tangy goat cheese–and chipotle butter. The chipotle compound butter I had made last month to cut into slices and melt over tenderloin steaks. Really good butter, softened and creamed with dried, ground chipotle chilies, minced fresh chives and a single raw, fresh garlic clove, minced very finely, then rolled up into a cylinder and wrapped and frozen. Since I had plenty left over from the steaks, I pulled it out to thaw, and added it to the potatoes.
Smoky, garlicky, potatoey goodness with the sharp tang of goat cheese and the rich creaminess of butter was the result.
For the green vegetable, I simply heated up canola oil, in another cast iron skillet, toasted up some panch phoron, and after the mustard seeds popped, I tossed in some broccoli rabe, and then when it turned deeply green and browned on the edges, I added salt and lemon juice.
It was a fantastic dinner, one that I have been told must be made again, sometime in the near future. And since I have plenty of that spiced blueberry applesauce to eat, it seems that it is only inevitable that we should eat this particular meal again.
Apple and Onion Smothered Pork Chops With Garam Masala and Chipotle Goat Cheese Mashed Potatoes
Ingredients For the Pork Chops:
3 bone-in, thick cut pork loin chops
1 1/2 teaspoons garam masala
2 tablespoons olive oil
1 cup thinly sliced yellow onion
1 cup peeled and thinly sliced fresh firm, tart apple–I used Jonathan, but Cortland or Granny Smith would work well, too
1 teaspoon crushed dried juniper berries
1/2 teaspoon salt
1/2 cup Marsala wine, apple cider, apple brandy or dry sherry
freshly ground black pepper and salt to taste
Method:
Rub garam masala evenly on both sides of each pork chop and allow to sit about fifteen minutes at room temperature.
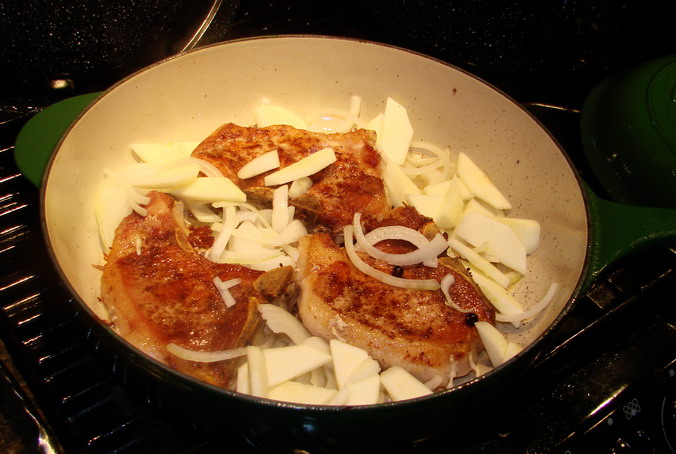
Heat olive oil in a heavy bottomed cast iron skillet over medium heat. When it is quite hot, add the pork chops. Allow them to sit undisturbed until browned on the bottom, then turn over. When brown on the second side (you will know this because the chops will no longer stick to the pan–they will move freely), add onions and apples to the pan, along with crushed juniper berries. Sprinkle apples and onions with salt.
Cook, stirring now and then, until the onions and apples are golden brown. Deglaze the pan with wine, stirring. Allow the alcohol to boil off, then turn heat down to low, and cover the pan.
Cook until sauce reduces to a reddish brown glaze, and the apples and onions cling to the chops.
Serve with some spiced apple sauce on the side.
Ingredients For Chipotle Mashed Potatoes:
2 pounds red potatoes, peeled and cut into medium dice
1 head garlic, peeled and cloves separated
1 teaspoon salt
4 tablespoons butter
1/2-1 teaspoon ground dried chipotle chile (to your taste and heat tolerance)
2 teaspoons finely minced fresh chives
5-6 tablespoons fresh, tangy chevre
milk as needed
salt and freshly ground pepper to taste
Method:
Put potatoes, garlic cloves and salt into a large pot and cover with cold water. Bring to a boil, then turn down heat and simmer uncovered until potatoes are completely softened, but not falling apart.
Drain potatoes and garlic, then put cooking pot back on the heat. Allow heat from burner to evaporate liquid. Add potatoes and garlic, and stir, allowing the burner to evaporate some excess moisture.
Remove from burner, turn off heat, and add butter, chipotle, chives and chevre. Mash with a potato masher or hand-held mixer, until a soft puree is formed. After mashing, add whatever milk is necessary to whip the potatoes into a fine, light mash. Add salt and pepper to taste, and serve immediately.
Note: You may use more or less butter and chevre if you like. You can use skim milk for the milk, or cream, if that is what floats your boat. The dairy added to the potatoes is more of a “to your taste” sort of thing–you be the judge of just how fattening or not you want to make your potatoes. I make mine pretty fattening, in large part, because I don’t eat fattening food all the time. Just now and then.
Everything in moderation.
Now that I think on it, these potatoes would be banging good on top of shepherd’s pie. Maybe I could spice the ground meat filling with cumin, coriander, cilantro, tomatoes and corn–sort of a taco filling kind of thing, and then use these chipotle mashed potatoes and shredded cheddar cheese as a topping, and call it Tex-Mex Cowboy’s Pie. Might have to try that once the weather finally deigns to cool off.
East-West Fusion: Kimchi-Style Cucumber Pickles
I love pickles.
When I was a little kid, around five years old, my mother caught me drinking pickle juice right from the jar. This disturbed her greatly, not only because I had ruined a jar of pickles by putting my germy little lips on it, but, because she was sure that much acid was going to kill me.
I helped Grandma make many a batch of her dill pickles–my job was to scrub the heck out of the pickles before they went into the brine. When it was time to pack them into jars, my other job was to pick whole dill blossoms and peel whole cloves of garlic to put in the jars before Grandma squeezed the cukes in. The fragrant umbrels of dill looked like floral fireworks pressed against the glass of the jars, while the scent of garlic, vinegar and brine permeated my skin and hair, much to my delight.
As a pre-teen and a teen, one of my favorite snacks was a whole crisp, garlicky kosher dill pickle, fresh from the jar or barrel. I remember being impatient when it came to letting pickles age before nibbling on them, but when I did pick at them before their time, I found Grandma’s admonitions to leave them alone were right–young pickles are not always very good.
My love of pickles has diminished somewhat in adulthood, though I still love plenty of sour foods. I no longer drink pickle juice straight from the jar, but I will dig into my huge jar of spring kimchi and snag a choice morsel or two for a snack about every other day. Sometimes I will even eat that for breakfast;.
The last of cucumbers are in season, and are gloriously inexpensive, so I bought about three pounds of them at the farmers market with an eye to turn them into pickles. But what kind?
I nearly turned them into kimchi, but while I know that there are summer kimchi varieties made with cucumbers, they are meant to be eaten quickly, and are not meant for preservation and winter consumption. And I wanted to make pickles, but not plain old dill pickles.
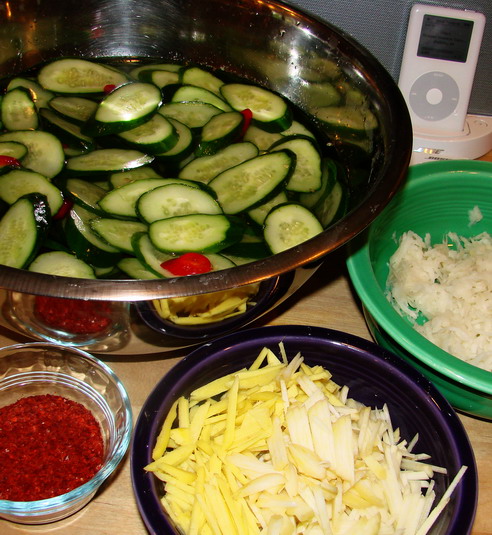
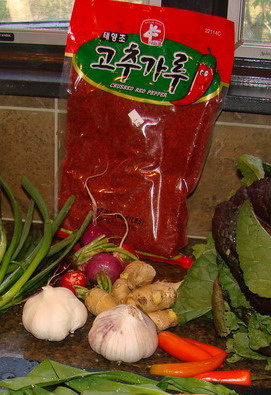
So, I got the idea of making cucumber pickles with the flavorings that go into kimchi: ginger, garlic, fresh chilies, shredded, salted daikon, and dried Korean chile flakes.
(To find Korean chile flakes, try a Korean grocery or a general Asian market. The Asian market here in Athens keeps the Korean chile flakes in the refrigerated section. For reference, you can always print out the photo here of the chile and take it with you.)
I used a recipe that included a short brining time, because I was too impatient to let the pickles sit for a day, and because I didn’t really have a good place to leave them undisturbed where cats couldn’t get into them. This recipe was for sandwich pickles and included a heinous amount of sugar in it–sugar which, for the most part I left out. (I really, really dislike sweet pickles. They made me gag as a kid and to this day, tasting them still makes me shudder. I don’t know why, because it isn’t like I dislike sweet and sour flavor combinations. But something about sweet pickles—eech. It just gets to me.) I did leave a spare one tablespoon–and it didn’t so much as change flavor of the pickles as enhance them.
The first step I took was to peel and shred the daikon radish, which I then rubbed with about a teaspoon of salt, and let sit until much of the juice was drawn from the vegetable’s tissues.
That is the purpose of salting or brining when it comes to pickling, by the way–it helps remove excess water from the vegetable tissues. This does two things. First, the removal of some water gives the vegetable a crisper texture, and secondly, this slight dehydration process helps preserve the vegetable by means of making the vegetable a less hospitable place for bacteria. Salt, of course, also inhibits the growth of many harmful bacteria, so it also has a cleansing and preservative effect on its own, outside of its physical effects on the texture of the vegetable.
The cucumbers I sliced thinly on the diagonal–after obsessively scrubbing the somewhat muddy skins, of course–and tossed into a large stainless steel bowl with the thinly sliced serrano chiles and set them all to soak in brine (a solution of salt and water) for three hours.
While the cukes were brining and the daikon was leaching out excess water, I peeled and cut into very thin slivers four ounces each of garlic and ginger. I could have minced them up and that would have been easier, but I decided I liked the look of very thin slivers much better than a paste of ginger and garlic floating around in the pickle jars. Slicing tiny slivers is easy–you peel both the garlic and ginger, and then slice them into very thin slices. Then, you stake 3-5 slices on top of each other and then cut each stack into very thin strips. It is really easy once you get used to it, and when you must do a lot as I did, it becomes a moving meditation. I find such cutting relaxing.
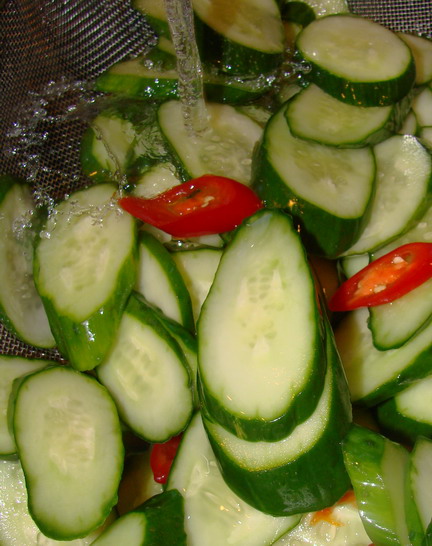
After three hours, I drained the the cucumbers and chilies, and rinsed them well under cold running water, rubbing them with my hands to get the excess salt out of them. (I should have worn gloves for this, too, because all that salt is really not good for dry skin. Gee–maybe it is because of that dehydrating effect that salt on organic tissues? Hrm. Maybe.)
Then, it was time to make the pickling solution–I just poured the two vinegars, the water and the sugar into a pot, and brought it to a simmer over medium heat. When it started to boil, I poured in the Korean chile flakes, the ginger and the garlic and let it boil for about five minutes. This turned the solution a brilliant scarlet hue that kimchi-lovers know very well. and the fragrance once the ginger and garlic were added was delicious. I almost wanted to drink some right then and there.
But instead of that, I stirred the cucumber and chile slices into the pickling juice, and let them simmer for about five minutes.
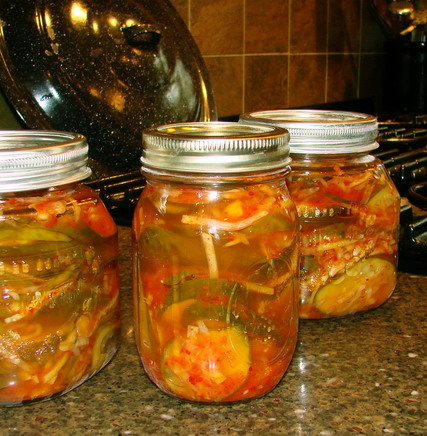
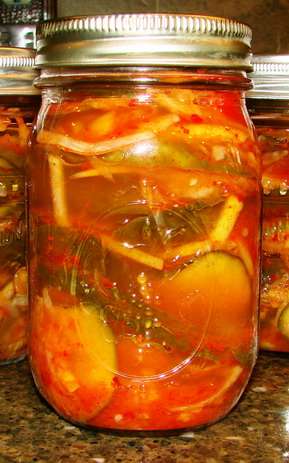
Then, I packed them into hot jars, and as a final step, I added a bit of Ball’s Pickle Crisp to the top of the pickles, then screwed on the lids. Pickle Crisp, which is the proprietary name Ball gives to calcium chloride. Calcium chloride helps pickles retain their crisp texture by acting to firm up the natural pectins found in the cucumbers without also raising the pH level of the pickling liquid.
The most important thing you have to remember when packing pickles into jars, is to be obsessive about poking out excess air bubbles. Cucumbers are notorious for trapping pockets of air among themselves and between themselves and the glass of the jar. I have found, and was taught by Grandma to pack cucumbers fairly tightly, and after pouring in the hot brine, to use a thin spatula, a table knife or some other implement (a chopstick works pretty well) to poke around the pickles and down the sides of the jar to seek and destroy the air bubbles. After that, you just have to top up the vinegar solution while leaving the recommended empty space at the top of the jar.
Then, I just processed the jars for ten minutes. They all sealed perfectly, and I cannot wait to try the pickles!
But, wait I will. Pickles are not usually at their best when first made. They should really age a bit on a cool, dark shelf undisturbed. During this time, the flavors mellow and begin to cuddle with each other, becoming friendly. The vinegar loses its raw, sharp quality, the garlic snuggles up tot he ginger who kisses the cucumber, and the Korean chile pepper weaves all of these tastes and textures into a cohesive, spicy whole.
(Though, I have to admit that I tasted a couple of pickle slices before I started packing the jars. Even hot and fresh and new, the pickles tasted pretty darned good. They are also very spicy, so keep that in mind if you decide to make this recipe, and lower the amount of Korean chile flakes accordingly.)
Have no fear–when I open my first jar of these scarlet and pine colored wonders in a couple of weeks, I will write an update letting everyone know how they turned out.
Until then, here is the recipe, if you feel the need to experiment right along with me.
Kimchi-Style Cucumber Pickles
Ingredients:
1/2 cup kosher salt
8 cups cold water
3 pounds cucumbers, well scrubbed and sliced thin on the diagonal
4 serrano chiles, sliced thin on the diagonal
12 ounces daikon radish, peeled and shredded (I used the large holes on a plain old box grater to do this.)
1 tablespoon kosher salt
3 3/4 cups white vinegar
1 cup water
1 tablespoon raw sugar
1/4 cup Korean chile flakes
4 ounces fresh garlic, peeled and cut into fine shreds
4 ounces fresh ginger, peeled and cut into fine shreds
Method:
In a large stainless steel or glass bowl, stir salt into the water until it completely dissolves. Add cucumbers and chiles and allow to sit undisturbed for 3 hours. While this is going on, you can prepare the rest of the vegetables.
Massage the tablespoon of salt into the daikon radish and leave to sit in a bowl undisturbed for about an hour. After an hour, remove daikon and squeeze as much juice out of it as you can with your hands, until all that is left are fairly dry, crisp, lightly salty shreds of vegetable.
After three hours, drain the cucumbers and serranos and rinse the brine thoroughly off of them with very cold running water. (I rinsed, massaged, rinsed and rubbed for about eight minutes to get most of the salt off of the vegetables.) When you are finished, allow vegetables to drip dry in colander while you prepare the pickling solution.
In a saucepan or pot large enough to contain all of the cucumbers plus the pickling solution, bring the vinegar, water and sugar to a boil, stirring to dissolve the sugar all the way. Add Korean chile flakes and allow to boil gently for about ten minutes. Add the garlic and ginger, then add the cucumbers, chilies and daikon shreds, stirring to combine. Bring to a simmer and simmer about five minutes.
Pack into hot jars, being careful to pack the pickles in fairly tightly. Leave 1/2 inch of headspace at the top of the jar, then ladle pickling solution into the jars, leaving 1/2 inch of headspace at the top of the jar. If you wish, you may add 3/4 teaspoon of Pickle Crisp directly to the top of a pint jar after it has been filled with pickles and juice. (Use 1 1/2 teaspoons for a quart jar.)
Wipe the rim of the jar, center the lid and tighten the ring to finger-tightness–remember, not too tight. Continue filling jars until your pickles are all packed in.
Place on a rack in a hot water bath canner, with plenty of water to coverbring to a boil, boil covered for ten minutes. Turn off heat, remove lid from canner, and allow jars to sit submerged for five minutes. Then, remove from canner with jar lifter, set on a clean, folded dishtowel, and leave undisturbed until cool. Check seals, and if they are good, wipe down the jars, and tighten the rings, and store in a cool, dark place for at least two weeks before tasting.
Makes four pints or two quarts.
Savoring the Fruits of the Season: Spiced Blueberry Applesauce

I love applesauce, but generally only when it is homemade.
When I was a kid, my Mom and both grandmothers ruined my ability to eat store-bought applesauce by making it from scratch from really good apples.
Compared to the somewhat chunky, thick, tart-sweet and cinnamon-laced concoctions they made the applesauce from the store tasted like insipid, grainy sugar-paste. All three of them insisted on good apples, and would buy from farmstands or farmers markets, and they never used the mealy, tasteless apples that the grocery stores carried.
Grandma and Grandpa didn’t have their own orchard on the farm, but they knew folks who did, and they would either buy bushels of fresh apples from them or trade some of their home-grown potatoes, cabbages, and some of Grandma’s canned tomatoes, beans and jellies for apples. They never got Red Delicious, either, an apple that Grandpa decried as a “worthless, tasteless excuse for an apple.” They always bought Cortlands, Jonathans, Grimes Golden, and Rome apples–all of them fairly tart, very firm and crisp, and delicious. They kept half of them in the root cellar in their bushel baskets to eat fresh or make pies from all winter. They stayed perfectly crisp that way, along with the potatoes, sweet potatoes, turnips, pumpkins and winter squash–and it took no electricity or anything to keep them cool and fresh. (Sometimes I think that when we modernized, we lost out on a lot of more sustainable ways of doing things–refrigerators and freezers are electricity hogs, for example.)
Here in Athens, we are blessed with several wonderful orchards, where many varieties of apples, pears, peaches, cherries, quinces, apricots, plums and other fruits are grown. Right now, the apples are madly in season–at least from the trees whose blossoms were not hit with the late frost in April. Because most of the arable land here in Athens county is in hillsides and valleys, which saved many of the apple blossoms from being destroyed by frost and snow–hills and valleys create microclimates with pockets of warm air that can protect a fruit tree from frost.
The apples I had on hand to make this applesauce were Cortland, MacIntosh, and Ginger Gold. Cortland are tart-sweet, and MacIntosh cook down to a wonderful thick, flowery-scented sauce, while the Ginger Golds are tart and zingy. I mixed them with some organic frozen blueberries, with the notion of feeding the sauce mainly to Kat, mixed into her morning oatmeal along with yogurt. Blueberries are one of her favorite fruits–and they are so full of nutrients, I cannot help but give them to her at every opportunity.
I only used one cup of sugar–much less than is usually stipulated for applesauce, and I used raw sugar, because I like the more complex flavor profile it gives to anything it is cooked with. It has similar flavor notes to honey, in my opinion, which is more interesting than white sugar which is just purely sweet. And then, because I cannot leave well enough alone, I added some spices: ginger, cardamom and allspice.
Cooking applesauce is easy–I just put the thinly sliced apples into a large pot with the blueberries, and added just enough water to barely cover the bottom. Then, I put the pot on the stove over high heat, and started cooking, stirring constantly, until the apples on the bottom let out their juices. Then, I stirred heartily in order to get the still raw apples and blueberries off the top of the pot and to the bottom, and stirred in the sugar and spices, and kept cooking until all of the apples and blueberries were soft and the MacIntosh apples had started to fall apart. I turned off the heat, and let the pot sit on the still warm stove in order to keep the sauce hot.
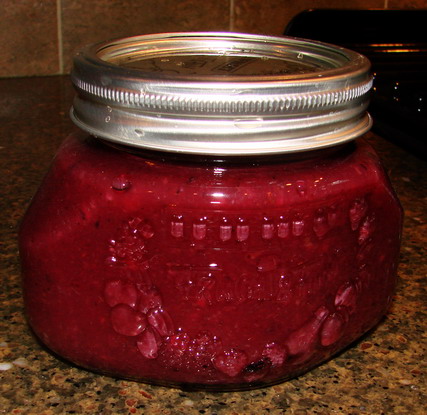
Then it was a simple matter of taking out my immersion blender and ground up the entire potful of fragrant fruit into a lovely, slightly chunky violet-hued puree. After that, I mixed in three tablespoons of bottled lemon juice to acidify the sauce in order to can it safely in a hot water bath canner. (In canning recipes, bottled lemon juice is specified over fresh because the bottled type has an exact pH which is known and thus the correct amount needed to acidify a recipe exactly can be ascertained.)
Then I packed it into hot jars, put on the lids and processed them in a boiling water bath for twenty minutes.
While it was processing, I took a taste of the applesauce, and shivered. It was that good–flowery and fruity, with the best qualities of both apples and blueberries, with a perfect balance between tart and sweet. The spices were subtle, but definitely present, and they took the sauce over the top into splendid. It will taste great in Kat’s oatmeal, for certain, but it is also something that I see the rest of us eating too. I can see putting it over good vanilla ice cream, or serving it with braised pork or roasted venison. Or using it as a tart filling or a spread on bread. Or just plain old eating it.
It is so good that I am buying more apples and blueberries tomorrow in order to make more of it in the coming week, in addition to a batch of plain spiced applesauce and a cherry applesauce.(Yes, I will post the recipes as I make them.)
Spiced Blueberry Applesauce
Ingredients:
2 pounds frozen or fresh blueberries
5 pounds sliced cored apples {weigh them -after- peeling, coring and slicing and use several varieties for best flavor)
1 cup raw sugar or plain sugar
1 teaspoon ground ginger
1/2 teaspoon ground cardamom
1/4 teaspoon ground allspice
3 tablespoons bottled lemon juice
Method:
Place the apples and blueberries into a heavy bottomed pot large enough to hold all the ingredients and allow room for stirring. Add just enough water to cover the bottom of the pot–about 1/2 inch of water on the bottom or so.
Put the pot onto high heat and stirring constantly, bring to a boil. Turn heat down to medium, and stirring continually, cook until the apples are all soft and some are beginning to break down, thickening the released fruit juices. Stir in the sugar and spices and keep cooking until the sugar is well combined. Turn off the heat, but keep the pot on the stove in order to keep the applesauce hot.
Using an immersion blender, a food processor or food mill, grind the fruit up into a slightly chunky puree–or, if you wish, grind it down to a perfectly smooth puree.
Stir in the lemon juice thoroughly, then pack into hot pint or quart jars. Try to get any visible air bubbles out with a spatula; this is very difficult with very thick foods like applesauce, but try anyway. Wipe off the rim of the jar with a damp cloth, then center a lid on top and screw on a band. Do not tighten the band–just screw it down until it is closed, but not at all difficult to unscrew.
Put into a hot water bath canner, making certain that water covers the jars completely. Bring to a boil, clap the lids on top of the canner and process the jars for 20 minutes–the processing time is the same for either pints or quarts.
When they have processed for twenty minutes, turn off the heat and open the lid to the canner. Allow the jars to sit in the hot water for five minutes, then carefully lift up each jar and set it on a folded dishtowel in order to keep the counter from possibly cooling the glass too rapidly, causing the jar to crack.
Check the seals on the lids–they should be concave and very tightly adhered to the jar rim. If after 24 hours the lids have not sealed, either use up the food that did not seal, or re-pack using new jars and new lids.
Recipe makes eight pints or four quarts.

Categories:
- Admin (rss) (55)
- Blogs and Blogging (rss) (81)
- Book Reviews: Cookbooks (rss) (43)
- Book Reviews: Non-Cookbook Food Books (rss) (38)
- Cats and Cat Blogging (rss) (47)
- Chinese Cooking Lessons (rss) (32)
- Culinary School Stories (rss) (18)
- Dairy Pruducts: Cultured and Barbaric (rss) (4)
- Documentary Filmmaking (rss) (1)
- Essays, Rants and Reflections (rss) (260)
- Fighting Hunger (rss) (12)
- Food and Kids (rss) (45)
- Food in the News (rss) (126)
- Food Media (rss) (98)
- Food Preservation (rss) (18)
- Food Safety (rss) (45)
- Gardening (rss) (30)
- Herbs and Herb Blogging (rss) (20)
- Holidays (rss) (50)
- Kat Blogging (rss) (22)
- Kitchen Science (rss) (36)
- Leftover Makeover (rss) (8)
- Life, the Universe and Everything (rss) (131)
- Local and Sustainable (rss) (227)
- Local Athens Food and Foodies (rss) (42)
- Meatless Mondays (rss) (32)
- Menu For Hope (rss) (5)
- Nutrition, Diet and Health (rss) (84)
- On The Farm (rss) (8)
- Recipes: Almost Vegetarian, Vegetarian and Vegan (rss) (294)
- Recipes: American Regional (rss) (37)
- Recipes: Appalachian Hillbilly (rss) (33)
- Recipes: Bread, Pasta, Grains (rss) (95)
- Recipes: Canning and Preserving (rss) (8)
- Recipes: Chinese (rss) (123)
- Recipes: Comfort Food (rss) (120)
- Recipes: Cookies (rss) (16)
- Recipes: Desserts (rss) (48)
- Recipes: French (rss) (25)
- Recipes: Fruits and Vegetables (rss) (302)
- Recipes: Greek, North African and Middle Eastern (rss) (31)
- Recipes: Indian (rss) (137)
- Recipes: Italian (rss) (42)
- Recipes: Japanese (rss) (7)
- Recipes: Jewish (rss) (4)
- Recipes: Korean (rss) (6)
- Recipes: Meat, Poultry and Fish (rss) (220)
- Recipes: Mexican/Native American/ Latin American/Caribb (rss) (27)
- Recipes: Original (rss) (108)
- Recipes: Thai (rss) (27)
- Recipes: Tofu (rss) (17)
- Recipes: US Regional (rss) (16)
- Recipes: Vietnamese (rss) (8)
- Restaurant Stories (rss) (28)
- Sewing, Quilting, Arts and Crafts (rss) (16)
- Simple Chinese Recipes (rss) (30)
- Slow Food and Heritage Foods (rss) (10)
- Spice Blogging (rss) (44)
- The Chinese Cookbook Project (rss) (14)
- The Chinese Pantry (rss) (39)
- The Documentary (rss) (2)
- The Kitchen Saga (rss) (17)
- The Locavore's Bookshelf (rss) (15)
- The Unsung Adventures of The Culinary Nerd (rss) (6)
- Tools and Toys (rss) (35)
- Uncategorized (rss) (10)
- With a Side of Politics (rss) (48)
Archives:
- August 2012 (9)
- July 2012 (12)
- September 2011 (3)
- August 2011 (7)
- July 2011 (8)
- June 2011 (16)
- May 2011 (17)
- April 2011 (11)
- December 2010 (9)
- November 2010 (5)
- February 2010 (1)
- December 2009 (5)
- November 2009 (7)
- October 2009 (10)
- September 2009 (16)
- August 2009 (14)
- July 2009 (14)
- June 2009 (7)
- May 2009 (17)
- April 2009 (10)
- March 2009 (25)
- February 2009 (13)
- January 2009 (10)
- December 2008 (5)
- November 2008 (5)
- October 2008 (6)
- September 2008 (13)
- August 2008 (8)
- July 2008 (11)
- June 2008 (18)
- May 2008 (13)
- April 2008 (14)
- March 2008 (16)
- February 2008 (17)
- January 2008 (19)
- December 2007 (25)
- November 2007 (18)
- October 2007 (24)
- September 2007 (16)
- August 2007 (15)
- July 2007 (15)
- June 2007 (10)
- May 2007 (14)
- April 2007 (16)
- March 2007 (17)
- February 2007 (20)
- January 2007 (13)
- November 2006 (1)
- October 2006 (8)
- September 2006 (14)
- August 2006 (25)
- July 2006 (30)
- June 2006 (28)
- May 2006 (34)
- April 2006 (29)
- March 2006 (24)
- February 2006 (30)
- January 2006 (38)
- December 2005 (40)
- November 2005 (37)
- October 2005 (32)
- September 2005 (25)
- August 2005 (30)
- July 2005 (28)
- June 2005 (21)
- May 2005 (8)
- April 2005 (22)
- March 2005 (17)
- February 2005 (29)
- January 2005 (10)
Search Site:
Links:
- Lily’s Wai Sek Hong
- 101 Cookbooks
- A cat in the kitchen
- A Veggie Venture
- Accidental Hedonist
- Cha Xiu Bao
- chez pim
- Chocolate & Zucchini
- Chopstick Cinema
- Chowhound.com
- Chubby Hubby
- Cook sister!
- Cooking with Amy
- da*xiang
- Eat Local Challenge
- Eating Liberally
- Ecocentric
- Eggbeater
- Epicurious
- Farmgirl Fare
- Fatfree Vegan
- Foodgoat
- ForkandBottle.com
- Green Olive Tree
- Hooked on Heat
- Jaden’s Steamy Kitchen
- Kalyn’s Kitchen
- Lucullian delights
- Mahanandi
- Matt Bites
- MeatHenge
- mmm-yoso!!!
- New York Times – Dining & Wine
- Pizza Goon
- Rasa Malaysia
- Ruhlman
- Sailu's Kitchen
- Serious Eats
- SF Gate: Food & Dining
- Simply Recipes
- Soul Fusion Kitchen
- Tastespotting
- The Amateur Gourmet
- The Cleaner Plate Club
- The Food Section
- The Grub Report
- thecookscottage
- U.S. Food Policy
- Wandering Chopsticks
- Washington Post Food and Dining
- Wasted Food
Meta:

Powered by WordPress. Graphics by Zak Kramer.
Design update by Daniel Trout.
Entries and comments feeds.