Cook Local, Eat Global
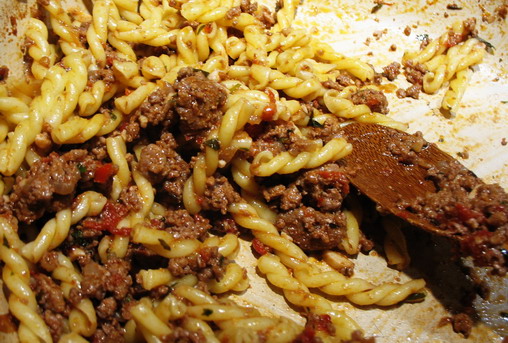
Stir-Fried Chicken with Gai Lan and Oyster Sauce
Morganna has been mourning the loss of stir fried suppers as I have been making foods for the freezer.
The truth is that as my pregnancy has progressed, the naturally occurring carpal tunnel issues in my right hand have been exascerbated by the extra fluid retention that comes with the other joys of the third trimester. As a result, I’ve lost feeling in my right hand, and this has made me very, very clumsy, very slow and my grip is weaker than it usually is. This means that I am just not comfortable doing as much precise cutting as is required for stir-frying as I normally am.
So, Morganna and I made a deal. If she wants a stir fry for dinner, she will do the majority of the cutting prep for it, and I will do the cooking.
This worked out admirably well on Friday when we picked up some gai lan and pressed dry tofu at the Asian market.
Gai lan is one of my favorite Asian greens. Also known as Chinese broccoli, it is indeed a member of the brassica family, but it is much sweeter than broccoli. It has thin to thick stalks, lots of sweet leaves and a few loose blossom heads that have either white or yellow flowers when they are fully matured.
A classical Cantonese dish is Beef with Gai Lan and Oyster Sauce, which is probably where the idea for the Chinese-American restaurant favorite, Beef with Broccoli came from. I much prefer the original Cantonese version, whether dressed up or down, whether it includes fermented black beans or not, to the restaurant version with American broccoli, but as I am still not really eating beef, I decided to make the dish with chicken.
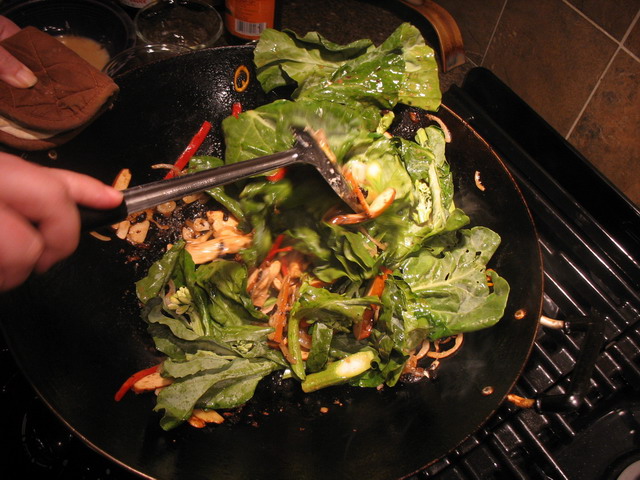
Since I only had a small chicken breast, I added a bit of pressed dry tofu to stretch the protein further, and to do make up for the fact that I am not always even able to stomach chicken these days. Many restaurants when they serve Beef with Gai Lan and Oyster Sauce, also include a sweet vegetable in a contrasting color to compliment the flavors of the meat and greens; since I had some ripe red Hungarian Hot Wax peppers, I used one of them, since they are not really that hot. They looked very pretty with the pale chicken, medium-toned tofu and brilliant emerald gai lan.
One could substitute carrots or fresh water chestnuts or jicama for the pepper, or use a yellow, orange or red sweet bell pepper. Any of these vegetables would provide a contrast in crunch, color and sweetness to the deep green gai lan.
For seasoning, I used a little bit of fermented black beans, some ginger, garlic, onions, and a very mild chile pepper, just to give a little lift to the dish. I used a little less oyster sauce than one would use in the beef dish, taking into account the milder flavor of the chicken, and I only used the thin soy sauce, eschewing the dark version. I also added about a teaspoon of raw sugar to the dish to bring out the native sweetness in the vegetables and to enhance the flavor of the chicken.
Overall, it turned out quite well, and although Morganna said she preferred the beef version, she could see that an all chicken or all tofu version would be excellent as well. (I like the combination of flavors and textures that comes from mixing the pressed tofu and the chicken, myself.)
Though, she admits she cannot wait for Kat to be born so we can go back to beef-based stir fries now and again, as well as grilled or pan seared steaks!
For an in-depth breakdown, with photographs of my stir-frying technique for chicken, please see Ten Steps to Better Chicken From a Wok. This will give more information to make this recipe even more successful for anyone who is a novice to stir frying.
Chicken with Gai Lan and Oyster Sauce
Ingredients:
1 boneless skinless chicken breast, cut into slices 1″ X1/4″X1/4″
2 tablespoons Shao Hsing wine
1 teaspoon oyster sauce
1 teaspoon light soy sauce
2 1/2 tablespoons cornstarch
4 tablespoons peanut oil
1 medium onion, sliced thinly
1 tablespoon fermented black beans
3 cloves garlic, peeled and sliced thinly
3/4″ cube fresh ginger, peeled and thinly sliced
1 small medium-hot chile, thinly sliced on the diagonal
4 ounces spiced dry tofu, cut into thin slices
1 teaspoon raw sugar
1 tablespoon light soy sauce
1 red Hungarian Wax hot pepper, julienned
1 pound gai lan, large stems trimmed, small stems and leaves cut into 2″ pieces and strips
3 tablespoons chicken broth
2 tablespoons oyster sauce
1/4 teaspoon sesame oil
Method:
Mix together chicken with next four ingredients and allow to marinate for at least twenty minutes, while you prepare other ingredients.
Heat wok until it smokes, and add peanut oil. When oil is hot, add onions and black beans and stir fry for about two minutes, or until the onions are golden and fragrant. Add garlic, ginger and chile, and stir fry thirty seconds more.
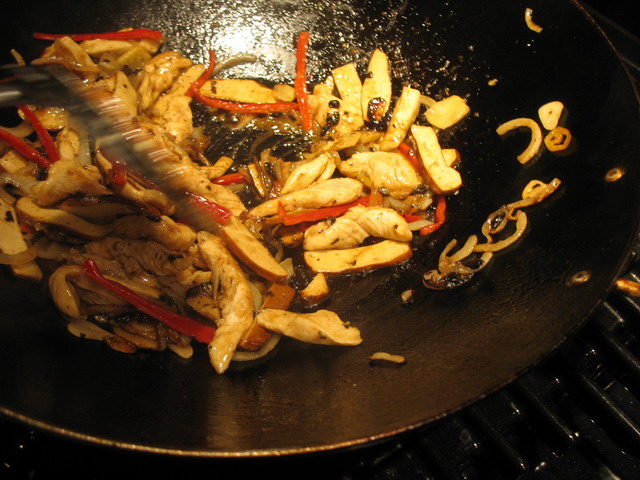
Scrape aromatics up the walls of the wok, and add chicken into a single layer on the bottom of the wok. If there is liquid marinade left in the bowl, reserve it–do not add it at this time! Sprinkle the tofu over the chicken, and then the sugar over the tofu. Allow the chicken slices to sit, and cook undisturbed, until they begin to brown on the bottom, and the edges of the chicken are starting to turn white on the top side. Begin stir frying–and stir fry until half the chicken pieces are white and brown and half are still pink.
Deglaze wok with soy sauce, scraping up any browned bits of marinade clinging to the wok sides and bottom. Add Hungarian wax pepper, and stir fry another minute, until most of the chicken is done, and there are only little traces of pink left. If there was leftover marinade, add it at this time.
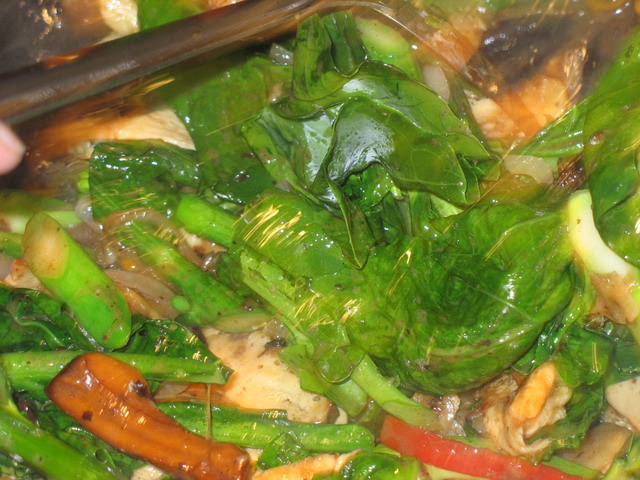
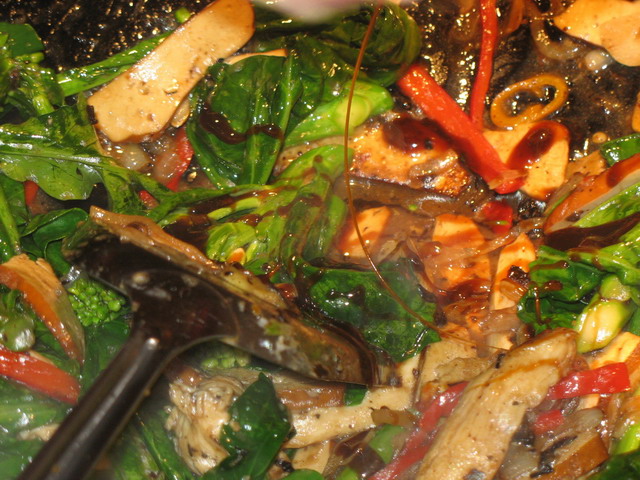
Add gai lan and chicken broth, and stir fry, scooping the hot chicken over the gai lan, and getting the gai lan onto the hot surface of the wok. As soon as gai lan begins to wilt, add oyster sauce and continue stir frying until all pink is gone from the chicken, the gai lan is properly wilted–the stems should be crisp, and the leaves velvety and half-wilted without being slimy and fully wilted.
Take wok off heat, drizzle in sesame oil, stir a couple times more and scoop into a heated serving dish, and serve with steamed rice or boiled noodles.
Meme: Five Things To Eat Before You Die–The Field and Stream Edition
Lucette of Cooking Vintage tapped me with the magic meme twanger for the meme that is travelling across the food blogosphere: “Five Things To Eat Before You Die.”
Lots of folks have answered with some beautiful, unusual and local (to them) foods that are truly inspiring.
But, I want to take a slightly different approach. I don’t want you to just eat something before you die–I want you to hunt, gather, kill, prepare and -then- eat it before you die. I want you to be fully engaged in the process of finding food in the wilderness and then consuming it.
In other words, I want you to try out eating like a hillbilly.
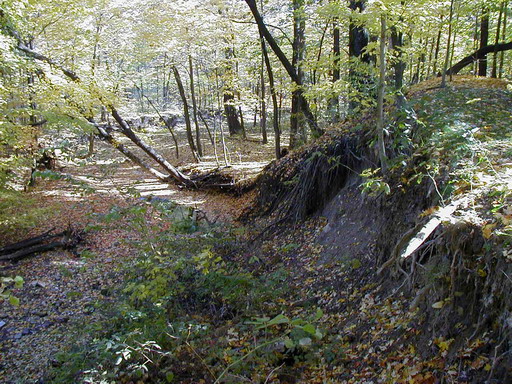
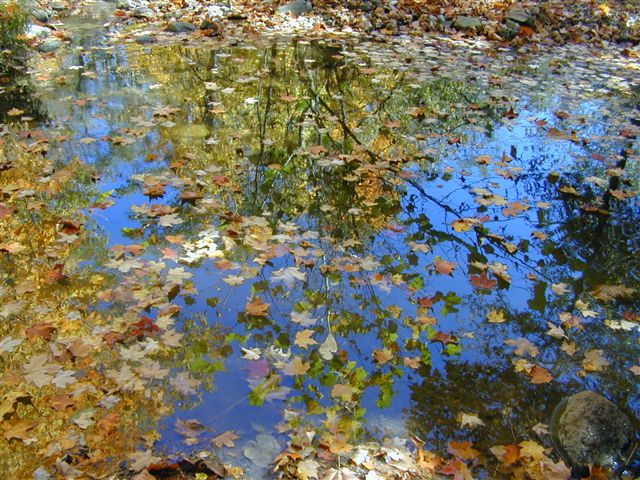
I want you (especially you city folks) to step out of your ordinary reality for a little while, and immerse yourselves into another world, a world that is precious to me, and which I miss living in the midst of. I want you to take a walk in the woods, not just once. Not just twice. Not just for vacation. But I want you to go out into the woods and observe, silently, and see, really see–with all of your senses–what is there. If you are silent enough for long enough, you will discover, as I did as a child, that you can -become- part of the woods, and miracles large and small will make themselves manifest around you.
You will be able to see the dance of water-walker bugs on the surface of a stream. They wheel and turn and spin, pirouetting like ice-skater, until with a silvery flash from below, a brook trout emerges from her hiding place beneath a stone, and sucks one down her gaping mouth, then is gone in a shudder of iridescence.
Squirrels will cavort like mad aerialists above your head, their antics as they chase each other for sex, for territory for stolen food, for fun, amazing to behold. They are graceful in a completely wild way, in a way that we two-legged groundhugging folk cannot fathom, and I can remember many long afternoons watching them as I sat huddled in the shadow of a great oak tree, so quiet I had become invisible to them.
What five things do I suggest you hunt or gather from the woods?
Well, in truth, it is up to you. I suspect that if some of you watch animals in the forest going about their business long enough, you won’t -want- to catch and eat them. This never stopped me–I can, on the one hand, appreciate the lithe grace of a deer, and then turn around and enjoy the gustatory pleasures of a bowl of venison stew.
But, if I were to suggest five foods, all from the Appalachian woodlands, for you to hunt, gather, prepare and taste before you die, it would be these five seasonal delights–two from spring, two from summer and one from fall. (As for winter–winter is for resting, and reflecting. There isn’t much to harvest then–hopefully in winter, your harvest is already done and put by, and you are eatng from a full larder.)

Ramps: I’ve written a lot about these emerald beauties of the springtime forest. They are also known as wild garlic, wild leeks and ramsons, though most call them ramps. You can find them in farmer’s markets all through the Appalachian mountain region, but it is more fun to go gathering your own. They tend to like moist areas near creeks and springs, and they favor shady, deep humus with lots of leaf litter to grow in. There are very few plants that they look like–one, which is poisonous is a garden plant, and that is lily of the valley, but I will say this–it you confuse the two you have no sense of smell. Ramps -smell- strongly of garlic and onions. You cannot miss that odor.
Some people only cut the leaves, but I dig up the roots as well and use the whole plant. Just remember to be a good naturalist and not harvest entire clumps–leave some to grow new clumps for the years to come. Some woods, though, will teem with these lovelies–you will see them carpeting the forest floor. In cases like that, you still should harvest responsibly–leave parts of every clump to grow back.
They freeze well as chopped up roots and leaves, as ramp butter or as ramp pesto.
Morel Mushrooms: I am not a lucky mushroom hunter, but that doesn’t mean you shouldn’t try. I have harvested shaggy inkcaps (I have photos of these, too, but cannot find the pictures–of course!) and young puffballs from my woods, but I have never found morels. I -know- that they are out there–because I have eaten them at friends’ homes. But they are hard to find. (My suggestion when it comes to mushroom hunting is for you to go out with an experienced ‘shroomer who knows what is edible and what is not. Take a guidebook, too, and when in doubt, don’t eat it!)
Hard to find or not, they are well worth the searching if you -can- find them. They are delicious, rich, and full of the earthy scent of the early spring woodlands. They like to grow under oak trees and pines, and they blend perfectly into the leaf litter, so they are really hard to find. (Inkcaps and puffballs are simpler–they grow in grassy swards and meadows.) Again, leave some to reproduce, and mark the spot in your memory and return next year–if you find a good morel place, you have a treasure for years to come.
Wild Blackberries: These grow all over the place in Appalachia–and in summers where there is adequate rain and sun, they yield heavily. Their flavor is, to my taste, more complex than that of the larger, juicier domestic varieties which you find at the farmer’s markets, and besides, you get the fun of braving copperheads, thorns and mosquitos to pick these yourself!
No, I have never been bitten by a snake while picking berries, but I have -seen- them lurking under stands of blackberry brambles. They are waiting for unwary birds, I suspect, but if you take a long stick or a hoe with you berry picking, you can beat the bushes and scare the snakes off before they scare you. There are no poisonous look-alikes to blackberries, wild raspberries, dewberries or any of the other summer bramblefruits, so pick gleefully. These tend to be found in liminal areas,at the edge of woods near old fields, meadows, on creekbanks, and on fairly open slopes of mountains and hills. On a good year, you can go out and pick five gallon buckets of them in a few hours, and still have eaten enough of them fresh from the vine to stain your lips and tongue purple.
They make the best pies and jellies in the world.
Trout: Well, I suppose if I can’t get you to shoot a wild turkey, a squirrel, a deer, a boar or a rabbit, I can probably get even the most citified of you to catch a fish. And there is no fish sweeter than a troat from a coldwater mountain stream. Doesn’t matter if I am talking about rainbow trout, brook trout or brown trout–they all have the sweetest flesh you can imagine. This was my most favored food growing up, and I didn’t care how it was cooked. Fried in cornmeal with a bit of bacon grease was beautiful, but so was broiled in butter with just salt and pepper and parsley for seasoning.
Trout fishing takes some skill and I haven’t been out to do it in years, but the results are so magnificent. Besides, it isn’t like I am saying you need to wade into the ice cold water barefoot and tickle trout and catch them with your bare hands like the Native Americans and the mountain men did! Even I, who can catch bass and bluegill with a net, can’t do that, though I have known a dog good enough to catch fish with his bare paws.
Black Walnuts: These native American nuts are treasures of the autumn woodlands. Both sweeter and muskier than the more common English walnuts you find at the store, they are rich and buttery in texture, with a pronounced, lingering scent.
They make you work for theier goodness, however, which is the case with most wild-foraged or hunted foods. They come wrapped in leathery green casings that mature to black; these fruits are filled with a compound which will stain your hands brown or black if you gather and work with walnuts without wearing gloves. This covering, which was used to Native Americans and settlers to make clothing dye, ink and stains for hides and wood, needs to be removed after you gather the nuts.
How do you gather them? Well, you find them on the ground, most often, in these often smushed or broken leathery black spheres. Watch for a lot of squirrel activity–they love these nuts as much as you will. Black walnut trees tend to be hugely tall, so climbing up and shaking the nuts down or beating the branches with sticks is not a good choice for getting more to fall. We just kept an eye on our trees and gathered affter most of the nuts had naturally fallen, usually in late October or early Novemeber.
After you peel off the outer covering, you leave the nuts themselves to dry for a week or so, depending on the weather. Once they are dried out, it is time to deal with the thick, rock-hard shells, which necessitate the use of a hammer and sometimes a chisel to get through.
We used to lay a tarp down on the concrete floor of the barn, and spread the nuts out in a pile in the center. Then, we’d all take our hammers, chisels and nutpicks, and grab a nut, and leave it laying on the tarp-covered concrete, and give it a mighty thwap. Sometimes this broke the nut, and sometimes it didn’t. If three thwaps didn’t do it, we’d pin it against the concrete with a chisel, and give it a good tap with the hammer, and that usually split it.
Then, we’d dig the nutmeats out with picks and our fingers, and toss them, sans sharp shell bits, into bowls Grandma had set out to collect them.
She always froze the nuts, and each year we gathered enough to keep us in nutbreads, nutcakes and cookies for the rest of the year.
Was all of the work worth it?
Yes.
Working for your supper makes it have more meaning. It connects you intimately with the natural world, much more so than just running out to the grocery store and picking something up does. I am not suggesting that everyone has to “go back to the land” and live like our pioneer ancestors did–far from it. I honestly don’t think that such a life would suit very many people anymore. But, what I would like to see, is more people trying out this life–even if it is for only one meal–and seeing what it is like.
I guess I just know how much being able to wander the woods, fields and streams of Appalachia have meant to me in my life, and I would like to see more people experience that viscerally, by not only walking in the woods, but tasting them, also.
So there we have it–Barbara’s Field and Stream Edition of the Five Foods To Eat Before You Die Meme.
Thanks for tapping me Lucette–I hope you enjoyed my answers as much as I enjoyed writing them!
Note: All of the photographs in this post came from our woods that came with our house in Pataskala. I did a good bit of foraging from them–ramps, mushrooms, blackberries, violets, wild greens and black walnuts, mainly.I don’t much miss that house–it was pretty, but this house is much more “us;” but I do miss my rambles in the woods, and my huge garden.
Christmas (Limas) in September (And a Rumination on Chowder)

One of the best things about the farmer’s market here in Athens is the fact that the folks here often grow unique varities of vegetables that you just don’t find in most markets, even farmer’s markets, elsewhere.
For example, look at those lovely beans above. Are they not just the prettiest things? Don’t they look lovely in their batiked burgundy and white coats? Don’t they just make you want to grab them up and figure out a way to cook them?
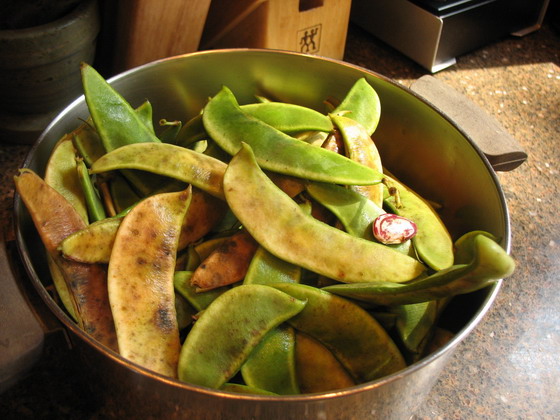
This is what they looked like at the market–not nearly so pretty, but I got a glimpse of the one shelled bean, enough to see what it was.
“Are those Christmas limas?” I asked the farmers, who incidentally, were the same older couple from whom I bought the horticultural beans a few weeks back, and from whom I have been buying pounds of Kennebec potatoes for the past several weeks. (Look for a post waxing rhapsodic about Kennebecs in the future–it was my Grandpa’s favorite potato to grow, along with Irish Cobblers, and I love the flavor of them.)
The little lady’s grey eyes lit up and she smiled. “Oh, you know your beans,” she said. “Yes, indeed, and if you liked those horticultural beans, you’ll love these. They taste like chestnuts.” She winked to me. “Did you put ham in those horticultural beans?”
“Of course,” I said. “Ham, onions, garlic, sage, rosemary, some wine and then when they were done, I tossed pasta with them.”
Her grin grew. “Allright then! That sounds right good. You treat these beans the same and you’ll love them, I promise. These’re an old type of lima, not many people grow it, but they should, because it is just beautiful on the plant, in the pot and on the table.”
I told her I’d take a basket, and she dumped it into a bag, then dug around in her bucket of backstock Christmas Limas, and put about four more handsful in the bag. (This is what happens when you make friends with your farmers. You get extra, what the Cajuns call langinappe. This is something that will never happen in a grocery store, no matter how friendly you are to your clerks.) As she packed up the beans and her husband packed up my ten pounds of potatoes, she said, “We dried the rest of those horticulturals for winter–would you be interested if we bring them to market?”
How could I say no?
The answer is I couldn’t, so I assured her I would buy both the horticultural beans and the Christmas limas dried, especially if the limas tasted as wonderful as I heard.
Christmas limas are indeed an old variety, most popular in the 19th century, and according to Slow Food USA, is a member of the “Ark of Taste” a group of plant and animal varieties which are in need of being saved from extinction. A native of Peru (as all lima beans are), the Christmas lima is used both fresh, and dried. The plump, quarter-sized beans come 2-4 in a pod and when cooked, have the dry fluffy texture of a baked potato and the nutty, sweet flavor of chestnuts. (One should never eat lima beans raw–they are somewhat toxic until cooked.)

I ended up shelling only about a third of the beans last night; I had a craving for corn chowder, thanks to Elise’s wonderful post about it on Simply Recipes from a few days ago. Crab and corn chowder became a staple of my summer cooking when we lived in Maryland; here in Ohio where blue crab is thin on the ground, I decided that I would use the chicken stock I had just made and some of the chicken I had recovered from the bones. Reading that Christmas limas were good in succotash, a Native American mixture of beans and corn, I had the idea of adding them to the chowder, along with my usual Southwestern style flavorings of roasted sweet red peppers, chiles both dried and fresh, cumin, coriander and cilantro.
A few words about chowder: often, I have been asked, what makes a chowder? Is it a seafood soup? Does it have to have milk? Can it have tomatoes? Which is more authentic–Boston or Manhattan clam chowder?
According to Jasper White, one of the great chefs of the Northeast, what makes a chowder a chowder is potatoes. Not fish, not clams, not milk, not thickening them with dry crackers. Potatoes.
However, it is also generally accepted that chowder evolved from the fish and clam soups cooked by the Native Americans of the northeast, particularly the Narragannsett (who, by the way, gave us the term “succotash,” from their word, “misukwatash”), which the Indians cooked in hollowed wooden vessels by adding hot stones to the water and ingredients therein.
The English word, “chowder,” is believed to have come from the French term, “chaudier,” which is the name of the iron cookpots or cauldrons of the time period which were used to cook these fish, seafood and potato soups. The root of “chaudier” is “chaud,” which means, “hot.”
Whatever the etymology and derivation of the term, “chowder,” these days, it means a tasty soup, usually with potatoes, often with seafood or fish, very often with cream or milk, and is generally considered native to the Northeastern United States.
This version is native to Barbara’s house, which is no longer in the Northeast, but is in Appalachian Ohio, however, the flavors it sports are more Southwestern than hillbilly. Make of this what you will–but do know that this is a very filling, nourishing soup, filled with intense flavors.
I first started making corn chowder when we lived in Maryland. I had bought my first batch of tetraploid “supersweet” fresh corn, and found it to be insipidly sugary-sweet when eaten off the cob. But, I had the rest of the dozen ears left and I didn’t want to waste it. So, I combined it with bacon, crabmeat, new red potatoes, roasted red bell peppers and chiles, then enriched the soup with a bit of milk and creamn and called it crab and corn chowder.
It was a hit.
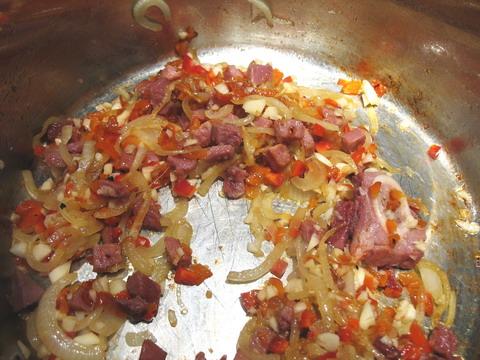
This version is even more substantial, since I used a bit of ham and a hambone to flavor the broth, and I added the very filling Christmas limas to the mixture, along with the chicken and the corn. With a killer fresh salad and some whole wheat bread from the bakery down the road, it made a lovely late summer meal. The leftovers have been duly stashed in the freezer to reappear for lunch or supper sometime after Kat’s birth, when we are having the quandry of what to have for dinner when Mom has no time to cook.
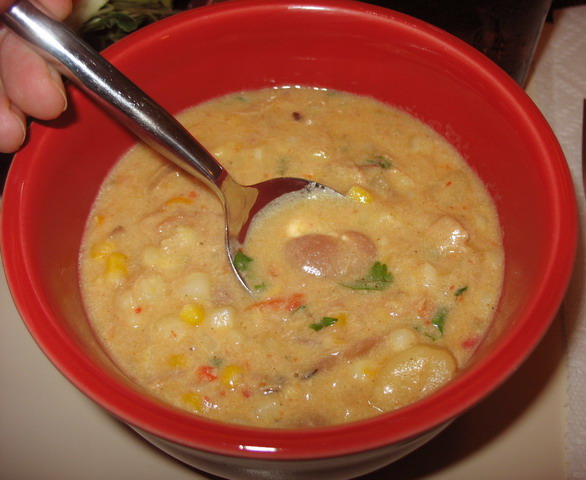
As you can see from the photograph below, Christmas limas (which I suspect are named for the fact that their skins are red and white and the interior is green), keep much of their skin color after they cook. They cook up to an attractive wine-stained blush, which looks well in the chowder.
Chicken, Corn and Christmas Lima Chowder
Ingredients:
3 tablespoons olive oil (or bacon grease, or butter)
1 large onion, thinly sliced
1 ounce ham, cut into very small dice
1 ham bone (optional)
1/2 teaspoon celery seeds
1 red bell pepper
1 ripe jalapeno, seeded and finely diced
1 head garlic, peeled and minced
1 teaspoon ground cumin
1/2 teaspoon ancho chile powder
1/2 teaspoon ground chipotle chile powder
2 quarts chicken stock
1 cup fresh Christmas (or plain) lima beans, shelled–see note below
1 cup cooked, deboned chicken, shredded
2 cups (two medium) potatoes, well scrubbed and cut into a medium dice
water as needed
8 ears of sweet corn, cut from the cob–yellow corn or a mixture of yellow and white are preferable, simply because it adds color
1 cup milk
2 tablespoons roux made from 1 tablespoon flour and 1 tablespoon butter, melted and cooked together over medium heat for three minutes
1/2 cup heavy cream
salt and pepper to taste
1 cup minced cilantro
Method:
Heat olive oil or the fat of your choice up in a heavy-bottomed dutch oven or soup pot over medium low heat. Add onions, and cook, stirring, until they become transluscent. Add ham and ham bone, and continue cooking until ham browns and onions turn golden brown.
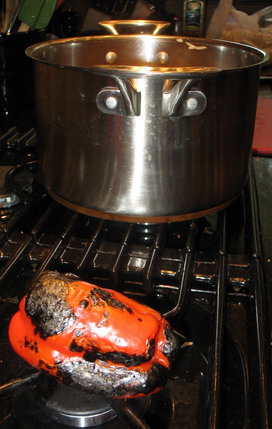
Meanwhile over a gas burner, cook a washed red bell pepper, until the skin is completely charred and blackened, turning now and then as needed. When it is completely black, put into a bowl and cover tightly with plastic wrap and allow to steam until cool enough to handle. Peel off the skin with your fingers, and discard. Remove seeds, and any white ribs of placental material inside the fruit, then cut into a very small dice.
Add roasted red pepper to the pot, along with chiles, garlic and spices. Cook, stirring, until fragrant–about two minutes. Add chicken stock or broth, and the lima beans and chicken, and cover, turning heat down to low. Simmer for one hour, stirring as needed.
Add potatos, and if needed, water to just cover potatoes. Allow to cook until potatoes are soft, and most of the liquid has boiled down–it should be reduced to 1/3 of its original volume. Add corn and milk, and bring back to a boil. Add roux, and cook stirring, until it thickens.
Add cream, salt and pepper and cilantro.
Serve immediately.
Note:
Shelling lima beans is hard; the pods are very tough and strong. When we froze limas in huge quantities and had to shell bushels of them in a day, we always used penknives to cut the end of a pod off, then pull off the string between our thumb and the side of the knife blade. We cut off both ends, did the strings, and then pried the pods open, and then would scrape the limas from the pod with the other thumb. It is hard work, and it tires both hands, particularly the thumbs. But, it is well worth it, for the beans look and taste fabulous afterwards.
Making Stock: The Good, The Bad, and The Ugly
Warning!
This post contains photographs of a graphic nature. If you are too squeamish to want to look at where your food comes from, if you cannot abide meat that looks like it came from an animal, then stop reading, move along and don’t look any further, because some of these photographs depict in graphic detail, various body parts of chickens, and the sight is not pretty.
Cue the Ennio Morricone soundtrack.
You know the one I mean.
Because I have an epic tale to tell. One that is almost (but not quite) as epic as one of Sergio Leone’s classic films.
The tale of making chicken stock, and it is a tale that is full of the good.
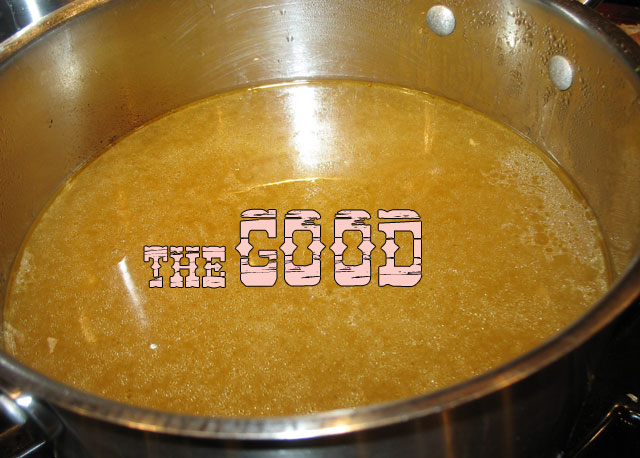
Yes, as you can see, the results are good, beautiful and pure: rich, golden, fat-flecked, full-bodied stock that is nothing more or less than the essence of chicken brought forth from the most humble of origins into glory.
But this tale is not all love and beauty, sweetness and light. There is a villain in this tale, which is right and proper, because all the best stories cry out for an antogonist. So, here, also, I will tell you of the bad.

Observe the low criminal forhead and shifting, beady eyes. This cat is up to no good, and in fact, in his self-serving quest for tidbits of chicken, he nearly caused countless kitchen disasters as Morganna and I labored mightily to bring forth the wonderous and nourishing chicken stock.
Ah, but yes, even though there is a villain, he is not the source of all of the ugliness in our story. Oh, no. For, indeed, chicken stock, though it does turn out to be clear, golden and pure, comes from a source which is not only humble but distinctly unattractive. In fact, for some people, the stuff from whence good chicken stock is made is a source of horror and disgust, and they turn their heads away and deny the truth of the viscerally ugly parts of life.
But not me. I am here to tell you all about the ugly, too.
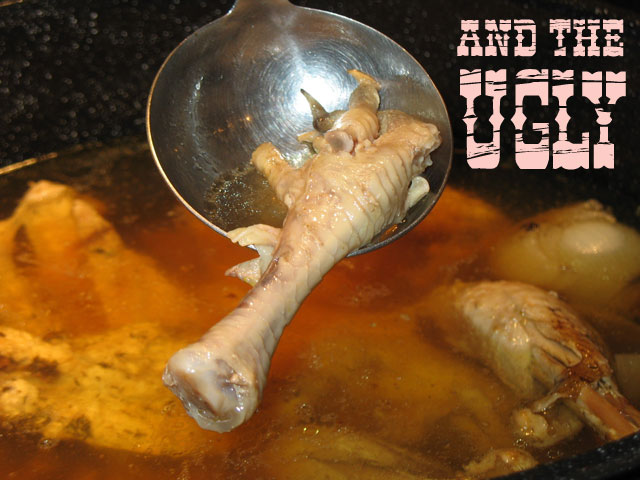
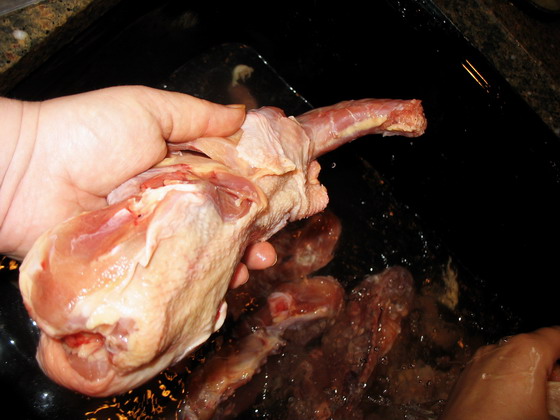
Yes, that photograph does indeed contain what it looks like it contains: a severed chicken foot, after it has been simmered for eleven hours in a pot mixed with many others of its fellows, as well as numerous backs, necks, and an entire poultry charnel house worth of bones, which have been collecting in my freezer over the past year.
But I get ahead of myself.
You see, Saturday, I decided I needed to clean out my freezers, and use up what I could so that I could then turn around and fill said freezers with food I had prepared with an eye toward having plenty of Barbara-made (not government issue) MREs for my personal troops while I recovered from giving birth to Kat.
So, I did just that. Okay, in truth, I cleaned them out Friday afternoon and stuck the resulting concatenation of chicken bones, backs, necks, feet and whole chicken carcasses in my upstairs refrigerator to thaw overnight so that I could do the magical ritual the next morning that turns that whole mess of flesh, blood and bone into a liquid so pure and well-flavored it is like drinking a healing cup of sunlight.
In telling you this tale, I am also writing down instructions on how to go about making French-style white chicken stock in your own home. I hesitate to call this a recipe, because no amounts for the ingredients are given. It all depends on how many chicken bones you have collected and how long you want to simmer them. But, I do guarantee that if you follow these directions, you will make a fine pot of chicken stock which you can then freeze and hoard like gold in your kitchen, or use it profligately until it is spent, kissing all of your cookery with the distinctive essence of our most beloved barnyard fowl.
Chicken Stock: The Fundamentals
Stock comes from bones.
Meat gives it flavor and depth, so it is wise to leave some of it on the bones that you use, but the true essential qualities of stock–its fragrance, richness, and its body–not to mention its healing properties–come from bones. Actually, it comes from the marrow of the bones, which is the spongey matter inside the hard calcified matrix of the bones, from which arises blood and bone cells, and from the connective tissues that hold the bones together.
It comes from all of those ugly but necessary things that reside within animals and our bodies that we never think of–our skeleton. The fluid of life comes from what is, in our culture, the symbol of death, because of course, in normal circumstances, we do not see bones on living persons or creatures. We only see them after death. Until then, they lay hidden deep within us, giving our bodies structure and strength, giving us the ability to walk upright and not fall into puddles of undifferentiated flesh.
To make stock, one must set aside squeamishness and fear. One must learn to look critically at the various body parts of chickens most Americans do not really think about or gaze upon, and one must handle them. Like touch them, and stuff. And one must do this without remorse–for indeed, the chickens involved are certainly no longer using them! But, if one is without remorse, one should handle the bones of chickens with respect and understanding that they did indeed give their lives so that we could eat and enjoy them.
I see the frugal nature of making stock–which is essentially taking what many people consider to be a waste product–to be a highly respectful action toward the chicken–because I am putting to use that which would otherwise be buried in a landfill, or worse, ground up and fed to some other animal who is not necessarily a carnivore.
So, the fundamental ingredient of chicken stock is chicken bones. Where does one get them? (Other than from dead chickens….)
Mine are all from local farmers, most specifically from two local Athens area farmers who raise free-range birds, some of them heritage breeds, for the local market.. I buy whole chickens and bone-in chicken parts all through the year, and when I am finished with the bones, I stick them in the freezer, cooked or not. One farmer with whom I am particularly close also gives me chicken backs, necks and feet–parts that he has the slaughterhouse throw away.
Chinese markets also will sell you chicken feet and necks (because Chinese folks know what goodness resides within those chicken parts and love to use them for soup as well as to eat), as will a reputable butcher. You might try asking at the regular grocery store, -if- they have a real meat department with real meat cutters and butchers on staff, but most of them won’t these days. But, if you live in a reasonable sized city, rest assured, you will be able to find some chicken feet and necks, and quite possibly some backs.
These normally wasted parts of a chicken make an already good chicken stock excellent, especially the feet.
Why the feet?

Well, because they are filled with a lot of connective tissue made of collagen and small, fragile bones filled with gelatin. These two ingredients give stock a quality of richness and body. When a stock made with plenty of chicken feet in it is cooled, it thickens into a gel–almost a consumee. When such a stock is hot, it has a feel on the tongue that is like velvet, and it makes superior soups, gravies and sauces, because as it reduces it thickens and that velvety mouthfeel intensifies along with the flavor.
Before using your bones, you should rinse them off and make sure they are good and clean, especially parts that are normally thrown away, like feet and backs. The slaughterhouse they came from may not be very assiduous in keeping such parts as clean as they might, so it behooves you to give them a nice going over under cold running water. Trim away excessive bits of fat, but not all of it–fat is where flavor resides after all–and remove excessive hunks of skin, because it doesn’t really add much to the stock but excess fat. (If you have dogs, as I do, they appeciate a snack of skin and fat.)
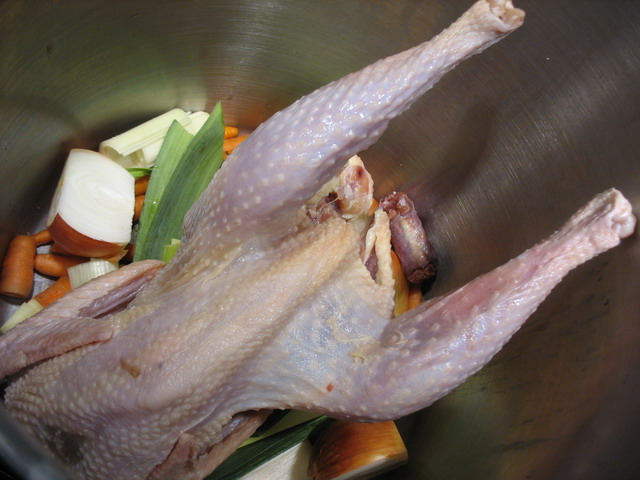
Then, you toss your bones in the pot atop a layer of vegetables, and perhaps the body of a whole chicken that you are cooking along with the stock for extra flavor, and so you can have some good chicken soup, or pot pie, or chicken and noodles for dinner after all is said and done. (If you use a whole chicken, do not add the giblets–the gizzard, the liver and the heart. They make stocks bitter, so leave them out. Cook them separately, save them in the freezer or feed them to your dog or cat.)
What vegetables?
In the French tradition, one uses carrot, celery, onion and leeks, and sometimes, but not often, parsnips. One need not peel these vegetables, but one should scrub them heartily, and cut them into managable sizes to go with the side of your stockpot. (I have a 20 quart stockpot and a thirty quart canning pot, so I don’t do much more than cut leeks and onions in half and long carrots in half if I must.) I don’t use celery, but instead throw a tablespoon or so of celery seed into the pot, which gives the same flavor without me having to buy celery especially for stock. Since I strain my stock anyway, I needn’t worry about the seeds clouding it up and making little dirty looking flecks in the finished product.
Use yellow onions, and leave the skins on–wash them well in cold water first, of course, and cut off the root ends. But leave the skins on, for they give chicken stock that golden delicious color that it has. Do not be fooled by yellow-skinned hens–Tyson’s feeds their chickens calendula petals to color their skin and feet naturally yellow. (The things you find out in culinary school are amazing–and most of the good stuff comes as asides from the chefs and professors, like this bit about Tyson, chicken skin and flowers.) Otherwise, these parts would be pink or white. The calendula, also known as pot marigold, have a natural dye in them that colors the birds skins, and gives them appearance of being rich and fatty (chicken fat is naturally yellow.) They aren’t. Yellow skinned birds are no better than white skinned or the rare black skinned birds. They just are wearing cosmetics is all.
The fat of a chicken will color the stock gold, but yellow onion skins are a traditional addition to make the stock even more pretty. It does no harm, and in fact, makes the stock as pretty as you see in the first photograph of this post, so please, go ahead and leave the skins on.
If one uses leeks, as I did, one must cut them lengthwise in half, and cut them crosswise in half, and then separate out all of the layered bits of their flesh and soak them in a sink full of cold water, swishing them around to get all of the dirt and grit out. Lift them from the water, drain the sink, and repeat this process at least three times, always lifting the leek bits from the water, to allow the grit to fall to the bottom of the sink and go down the drain.
Parsnips add extra sweetness to the stock, which is why they are not classically used, unless one is making a specific soup from the stock, or one is making a regional variant on plain chicken stock. Treat them just like carrots, giving them a scrub, and throwing them in whole, or in halves.
The herbs one uses are thus: rosemary, bay leaf, thyme, parsley and sometimes sage. One usually ties them up in a bag of cheesecloth, along with about a teaspoon of whole peppercorns, before lowering them into the pot. This keeps herb bits from floating away and clouding up the stock, but if you take the time to strain your stock after it is cooked, one need not worry about tying up ones herbs in the first place. I prefer using fresh herbs, but dried ones will do.
I add salt right away to the stock, because it helps dissolve the flavoring elements into the liquid, and because I believe in seasoning from the beginning of a recipe. But, I add it with a judicious hand, knowing that the stock will simmer uncovered for a very long time and the flavors will concentrate as the liquid reduces, so I am careful not to just pour handsful of salt over the bones and chicken carcasses.
I also add a judicious amount of dry white wine at the beginning, pouring it over the bones. For this stock-making day, I used a full bottle of dry Riesling, split between the two pots.
After all of that is in the pot, one adds water.
Cold water.
Always start your stock with cold water, for several reasons.
One, it is more efficient to dissolve the gelatin in bones gradually with cold water slowly brought to a simmer. This extracts the full amount of the gelatin, whereas starting with hot tap water does not. Two, it results in a clearer stock, because heating the bones and flesh up gradually results in less of a release of fats, blood and other impurities (more about this later) into the liquid.Three, you are less likely to end up overheating your stock to a rolling boil, which you -must not- do, because it results in a cloudy stock that will never clear up, because all of the impurities get roiled around in the liquid and will refuse to float to the surface where they can submit to being skimmed and discarded.
Skimming the Scum
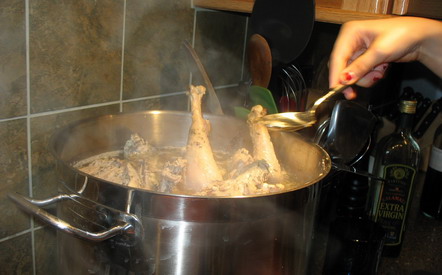
There is Morganna, diligently skimming the accumulated scum that floats to the top of the slowly warming stockpot as blood and other impurities are driven from the bones and flesh of the birds by the gradually heated water. This is a most important step. If you let all that nasty-looking scum stay in your stock, you will end up with a disreputable-looking pot of dirty dishwater that smells and tastes bitter. If you let your stock boil at this time (watch the fire and the stockpot like a hawk, and keep turning the flame down as the pot heats until it is on as low as it will go and keep the pot gently bubbling), you will end up with stock that is inedible and gross. Why bother with that? No one wants to eat or drink dishwater, so when the foamy scum slides to the top of the pot, skim it off, and pour it down the sink. Not even cats or dogs much like this stuff–it really is icky.
I remember being in stocks and sauces class–the first class of culinary school, and hearing Chef Aukstolis, a great bear of a man, bellowing, as he marched past the row of cauldron-like steam kettles (one could cook a person in them, they were so large), “Skim the scum! Skim the scum, or your stock will suck.” He would pause and then say, “And say it with me!”
And we would all join in the chorus of his mantra, no matter where we were or what we were doing. We would recite with him, “If your stock sucks, your sauce will suck!”
Truer words were never bellowed.
So there you are. Skim that scum, often and well, in the early part of stockmaking.
You will likely have to do this three or four times after the stockpot comes to a good bubbly simmer. After that, the nastiness will have been purged from the bones, and you can relax, leave the top off the pot and just watch that it doesn’t boil.
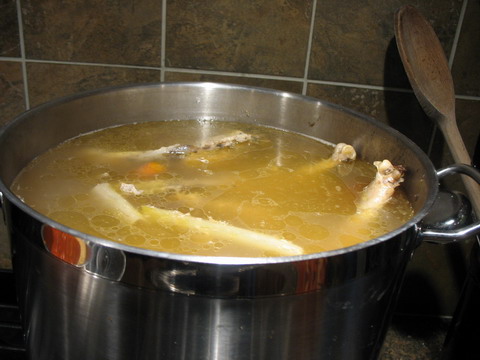
At this point in the stock-making one can sit back, and just let the fire, the water and the bones do their magic. Let them simmer. Keep an eye out that they do not boil, and if a stray bit of scumminess floats to the top, skim it off and toss it out, but for the next oh, six to twelve hours or so–depending on how long you want to stay in the house and go back and forth and watch the stockpot, you can just let it go on its merry way while you enjoy the rich aromas that will begin to pour forth from the pot and scent your home with the savory, comforting fragrance of Grandma’s best chicken soup.
Finishing the Stock: Picking Meat and Straining
We are in the home stretch now.
We are also at the part of our tale where The Bad Guy arrives. I shouldn’t say arrives–Ozy was in the kitchen the entire time the stockpots bubbled, drawn by the irresistable smell of cooking chicken. However, he did become most active during this stage of the stock-making process. Ozy is our oldest cat and to say that he is pushy is an understatement. When it comes to chicken, he is a master of putting himself right in the line of fire, just on the off chance he might trip up an unwary cook and they might drop a tidbit or two on the floor, where he pounces upon it and gobbles it up with a speed that belies his age and infirmity.
He is a right bastard about it, a bandit of the old school, and is as wily as a certain cartoon coyote, but is much more successful at getting dinner than his celluloid brother.
Needless to say, the operations I am going to describe to you go more smoothly if you do not have an irritating cat (or dog) underfoot.
When you have determined that your stock tastes as strong as you want it, or you are ready to go to bed, whichever comes first, it is time to strain the stock, pick the meat from the bones (if you want to) and discard the leavings, which are, at this point, a hideous mess of ugliness.
I cooked this batch of stock for close to twelve hours, and ended up with a very rich result.
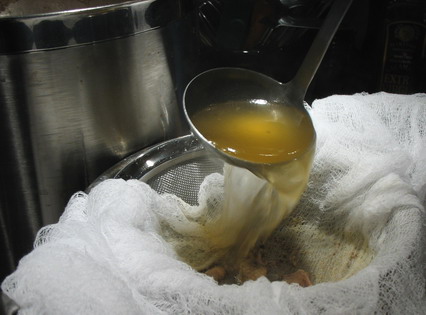
To strain the stock, line a fine chinoise or mesh strainer with two to four layers of cheesecloth as shown in the photograph above, and set it over a clean pot that will fit into your refrigerator. I am lucky in that I had a completely empty fridge in which to put all twenty four quarts of stock I made on Saturday–if you are not so fortunate, make smaller amounts of stock! Then, ladle out the stock from the cooking pot into the holding pot. Do not try to pour from one to the other–you are likely to make a mess that way.
As you get down into the bones and mess of vegetables and possibly your whole chicken carcass, and you cannot easily ladle out the stock, use tongs to lift out the solid leavings,set them aside on a plate, and if you want, pick out the meat from the bones. (Of course, I did this, and saved the meat. I have since used the very flavorful flesh (and stock) in chicken and noodles and jambalaya, and plan to make chicken pot pie with it later this week.)

You can lay these bones and vegetables onto layers of cheesecloth, and when they are cool enough to handle, you can wrap them in the cheesecloth, hold them over your strainer, and squeeze out any remaining liquid, in order to extract every bit of goodness left in the ugly leavings. After that, I always triple bag them and throw them away or bury them in a compost heap, because chicken bones are very dangerous to feed to dogs. As much as my pooches would love them, they shatter into needle-sharp shards easily and could puncture their esophogi and that is never a good thing.
At this point, you simply cover the strained stock with a lid, chill it down in a sink of ice water and then put it in the fridge, and allow it to cool and congeal overnight.
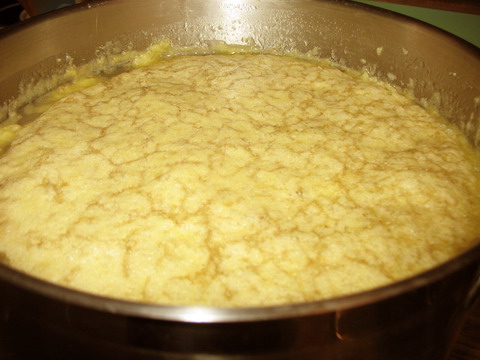
In the morning, when you check on it, you will see solidified fat floating in a layer over the top of gelatinized golden stock.
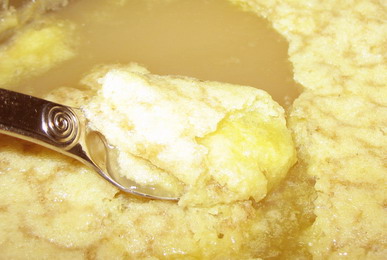
It is simple to use an ordinary spoon to skim off as much fat as you like from the surface of the stock, and then stir in what is left. I like to leave a good bit of fat in the stock, because it adds a great amount of flavor. But, you don’t want to leave all of it, because it will make your stock have a greasy mouthfeel that will also make your soups, sauces and gravies suck. (Remember, if your stock sucks, your sauce will suck. Say it with me.)
At this point, all that is left is for you to ladle the cold stock into containers, label them, and stick them in the freezer. I like to freeze it in one quart containers. Remember to leave headroom, as liquids expand when they freeze.

It is also a simple trick to freeze some into ice cube trays, then pop them out into ziplock bags afterwards in order to use these two tablespoon amounts in small batches of pan sauces, or in stir-fries where a tiny amount of broth or stock are called for.
There we are–the making of stock in all of its good, bad and ugly glory. It is not hard to do, nor does it require much culinary finesse. It only requires time, patience and attention to detail, but the results are very much worth the effort. The flavor of homemade stock will ehance your cooking much more than the use of commerial broths, and the results are very healthful and satsifying.
This, of course, is the typical French method of stock-making. Look for a post soon on the making of Chinese-style chicken stock: I have one more whole chicken in the freezer, along with some pork neckbones, so I want to make a goodly batch of it to have on hand, too. The methods are similar, but different enough to warrant a completely different post.
With that, I bid you good day, and good cooking!
Another Greek Casserole: Pastitsio
For those rare souls who do not love moussaka, (and this dislike usually comes about because of an aversion to eggplant–something which I cannot understand myself, but which does afflict a not insignificant number of people–like Zak) there is another Greek casserole, one that is luckily, even less trouble to make, and which tastes pretty darned good: pastitsio.
I am told that the name itself is a Greek version of the Italian term, “pasticcio” which I am told means, “hodgepodge.” “Hodgepodge,” of course, in English means “a collection of disparate things.”
Which doesn’t sound very enticing when it comes to food, does it?
Well, rest assured, that pastitsio is not just a bunch of stuff thrown together willy-nilly, nor is it a dumping ground for just whatever one has on hand, though, I must say that a cook could do worse than riff off this dish by adding a few seasonal vegetables such as zucchini or dare I say it–eggplant–to the mixture.
The basic idea behind pastitsio is that of a layered casserole that consists of a bottom layer of tubular pasta bound together with a cheese and egg mixture (ooh–starts off sounding like Greek macaroni and cheese–how can this be bad?) with the next layer being ground lamb or beef cooked with spices in a tomato sauce, with another layer of pasta and then a layer of egg custard topped with bechamel.
My way of making it comes from Sylvia, my mother’s friend Pete’s wife, who was sent by Pete’s mother from Greece to be his bride, sight unseen, back in the sixties. The two of them owned a diner, which my mother frequented every day when she worked as a computer programmer back before I was born, and while what they served to most customers was typical American lunch-counter fare–Sylvia also cooked up Greek specialities and served them to their Greek customers, to themselves and to folks like my Mom who had become family.
Sylvia simplified pastitsio incredibly, and I remember tasting it while sitting on her lap while she took a lunch break and talked to Mom who was taking a break from shopping with a small child in tow. Sylvia loved feeding me tidbits of whatever she was eating, and was always thrilled that I liked it and asked for more, my mouth opening like a little bird’s as she popped a fork containing one of her delicious mysteries into my mouth. Mom was always embarressed by my shamelessness in begging for another bite of free food, but Sylvia always laughed her off and said she was only sharing, and that my manners were in no way rough.
Sylvia was my kind of friend!
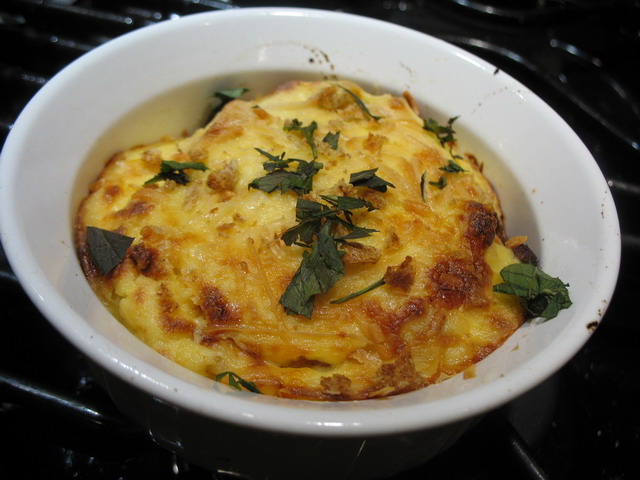
Anyway, back to her pastitsio–she mixed the meat sauce and macaroni (she always used elbow macaroni, because she already had it in the pantry to make American macaroni salad with it) and then topped it with the egg-enriched bechameil that went on top of moussaka, though it was firmer, so I suspect that in addition to adding more cheese to the dish, she added yet another egg yolk, which helps turn the bechamel into a puffy, light custard. She always finished the dish with a sprinkling of grated parmesan cheese, which gave it a brown crust that was delectable. Her final touch was a sprinkling of just-minced parsley, which gave a green fresh sparkle to the dish when it came steaming from the kitchen.
The whole thing was comfort on a plate, and I cannot really ever taste it without thinking of sitting comfortably on her lap, leaned against her chest, secure and warm in her embrace, and watching her eat dainty bites of fragrant pastitsio. I remember how when I would look up at her and pop open my mouth, she would take a tiny forkful, blow on it copiously to cool it, and then slip it between my lips. I can remember how the custardy bechanel would embrace the meat and macaroni mixture in a velvety-smooth cloak of richness, while the spices in the meat sauce would dance on my tongue. The cheesy crust was chewy and salty and the flecks of parsley were like a sweet chorus of birds on my palate, singing the entire dish to completion.
Here is my simplified version; if you want to make this for the freezer, make it as written all the way up to the step of actually baking it. Cover the casserole with tightly sealed foil, and freeze. To cook, take out, do not thaw and bake at 375 for probably 45-50 minutes, covered, though you should start checking on it after 20 minutes or so. After it is hot and bubbly, take the cover off and bake it for a further 10-20 minutes to brown the cheese on the top and get the bechamel to get all puffy and custard-like.
Pastitsio
Ingredients
1 pound tubular pasta cooked until al dente in salted water and drained
Meat sauce made from my recipe for moussaka with a generous pinch of nutmeg added with the other spices
1 cup parmesan cheese, or parmesan and gruyere mixed half and half, shredded
bechamel made from my recipe for moussaka, made with three cups of milk and a total of four egg yolks, with 1/4 cup shredded gruyere and two tablespoons fresh minced parsley added
minced fresh parsley and mint in whatever amount you would like as garnish
Method:
Preheat oven to 350 degrees F.
Mix together pasta and meat/tomato sauce, then spoon into a well-oiled (I use olive oil spray) 9X13 casserole dish.
Sprinkle with half the cheese.
Pour over 1/3 the bechamel, and gently stir into the pasta and sauce to mix the layers very lightly. You want the first layer of bechamel to penetrate the meat and pasta slightly, but you do not want it thoroughly mixed. Sprinkle with 1/2 the remaining shredded cheese, then top with the rest of the bechamel, and sprinkle with the last of the shredded cheese.
Put into oven and bake for about 40-45 minutes, though I suggest checking after twenty-five to make sure the cheese on top isn’t browning too rapidly. If it is, loosely cover it with a tent of foil and continue baking until the bechamel forms a puffy, brown-topped custard, and everything smells bubbly hot and delicious.
Serve with the parsley and mint sprinkled over the top. Needless to say, a big bowl of Greek Salad is not remiss with this comforting dish.

Categories:
- Admin (rss) (55)
- Blogs and Blogging (rss) (81)
- Book Reviews: Cookbooks (rss) (43)
- Book Reviews: Non-Cookbook Food Books (rss) (38)
- Cats and Cat Blogging (rss) (47)
- Chinese Cooking Lessons (rss) (32)
- Culinary School Stories (rss) (18)
- Dairy Pruducts: Cultured and Barbaric (rss) (4)
- Documentary Filmmaking (rss) (1)
- Essays, Rants and Reflections (rss) (260)
- Fighting Hunger (rss) (12)
- Food and Kids (rss) (45)
- Food in the News (rss) (126)
- Food Media (rss) (98)
- Food Preservation (rss) (18)
- Food Safety (rss) (45)
- Gardening (rss) (30)
- Herbs and Herb Blogging (rss) (20)
- Holidays (rss) (50)
- Kat Blogging (rss) (22)
- Kitchen Science (rss) (36)
- Leftover Makeover (rss) (8)
- Life, the Universe and Everything (rss) (131)
- Local and Sustainable (rss) (227)
- Local Athens Food and Foodies (rss) (42)
- Meatless Mondays (rss) (32)
- Menu For Hope (rss) (5)
- Nutrition, Diet and Health (rss) (84)
- On The Farm (rss) (8)
- Recipes: Almost Vegetarian, Vegetarian and Vegan (rss) (294)
- Recipes: American Regional (rss) (37)
- Recipes: Appalachian Hillbilly (rss) (33)
- Recipes: Bread, Pasta, Grains (rss) (95)
- Recipes: Canning and Preserving (rss) (8)
- Recipes: Chinese (rss) (123)
- Recipes: Comfort Food (rss) (120)
- Recipes: Cookies (rss) (16)
- Recipes: Desserts (rss) (48)
- Recipes: French (rss) (25)
- Recipes: Fruits and Vegetables (rss) (302)
- Recipes: Greek, North African and Middle Eastern (rss) (31)
- Recipes: Indian (rss) (137)
- Recipes: Italian (rss) (42)
- Recipes: Japanese (rss) (7)
- Recipes: Jewish (rss) (4)
- Recipes: Korean (rss) (6)
- Recipes: Meat, Poultry and Fish (rss) (220)
- Recipes: Mexican/Native American/ Latin American/Caribb (rss) (27)
- Recipes: Original (rss) (108)
- Recipes: Thai (rss) (27)
- Recipes: Tofu (rss) (17)
- Recipes: US Regional (rss) (16)
- Recipes: Vietnamese (rss) (8)
- Restaurant Stories (rss) (28)
- Sewing, Quilting, Arts and Crafts (rss) (16)
- Simple Chinese Recipes (rss) (30)
- Slow Food and Heritage Foods (rss) (10)
- Spice Blogging (rss) (44)
- The Chinese Cookbook Project (rss) (14)
- The Chinese Pantry (rss) (39)
- The Documentary (rss) (2)
- The Kitchen Saga (rss) (17)
- The Locavore's Bookshelf (rss) (15)
- The Unsung Adventures of The Culinary Nerd (rss) (6)
- Tools and Toys (rss) (35)
- Uncategorized (rss) (10)
- With a Side of Politics (rss) (48)
Archives:
- August 2012 (9)
- July 2012 (12)
- September 2011 (3)
- August 2011 (7)
- July 2011 (8)
- June 2011 (16)
- May 2011 (17)
- April 2011 (11)
- December 2010 (9)
- November 2010 (5)
- February 2010 (1)
- December 2009 (5)
- November 2009 (7)
- October 2009 (10)
- September 2009 (16)
- August 2009 (14)
- July 2009 (14)
- June 2009 (7)
- May 2009 (17)
- April 2009 (10)
- March 2009 (25)
- February 2009 (13)
- January 2009 (10)
- December 2008 (5)
- November 2008 (5)
- October 2008 (6)
- September 2008 (13)
- August 2008 (8)
- July 2008 (11)
- June 2008 (18)
- May 2008 (13)
- April 2008 (14)
- March 2008 (16)
- February 2008 (17)
- January 2008 (19)
- December 2007 (25)
- November 2007 (18)
- October 2007 (24)
- September 2007 (16)
- August 2007 (15)
- July 2007 (15)
- June 2007 (10)
- May 2007 (14)
- April 2007 (16)
- March 2007 (17)
- February 2007 (20)
- January 2007 (13)
- November 2006 (1)
- October 2006 (8)
- September 2006 (14)
- August 2006 (25)
- July 2006 (30)
- June 2006 (28)
- May 2006 (34)
- April 2006 (29)
- March 2006 (24)
- February 2006 (30)
- January 2006 (38)
- December 2005 (40)
- November 2005 (37)
- October 2005 (32)
- September 2005 (25)
- August 2005 (30)
- July 2005 (28)
- June 2005 (21)
- May 2005 (8)
- April 2005 (22)
- March 2005 (17)
- February 2005 (29)
- January 2005 (10)
Search Site:
Links:
- Lily’s Wai Sek Hong
- 101 Cookbooks
- A cat in the kitchen
- A Veggie Venture
- Accidental Hedonist
- Cha Xiu Bao
- chez pim
- Chocolate & Zucchini
- Chopstick Cinema
- Chowhound.com
- Chubby Hubby
- Cook sister!
- Cooking with Amy
- da*xiang
- Eat Local Challenge
- Eating Liberally
- Ecocentric
- Eggbeater
- Epicurious
- Farmgirl Fare
- Fatfree Vegan
- Foodgoat
- ForkandBottle.com
- Green Olive Tree
- Hooked on Heat
- Jaden’s Steamy Kitchen
- Kalyn’s Kitchen
- Lucullian delights
- Mahanandi
- Matt Bites
- MeatHenge
- mmm-yoso!!!
- New York Times – Dining & Wine
- Pizza Goon
- Rasa Malaysia
- Ruhlman
- Sailu's Kitchen
- Serious Eats
- SF Gate: Food & Dining
- Simply Recipes
- Soul Fusion Kitchen
- Tastespotting
- The Amateur Gourmet
- The Cleaner Plate Club
- The Food Section
- The Grub Report
- thecookscottage
- U.S. Food Policy
- Wandering Chopsticks
- Washington Post Food and Dining
- Wasted Food
Meta:

Powered by WordPress. Graphics by Zak Kramer.
Design update by Daniel Trout.
Entries and comments feeds.