Cook Local, Eat Global
The Dreaded Picky Phase
I have written a lot about picky eating. In kids, in adults, what to do about it, cookbooks for picky kids, about nature, about nurture…I’ve written all about it.
And if you have read all of those posts, you know how I feel about picky eating–I don’t really care about what people eat so long as they don’t make it my business, and unfortunately, when you are dealing with kids or adults who act like kids, it is made my business.
And it is certainly my business, when it is my kid.
And Kat, my kid, my beloved baby who used to eat chicken curry, curried carrot and sweet potato soup, garlic stalks, peas by the handful and cherry tomatoes by the pint, has turned into a toddler and has entered–cue dramatic music–the dreaded picky phase.
And vegetables, once beloved, are now to be shunned.
And curry is viewed with suspicion bordering upon paranoia.
And need we mention that lovely toddler capriciousness whereby a food, eaten joyously one day, is now verbotten when next the sun arises?
It is so strange!
Morganna was apparently like this when she was a toddler, though more so with her father and grandmothers than when she was with me. When she was with me, she would be suspicious of unfamiliar foods, but could be convinced pretty handily.
Kat–she is not so malleable.
One day, she is all about bison cheeseburgers–which we call “beefy” and feed her in morsels from our plates, and then the next week, when presented with the same exact food on her own plate, she turns up her nose and declares, “No!”
Corn on the cob uncooked is gobbled down with great glee, but when presented cooked, is rejected. If corn is cooked and mixed into any other food, it is glared at and pushed away. Peas, once consumed by the hundreds, are now only eaten in pasta, when slipped into the center of the penne where it cannot be seen. Carrots are eaten raw. Sometimes.
And tomatoes–Kat used to eat cherry tomatoes in copious amounts–frighteningly copious, in fact. She used to suck the innards out of them before she had teeth, in fact. Then, she just stopped, one day.
Until Saturday–I had bought some Sun Gold cherry tomatoes at the farmers market and as she watched me eat them, she demanded one. And ate it. And then proceeded to eat more than a dozen more. I was THRILLED!
And then, much to my dismay, when presented with tomatoes a few days later, she looked at me like I had lost my damned mind and pushed them away.
Blueberries, raspberries and blackberries are almost consistently eaten–almost. Sometimes, out of the blue, she will refuse them. Strawberries in fresh form are ignored. Dehydrated, or in lassi, they are favored foods. By themselves–Kat shakes her head and says, “No way.”
Yogurt is not touched unless it is in a lassi.
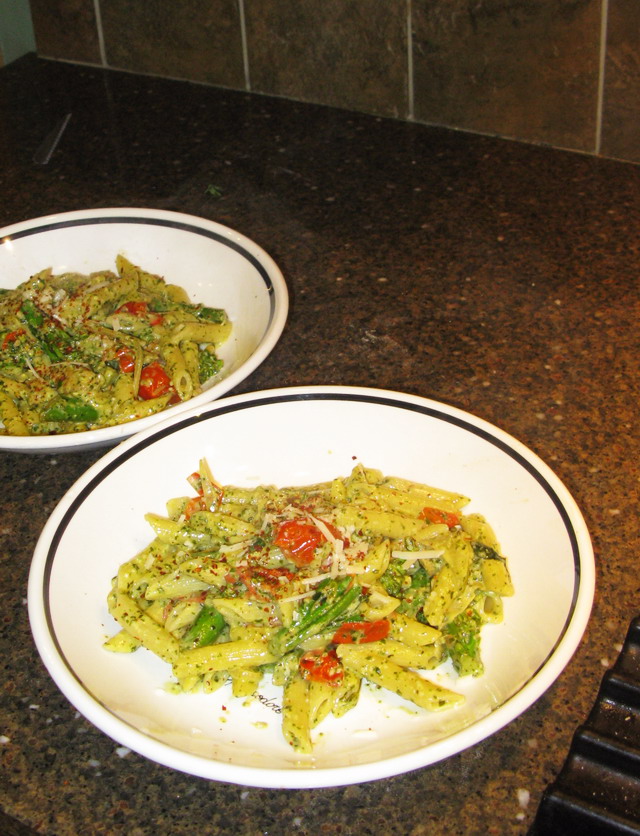
That said, Kat still eats lots of foods that I suspect most kids would turn their noses up at. Pesto is a perennial favorite. Lo mein with fermented black beans is beloved. Chicken, fried, sauteed or baked, is great. Rice with vegetables–so long as the vegetables are about minced to death, is usually accepted. Macaroni and cheese, of course. Grilled cheese sandwiches with sharp cheddar, muenster or havarti are eaten with great gusto. Basil in any form. Cherries are a favorite. Coconut is beloved. Bacon is never turned down. Bread of various sorts is always loved. Scrambled eggs with herbs and cheese is almost always a good bet. Fruity Cheerios, along with lots of other cereals that are almost healthy. Strawberry-filled organic multi-grain bars. Oat bread from the Village Bakery. Refried beans, especially from Casa or the ones I make. Beans are almost always good, but chickpeas–oh, they are scary! Spaghetti with marinara or pesto is good. Creamy sauces for pasta are good. Broccoli with rice and cheese is good, so long as she thinks the broccoli is an herb (I cut it up finely.) Barbecued pork. Stir-fried pork, chicken or beef. Tofu–sometimes. Stir fried bok choy–sometimes. Rice noodles, almost always. Ice cream–duh–always! Dehydrated bananas (but fresh ones–“No way!”) French toast, pancakes and waffles of various sorts, most of them whole grain. Pineapple once it is on the top of pizza, is great. Ham is always beloved, but especially on pizza.
And, of course, the perennial kid-pleaser–fries! We use them as incentive to leave the park or behave for baby sitters. They are definitely a treat, not an every day food. Just like cookies, only starchier!
So, it isn’t so bad.
I guess I should stop complaining, huh? Kat actually does eat a lot of different foods, most of them quite nutritive.
She’ll come around in time. The cherry tomatoes of last Saturday prove it.
But I do find it amusingly ironic that after all of my work to give her a varied diet and how much I have written about picky eaters and how to avoid same–Kat went through a picky phase anyway.
It just goes to show that there is such a thing as karma (in a light and amusing sense–I am not talking about the big heavy ethical ideas of karma) and the Universe, God or whatever you want to call it, has a sense of humor.
I am just glad I have one, too.
Meatless Monday: Falafel With Tahini Sauce
Nobody really knows where falafel originated. Many people say that these ground bean fritters came originally from India, probably brought to the Middle East region by spice traders. Considering that there are quite a few ground bean and lentil fritters traditional to various regions of India, and spice traders went back and forth from India to the Arab countries, this theory does hold water.
Others point to an origin in Egypt, where falafel is made exclusively from soaked, skinned and ground fava beans. Still others claim it is a traditional food of the Sephardic Jewish community.
Whatever the truth of the matter is, the fact remains that falafel is a much loved mezze, appetizer, street food and snack enjoyed in various forms all over the Middle Eastern region and now, throughout the world. It comes in many shapes and formulations–some are made with only fava beans, while others are made with only chickpeas, and still others contain a combination of the two. What is the same among all types of falafel is this–they are always made from beans which have not been cooked, but instead are soaked overnight in water, sometimes skinned and then are ground up with spices and aromatics and then fried.
This preparation method is fairly unique to falafel–most bean fritters are made from beans which have been cooked previously to being mashed or ground then shaped into fritters and fried. (South Indian idli, which are steamed cakes made from previously uncooked black lentils which have been left to ferment before being ground, are a similar idea–raw beans used to make a cake or fritter– but the preparation is steamed rather than fried and the fermentation makes the recipe completely different.)
I first came across falafel here in Athens, back when I transferred my credits from Marshall University to OU and came here to finish my degree. I tried them as the filling of a sandwich made by the Pakistani man who ran a street buggy called “Ali Baba’s.” He served his steaming hot chickpea falafel stuffed in a pita bread with onions, tomatoes, cucumbers, a garlicky yogurt sauce and, if you wanted, a hefty helping of his version of fattoush–bread and lettuce marinated in a tahini-lemon dressing.
I fell in love at first bite. I used to eat those sandwiches at least once a week–without fail. The only time I didn’t stop by for a falafel was when I was struck down with bronchitis for two and a half weeks, and I remember the nice man stopping Zak when he saw him walking by and asking about me. He knew something must be wrong if I hadn’t had falafel for two weeks!
After that, I took to eating falafel whenever and wherever I could get them–currently here in Athens, we eat falafel from Souvlaki’s–a hole-in-the-wall “fast food” Middle Eastern place that caters to the after-bar student crowd. Which is cool in that they make a good living that way, but uncool in that they make enough money during the school year that they can close up for the summer. Which is cool for them, but extremely uncool for me, because that means I have to procure my falafel by other means.
Which, this year, meant I felt the need to learn to make it myself.
And I found out that it wasn’t really so bad as all that.
The key to the making of falafel is two-fold. Be sure and soak your beans long enough–which means 24 hours. Yes, you have to plan ahead to make falafel. A whole day ahead. Don’t try using a pressure cooker to partially cook them and speed up the process like I did–the beans don’t soften enough that way. Just be patient and plan ahead and remember to put the beans in a bowl with water before you go to bed. Cover the bowl with a plate and leave it on your counter and check them in the morning. If they have soaked up all the water, add a bit more, cover them back up with the plate and leave them be until about two hours before you want to cook.
Then, uncover the beans and drain them well and allow them to air-dry until they are almost completely dry–just a bit damp–on the outside. It is important to do this, because it keeps your dough from being to wet to hold together in the hot oil once you grind the beans up and go to fry them.
Thus we come to the second secret of great falafel: the texture of the dough.
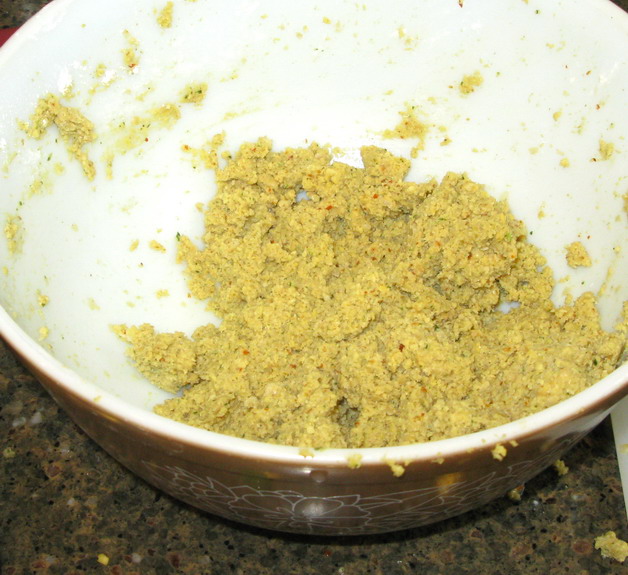
It cannot be too wet, nor can it be too dry. It must not be ground either too coarsely nor too finely–it has to be just right. When it is ground correctly, the dough will be slightly coarse and grainy, not perfectly smooth, and it will hold together well, but with slight cracking around the edges–if it is wet enough to hold together perfectly smoothly, it won’t hold together in the oil! But, when you squeeze it into shape and open your hand, it shouldn’t immediately fall apart either–in that case, it is too dry. If it is too dry, obviously you add more water, but the way I do it is by sprinkling a few drops in at a time with my fingers. If it turns out too wet, sprinkle in a bit of either all purpose flour or, chickpea (besan) flour. Too much flour will make the falafel tough, but a little bit–around a tablespoon–is fine.
The photograph above shows the ground dough–slightly coarse and pasty without being sticky.
Herbs, garlic, spices (often including cumin and chili pepper flakes), salt and onion are the main flavoring components of the dough which are ground right together with the beans. To grind the dough, I have used both my regular food processor and the Preethi: they both worked perfectly well. Some authors claim that in order to make the lightest and most delicate falafel, you must grind the dough in a meat grinder twice.
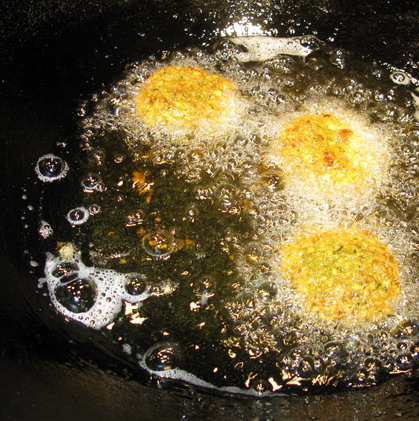
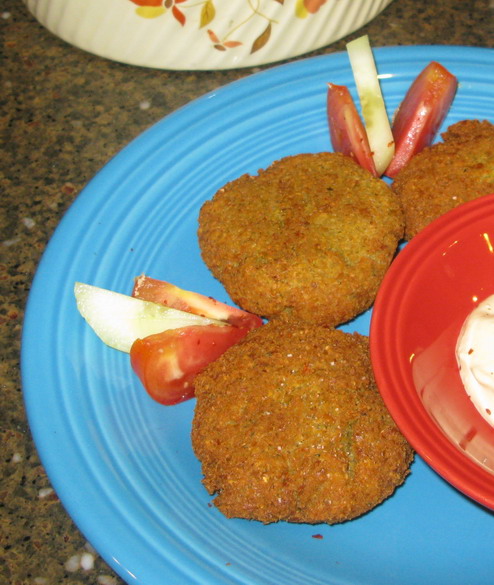
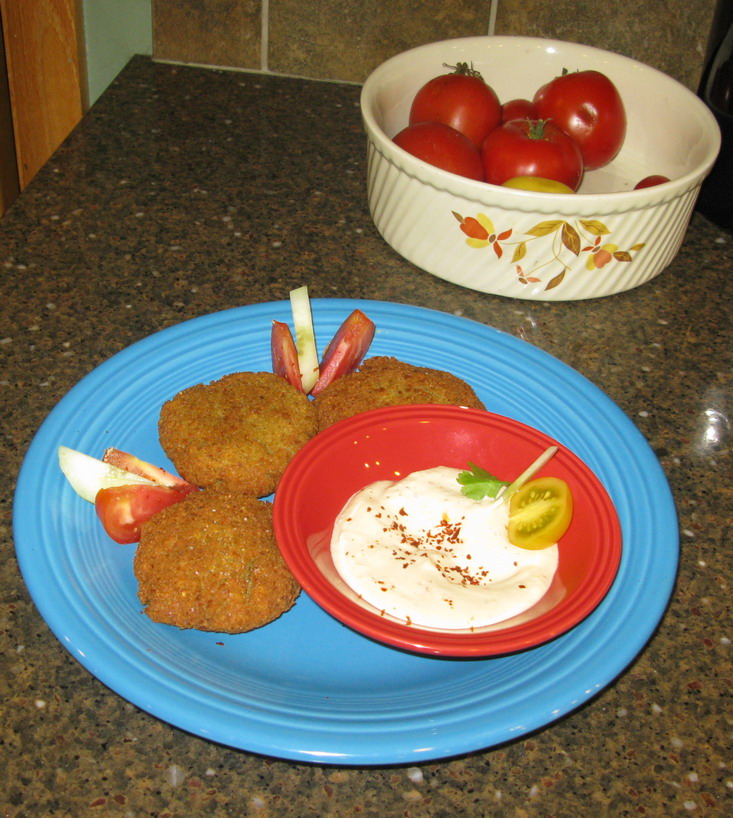
As for shaping the falafel–it can be rolled into walnut sized balls, or it can be flattened into patties like I did it, so they slip more easily into pita breads, or it can be shaped into egg-shapes or cylinders. After shaping it, you fry it–you can shallow or deep fry it according to your taste–in an oil that can withstand high temperatures like peanut or canola oil. I used my wok and shallow fried them in enough oil to cover the bottom, sides and most of the top. To check and see if the oil is hot enough, I dipped a bamboo chopstick into the wok–when the oil forms bubbles immediately around the chopstick, it is ready. You can also make a small ball of dough and drop it in and if it bubbles immediately, it is ready for the full-sized falafel.
A lot of people like yogurt sauce with falafel, but I prefer tahini sauce. A lemony, garlicky preparation made with tahini–sesame seed paste–it is rich and delicious, and versatile. Sure you can drizzle it over falafel or dip the fritters in it, but you can do quite a few other things with it. If you thin it out, you can use it for an amazingly fresh flavored salad dressing, or as a dip for crudite or pita wedges. It is also good with lamb.
I got the recipe for this tahini sauce from May Bsisu’s beautiful cookbook, The Arab Table.
I added a bit more Aleppo pepper flakes than Bsisu calls for, and the garlic I used was very fresh so it has a strong flavor, making my version of the sauce extra zippy.
I also based my falafel recipe on Bsisu’s formulation combined with Mark Bittman’s version of the recipe.
Falafel With Tahini Sauce
Ingredients:
1 3/4 cup dried chickpeas
2 cloves garlic, lightly crushed
1 small onion, quartered
1 1/2 tablespoons ground cumin
1 1/2 teaspoons Aleppo pepper flakes
1 teaspoon smoked paprika
1 cup chopped cilantro leaves (you can use fresh parsley instead if you like)
1 teaspoon salt
1/2 teaspoon baking soda
1 tablespoon lemon juice
peanut or canola oil for frying
Method:
Soak the beans in cold water to cover them by 3 inches or so. Unless you want dust and suchlike falling into the beans or your cats drinking the water from the bowl, cover the bean bowl with a plate. Soak for 24 hours, adding water as needed. Drain the beans well in a colander and then allow the surface water on them to dry for about an hour before transferring the beans to the bowl of your food processor.
Add all the other ingredients other than the oil, and grind the dough by pulsing the machine until everything is minced together but isn’t pureed into a smooth paste. Taste the dough and add extra salt, Aleppo pepper and lemon juice to taste.
Put the oil into a wok or deep saucepan to a depth of 1 1/2 inches to 2 inches–more if you want to deep fry the falafel. Heat the oil over medium-high heat until the oil shimmers and a chopstick or a bit of batter bubble immediately when you put them in the oil. (Around 350 degrees F. )
Scoop the dough out in heaping tablespoonsful, and shape it into balls or patties and fry in batches, without crowding your oil, (I did 3 at a time) turning once if you shallow fry like I did, until the falafel are nicely browned. They should fry for no longer than five minutes–about two minutes or so per side.
Drain on paper towels before serving.
Tahini Sauce
Ingredients:
2-3 cloves garlic, peeled and minced
1 cup tahini (stir in the oil that rises to the top before measuring)
3/4 cup freshly squeezed lemon juice
Aleppo pepper flakes to taste (I used about 2 teaspoons)
salt to taste
1 tablespoon minced cilantro or parsley
Method:
Put all ingredients in the jar of a blender or food processor or grinder and process until smooth. Add water until the sauce is as thick or thin as you like it. I like it a little thinner than mayonnaise.
Video From Athens Farmer’s Market
Here is a video blog fromThe Athens Farmer’s Market blog that features, among other great stuff, my dear husband, Zak, playing lap steel guitar, as well as Mark and Hilarie Burhans, the owners of Restaurant Salaam on fiddle and banjo.
This way folks can catch a glimpse of the sights and sounds of the market I love and am always talking about here. It is a very tasty slice of life in the great community of Athens, Ohio.
Reviewing The Preethi: I Picked a Winner!
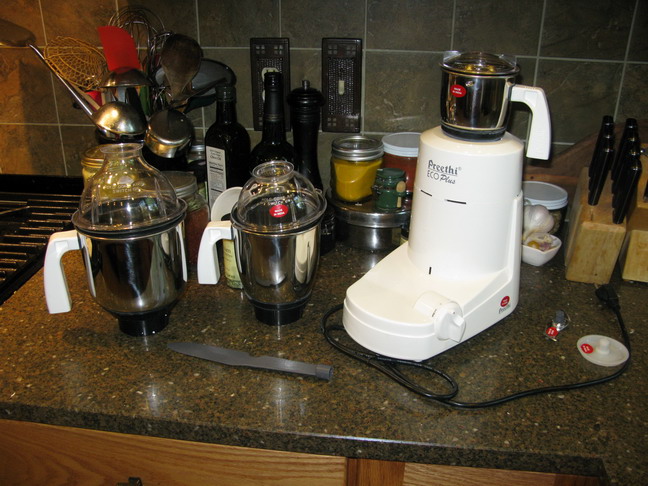
So, here’s the post that the kitchen geeks have been waiting for: the review of the new Preethi Eco Plus wet/dry grinder mixie.
First of all, let me explain why I picked out the Eco Plus instead of one of the other, newer models of Preethi.
It is quite simple–the other, newer models, such as the Chef Pro Plus and the Blue Leaf Platinum, looked like they had a lot more gewgaws and bits like storage containers which I had no need of. They also had a lot more plastic parts–and as I am hard on my kitchen equipment, I am enamored of nice tough materials like the stainless steel mixing/grinding jars of the Eco Plus. In addition to having more plastic and extra accessories which did not interest me, the Chef Pro Plus and Blue Leaf Platinum are both higher in price than the Eco Plus.
All three models have a 550 watt motor, and the jars have the same basic capacities, so I went with the lower price, stainless steel jars and fewer accessories of the Eco Plus.
Now we come to performance.
I put the Preethi through her paces: I used the chutney jar to grind dry spices (peppercorns, nutmeg, cinnamon stick, cloves, black cardamom, cardamom, cumin, coriander and dried chilies), wet spices (ginger, chilies, garlic and cilantro), a mixture of the two, and hot, caramelized onions. The grinder performed admirably at all tasks. The dry spices whirred through the machine and in seconds, were reduced to a fine powder. The wet spices I cut into chunks, and ground up in the order that the instruction manual called for–and a smooth paste resulted in a few seconds without the use of additional water. To do the combination of wet and dry spices, I ground the dry spices first, then put the wet stuff in, cut into rough chunks as before and within seconds a fragrant paste was made. The hot caramelized onions were pureed in mere seconds as well.
Cleanup was simple–as per the instruction manual, I put a bit of water and detergent into the jar, put it on the motor and whirred it about to clean the interior. Then, I rinsed well and wiped down the outside and let it dry on a towel on my counter overnight. The instruction manual says not to clean the jars in a dishwasher, so I am not going to do it. I am being good!
Then, I used the larger jar to make lassi–you can see the frothy results in my post from Sunday. Crushing the ice was no issue for the Preethi, nor pureeing frozen strawberries that were still like little rocks. Whipping everything into a froth was also simple and fast. The one thing I will note is that the removable top portion of the lid that allows you to drizzle liquids in while the machine was running was prone to leakage of lassi. I did accidentally overfill the jar, so that is probably why. Oh, and I should mention that you are supposed to hold that little lidlet thingie down while running the machine. No starting it up and walking across the room because your cat is on the counter and you need to shoo it away. Nope. I suspect that would result in lassi on the ceiling, so take my advice and throw a shoe at the cat and keep your hand on the Preethi.
Or, alternatively, turn it off before walking across the room and dealing with the cat, though the shoe throwing is more cathartic and fun.
I also made butter, well, I did, and then I screwed it up by overmixing it, but that was not the Preethi’s fault, but my own. But, let it suffice to say that butter is churned in under a minute, so keep that in mind and stop the Preethi as soon as chunks of butter slap up on the clear lid.
Now, you are thinking–that stuff was all easy. What about heavy-duty grinding? Like of lentils and beans and stuff, which the Preethi is specifically advertised to do.
I used it to grind soaked dried chickpeas for falafel, and, after a slight mishap, the Preethi turned the crunchy beans, spices, onions and garlic into a nice smooth paste that was ready for deep frying in the wok.
What was the slight mishap?
Well, I thought I had broken it for a moment. As I was grinding the beans, the motor ground to a halt and stopped dead.
I nearly cried.
But Zak, smart man that he is, came to my rescue. He turned the motor unit over, and saw there was a fuse on the bottom and pushed the button on it and VOILA! The Preethi woke back up, went back on the job and finished grinding those beans. In the future, I will be careful to do the bean grinding for falafel in two batches, then knead the dough together at the end. I may have overfilled the jar again.(Yes, I am going to present a recipe for falafel. Soon. Be patient.)
All in all, I am thrilled with my purchase. I have to say that the documentation included in the box is sparse. The instruction manual gets the point across in a spare and taciturn manner, though the English is pretty well grammatical and sensible. The instructional DVD is nigh-well useless though–it seems to all be television commercials, and even though you can select English on the menu, it is still a mixture of Indian languages with a tiny bit of English.
But that doesn’t matter. The Preethi Eco Plus is a very good appliance which does many jobs very well and is going to be a wonderful workhorse in my kitchen, helping me make Indian, Thai and Mexican foods as well as frozen alcoholic beverages, smoothies, milkshakes and other tasty things.
Now–I have to say–it doesn’t do everything. It has no shredding attachment, or slicing capabilities–for that you will still want to keep your food processor. But if you want dry spices ground to a powder and wet spices pureed smoothly and lentils and beans ground and made into doughs or batters and lassis and butter and all that stuff–you can turn to the Preethi without worry.
I bought my Preethi fromPerfect Peninsula, and their customer service is wonderful. Their response time is fast, their shipping is faster and the folks who answer their emails are very nice and helpful. I have nothing but good to say about them–they are a great online resource for Indian cooking essentials.
So, there we have it–my review on the Preethi Eco Plus–a grinder which has taken the place of my beloved but now deceased Sumeet. I hope that this review will be helpful to some of you, if not this moment, in the future.
Roasted Purple Cauliflower with Ghee, Mustard and Cumin

So, by now, everyone who reads this blog regularly should know that I like purple cauliflower. I’ve already featured it in two different Indian recipes: Gobi Mattar and Broccoli and Cauliflower with Panch Phoron., and here I go with another one. (The truth is, I like all kinds of weird colored vegetables–like blue potatoes, black tomatoes, and golden beets, but I extra special like purple cauliflower.)
Anyway, I bought yet another head of the pretty violet vegetable at the farmer’s market and wanted a new way to cook it.
I don’t remember where it was that I first read about roasted cauliflower, but I had been meaning to try it for a while, and just hadn’t gotten around to it. I mean, how can it be bad–roasting vegetables just brings out their inherent sweetness, and softens their interiors, while crisping the outsides. Oooh–great flavor and cool textural contrasts! Viva la roasted vegetables.
And in thinking about it–of course I had to roast cauliflower–I already love the sweet flavor -and- the creamy texture–both of which will be boosted greatly by roasting.
But why do the classic European/Californian roasting recipe of tossing the vegetable in question with olive oil, garlic, salt and pepper and maybe lemon juice? Why not do something different?
So, here’s what I did.
I melted ghee–Indian clarified and browned butter which has a delicious nutty flavor–then stirred in salt, a squeeze of lemon juice, Aleppo pepper flakes and whole cumin and mustard seeds, then tossed the cut cauliflower in it, and dumped it all out on a silpat-lined baking sheet. Then, I popped it all in a preheated 400 degree F. oven and left it alone for about twenty minutes and then pulled it out.
And how was it?
Ooooh.
I -really- like roasted cauliflower.
A lot.
The edges got crispy–and tasted like the best potato chips in the world.
And the inside was creamy and sweet–like parsnips or chestnuts, almost.
And the spices burst in the mouth with smoky flavor, and the ghee made all of the browned flavors taste extra special nutty and the lemon, chili and salt made it all come together.
I -will- definitely be making this again.
Roasted Cauliflower with Ghee, Cumin and Mustard
Ingredients:
1 large head purple (or yellow, or yeah, even white) cauliflower, cut into florets
3 1/2 tablespoons ghee
1/4-1/2 teaspoon salt (or to taste)
1 teaspoon Aleppo pepper flakes
1 1/2 teaspoons whole cumin seeds
1 teaspoon whole black mustard seeds
1 tablespoon fresh lemon juice
Method:
Preheat oven to 400 degrees F.
Put all ingredients except cauliflower into a large bowl and melt together in the microwave.
Take bowl out of the microwave and toss the cauliflower into the ghee mixture and stir it around until the cauliflower is coated with the buttery-spicy-salty-lemony goodness.
Dump the contents of the bowl onto a silpat lined baking sheet and arrange so the cauliflower is all in one layer.
Slap that baking sheet into your preheated oven and let it roast until the cauliflower is tender on the inside and lightly browned and crispy on the outside–about 20-25 minutes.

Categories:
- Admin (rss) (55)
- Blogs and Blogging (rss) (81)
- Book Reviews: Cookbooks (rss) (43)
- Book Reviews: Non-Cookbook Food Books (rss) (38)
- Cats and Cat Blogging (rss) (47)
- Chinese Cooking Lessons (rss) (32)
- Culinary School Stories (rss) (18)
- Dairy Pruducts: Cultured and Barbaric (rss) (4)
- Documentary Filmmaking (rss) (1)
- Essays, Rants and Reflections (rss) (260)
- Fighting Hunger (rss) (12)
- Food and Kids (rss) (45)
- Food in the News (rss) (126)
- Food Media (rss) (98)
- Food Preservation (rss) (18)
- Food Safety (rss) (45)
- Gardening (rss) (30)
- Herbs and Herb Blogging (rss) (20)
- Holidays (rss) (50)
- Kat Blogging (rss) (22)
- Kitchen Science (rss) (36)
- Leftover Makeover (rss) (8)
- Life, the Universe and Everything (rss) (131)
- Local and Sustainable (rss) (227)
- Local Athens Food and Foodies (rss) (42)
- Meatless Mondays (rss) (32)
- Menu For Hope (rss) (5)
- Nutrition, Diet and Health (rss) (84)
- On The Farm (rss) (8)
- Recipes: Almost Vegetarian, Vegetarian and Vegan (rss) (294)
- Recipes: American Regional (rss) (37)
- Recipes: Appalachian Hillbilly (rss) (33)
- Recipes: Bread, Pasta, Grains (rss) (95)
- Recipes: Canning and Preserving (rss) (8)
- Recipes: Chinese (rss) (123)
- Recipes: Comfort Food (rss) (120)
- Recipes: Cookies (rss) (16)
- Recipes: Desserts (rss) (48)
- Recipes: French (rss) (25)
- Recipes: Fruits and Vegetables (rss) (302)
- Recipes: Greek, North African and Middle Eastern (rss) (31)
- Recipes: Indian (rss) (137)
- Recipes: Italian (rss) (42)
- Recipes: Japanese (rss) (7)
- Recipes: Jewish (rss) (4)
- Recipes: Korean (rss) (6)
- Recipes: Meat, Poultry and Fish (rss) (220)
- Recipes: Mexican/Native American/ Latin American/Caribb (rss) (27)
- Recipes: Original (rss) (108)
- Recipes: Thai (rss) (27)
- Recipes: Tofu (rss) (17)
- Recipes: US Regional (rss) (16)
- Recipes: Vietnamese (rss) (8)
- Restaurant Stories (rss) (28)
- Sewing, Quilting, Arts and Crafts (rss) (16)
- Simple Chinese Recipes (rss) (30)
- Slow Food and Heritage Foods (rss) (10)
- Spice Blogging (rss) (44)
- The Chinese Cookbook Project (rss) (14)
- The Chinese Pantry (rss) (39)
- The Documentary (rss) (2)
- The Kitchen Saga (rss) (17)
- The Locavore's Bookshelf (rss) (15)
- The Unsung Adventures of The Culinary Nerd (rss) (6)
- Tools and Toys (rss) (35)
- Uncategorized (rss) (10)
- With a Side of Politics (rss) (48)
Archives:
- August 2012 (9)
- July 2012 (12)
- September 2011 (3)
- August 2011 (7)
- July 2011 (8)
- June 2011 (16)
- May 2011 (17)
- April 2011 (11)
- December 2010 (9)
- November 2010 (5)
- February 2010 (1)
- December 2009 (5)
- November 2009 (7)
- October 2009 (10)
- September 2009 (16)
- August 2009 (14)
- July 2009 (14)
- June 2009 (7)
- May 2009 (17)
- April 2009 (10)
- March 2009 (25)
- February 2009 (13)
- January 2009 (10)
- December 2008 (5)
- November 2008 (5)
- October 2008 (6)
- September 2008 (13)
- August 2008 (8)
- July 2008 (11)
- June 2008 (18)
- May 2008 (13)
- April 2008 (14)
- March 2008 (16)
- February 2008 (17)
- January 2008 (19)
- December 2007 (25)
- November 2007 (18)
- October 2007 (24)
- September 2007 (16)
- August 2007 (15)
- July 2007 (15)
- June 2007 (10)
- May 2007 (14)
- April 2007 (16)
- March 2007 (17)
- February 2007 (20)
- January 2007 (13)
- November 2006 (1)
- October 2006 (8)
- September 2006 (14)
- August 2006 (25)
- July 2006 (30)
- June 2006 (28)
- May 2006 (34)
- April 2006 (29)
- March 2006 (24)
- February 2006 (30)
- January 2006 (38)
- December 2005 (40)
- November 2005 (37)
- October 2005 (32)
- September 2005 (25)
- August 2005 (30)
- July 2005 (28)
- June 2005 (21)
- May 2005 (8)
- April 2005 (22)
- March 2005 (17)
- February 2005 (29)
- January 2005 (10)
Search Site:
Links:
- Lily’s Wai Sek Hong
- 101 Cookbooks
- A cat in the kitchen
- A Veggie Venture
- Accidental Hedonist
- Cha Xiu Bao
- chez pim
- Chocolate & Zucchini
- Chopstick Cinema
- Chowhound.com
- Chubby Hubby
- Cook sister!
- Cooking with Amy
- da*xiang
- Eat Local Challenge
- Eating Liberally
- Ecocentric
- Eggbeater
- Epicurious
- Farmgirl Fare
- Fatfree Vegan
- Foodgoat
- ForkandBottle.com
- Green Olive Tree
- Hooked on Heat
- Jaden’s Steamy Kitchen
- Kalyn’s Kitchen
- Lucullian delights
- Mahanandi
- Matt Bites
- MeatHenge
- mmm-yoso!!!
- New York Times – Dining & Wine
- Pizza Goon
- Rasa Malaysia
- Ruhlman
- Sailu's Kitchen
- Serious Eats
- SF Gate: Food & Dining
- Simply Recipes
- Soul Fusion Kitchen
- Tastespotting
- The Amateur Gourmet
- The Cleaner Plate Club
- The Food Section
- The Grub Report
- thecookscottage
- U.S. Food Policy
- Wandering Chopsticks
- Washington Post Food and Dining
- Wasted Food
Meta:

Powered by WordPress. Graphics by Zak Kramer.
Design update by Daniel Trout.
Entries and comments feeds.